













Job Platform
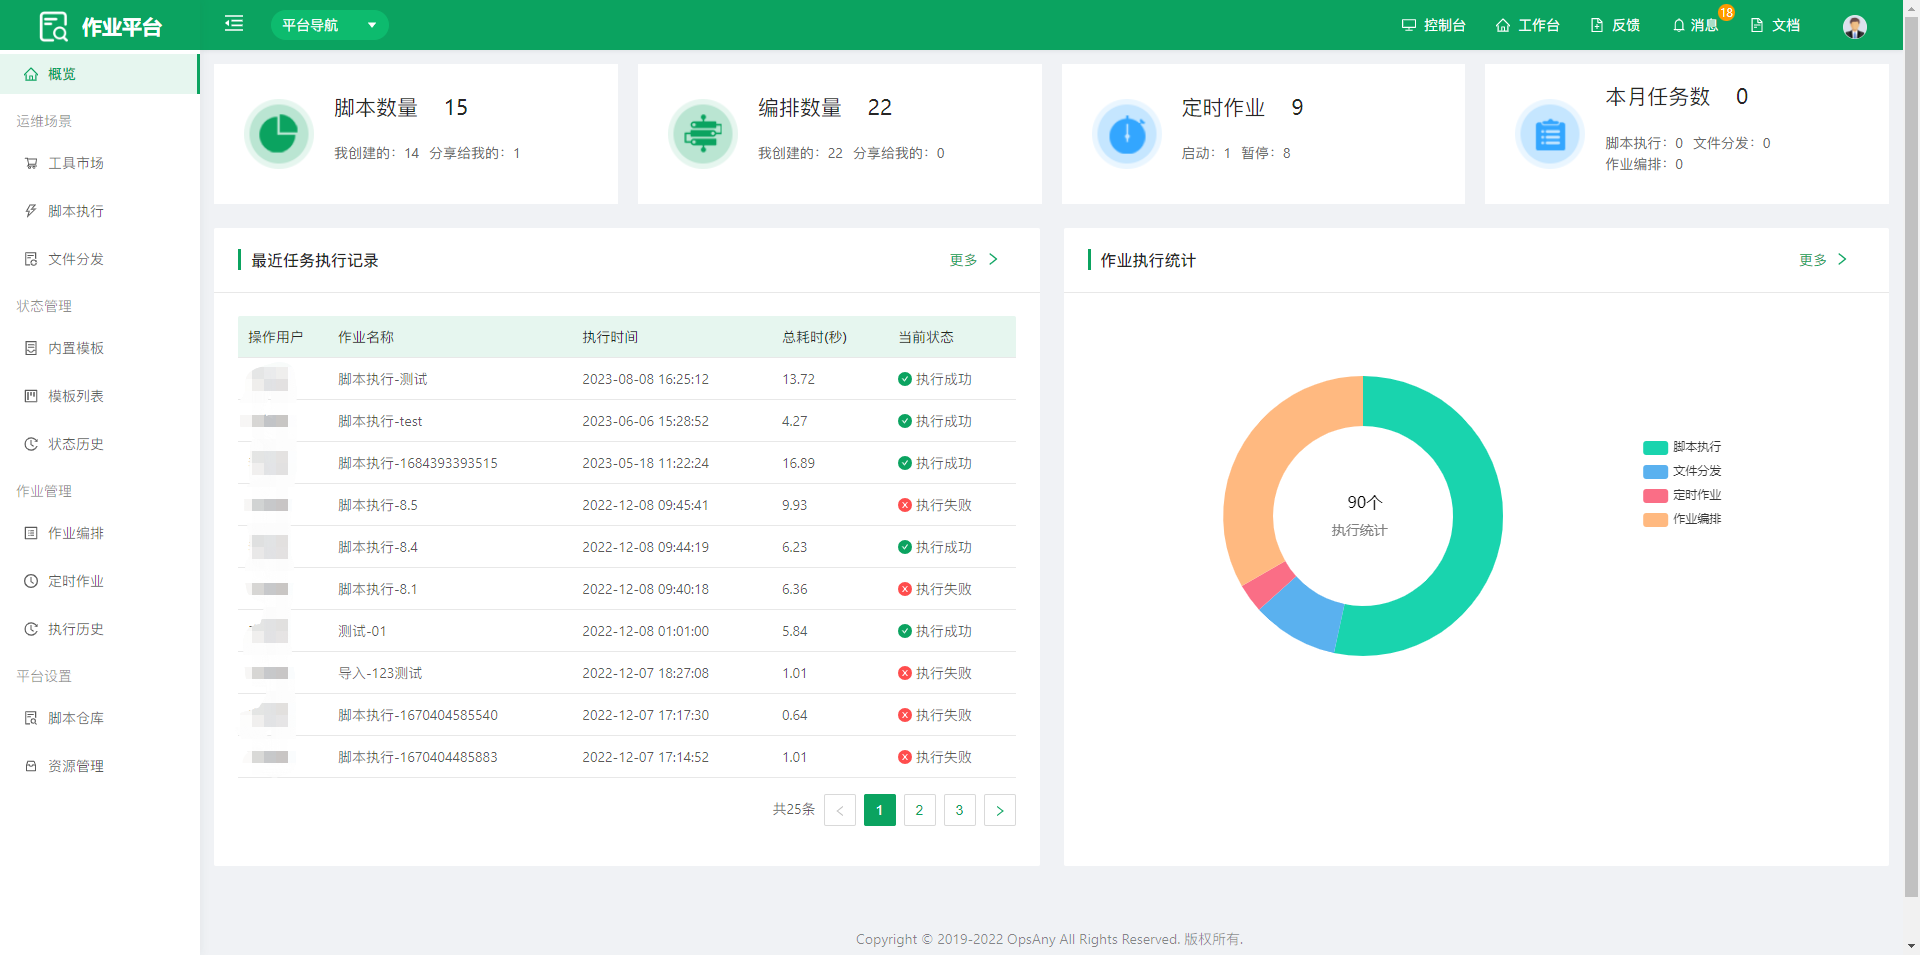
The Job Platform is built on top of the Control Platform Agent pipeline and provides users with a platform for atomic operations. It supports a series of O&M scenarios such as script execution, file distribution, scheduled jobs, and state management, and can assemble scattered single tasks into an automated job flow.
1. O&M Scenarios
O&M Scenarios support quick script execution and file distribution. The platform also includes common O&M jobs managed through the job marketplace, so users can quickly edit and run jobs according to their own O&M requirements.
1.1 Tool Marketplace
The Tool Marketplace displays public jobs and scripts as well as those the user is authorized to access. You can execute them directly or reselect target hosts.
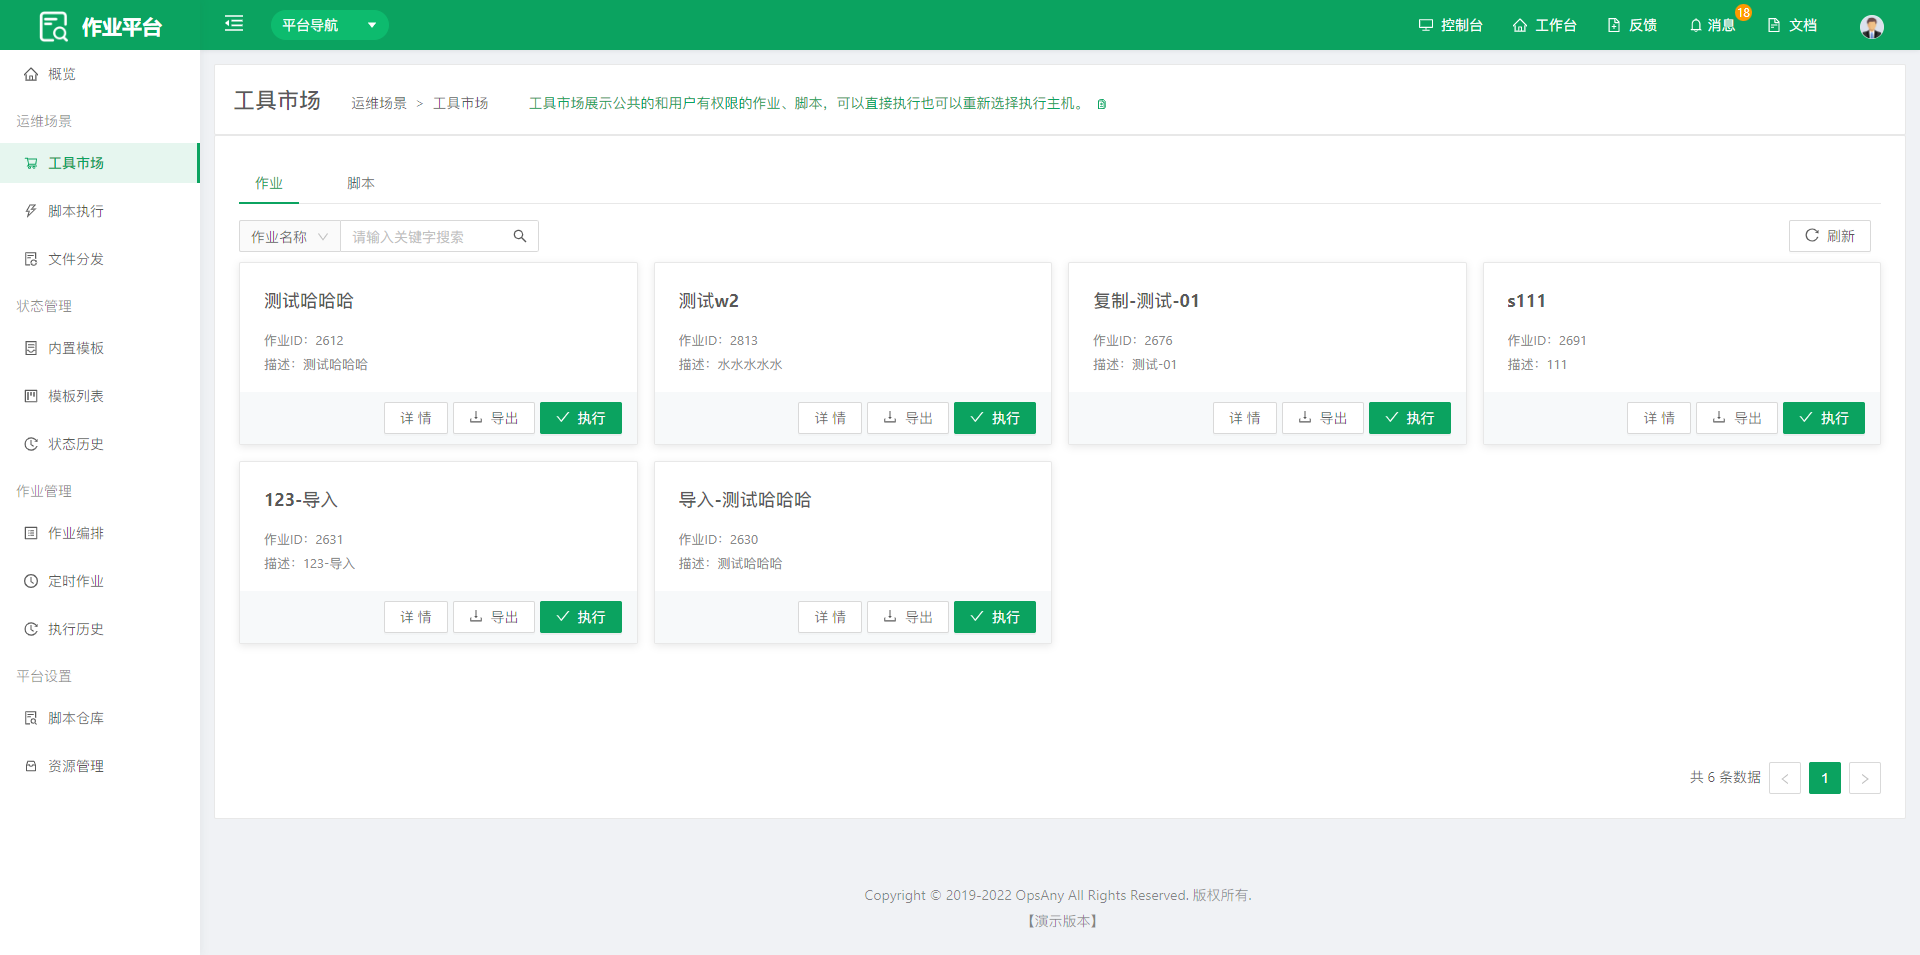
- Click View Details to view the specific steps of the target job and the target execution hosts.
- Click Execute Now to run the target job.
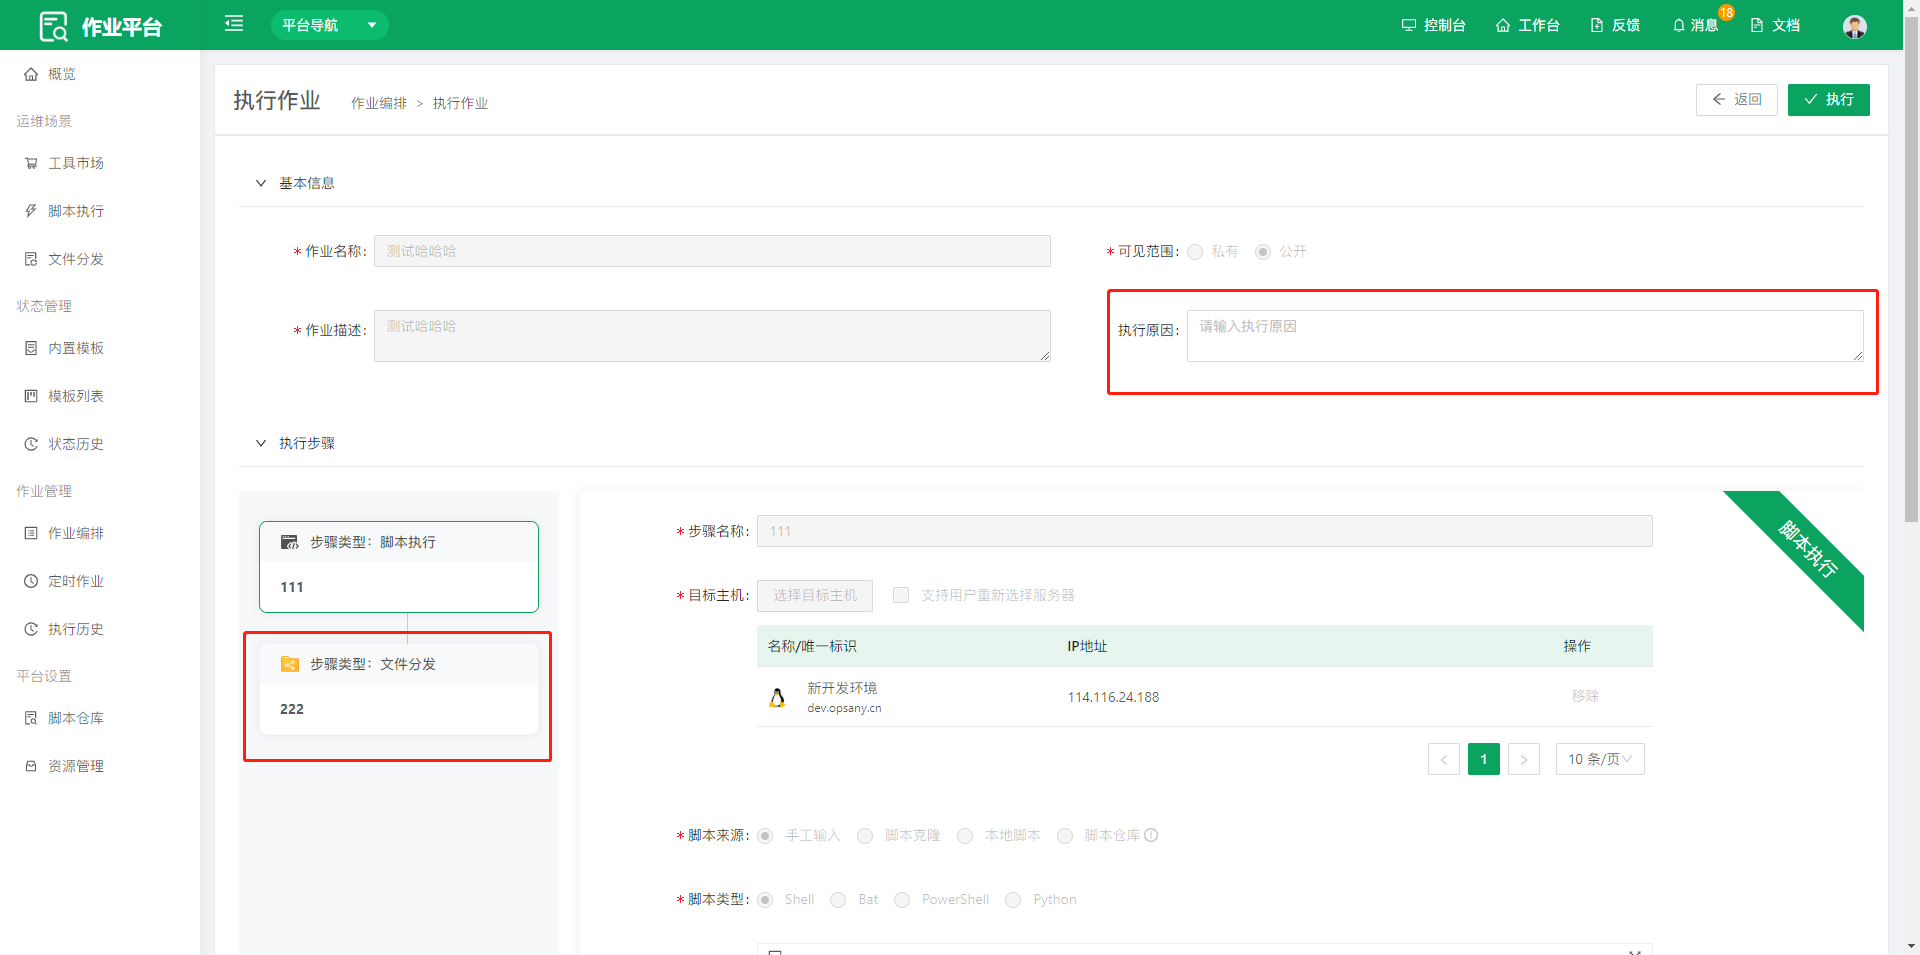
- Execution Reason: enter the reason for running this job.
- Click each step to view the details of the current step.
1.2 Script Execution
Script Execution is mainly used to quickly run a temporary script, which facilitates timely O&M operations.
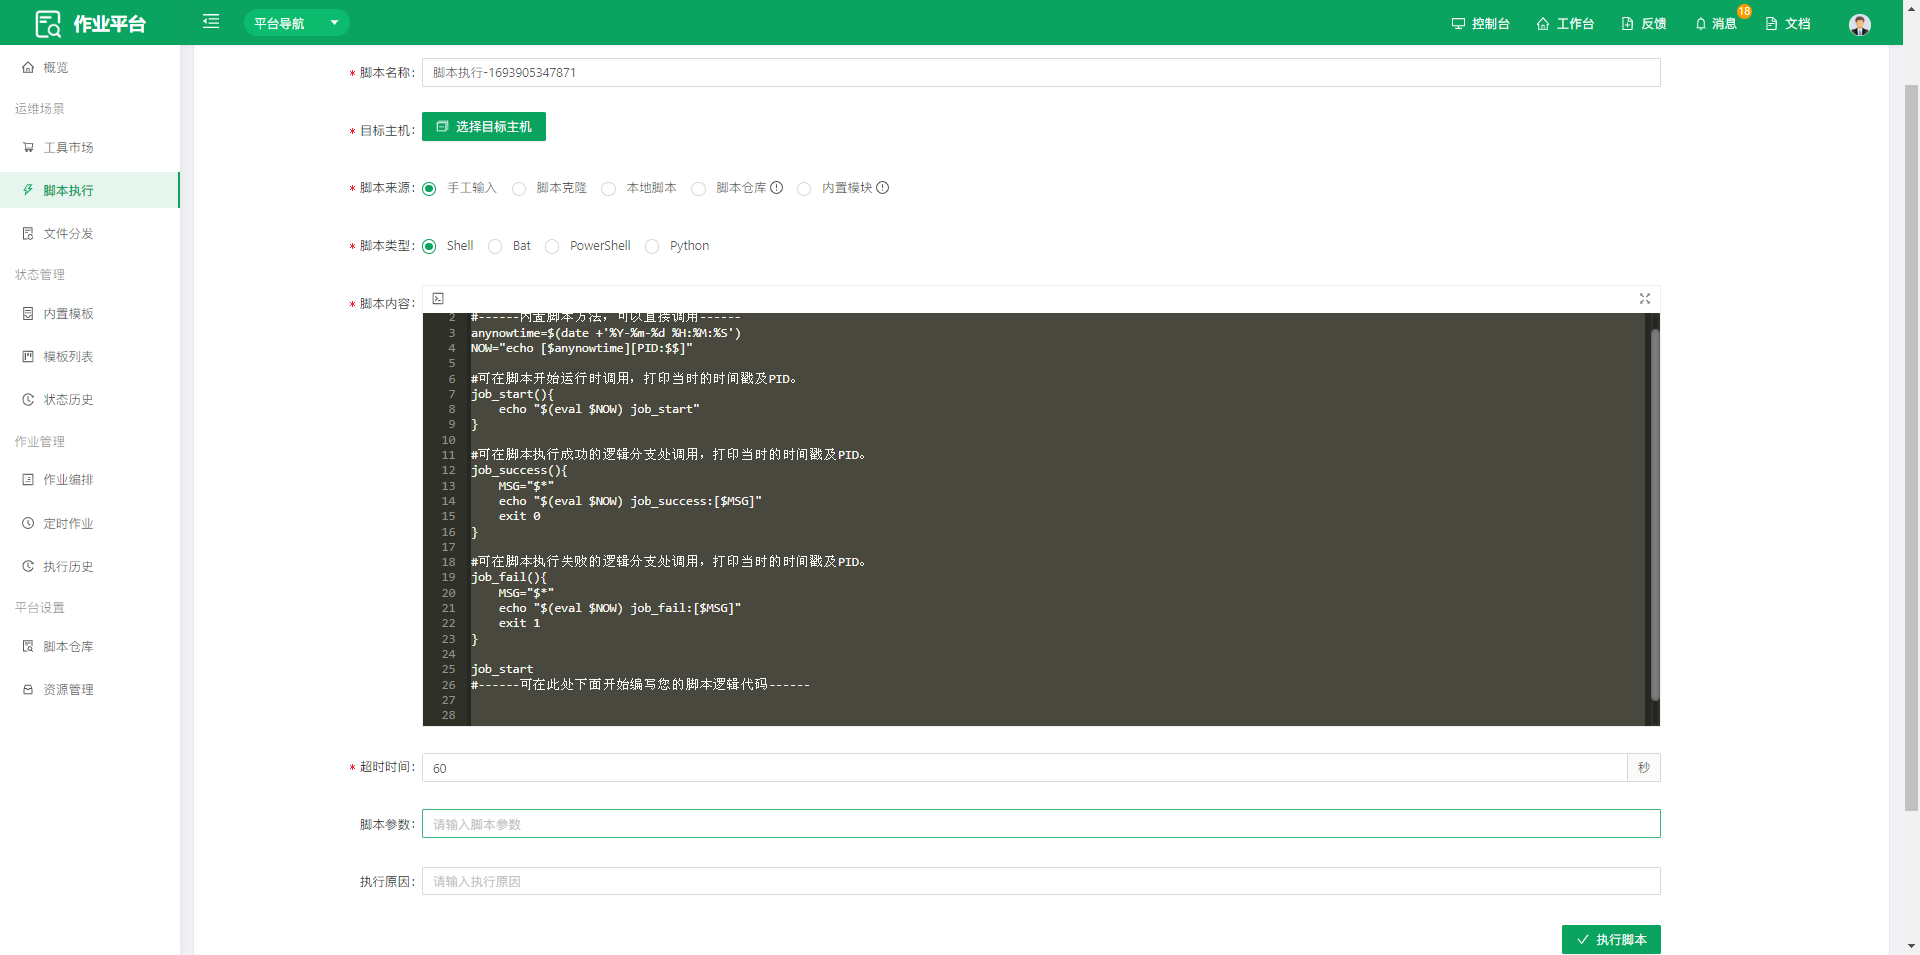
- Script Name: the system generates a name automatically; users can also customize the script name.
- Target Hosts: select the hosts to execute on here. The hosts come from the host management list of the Control Platform.
- Script Source: quickly write a script by selecting a different script source.
- Script Type: selecting a different script type generates different script content for writing different scripts.
- Timeout: the maximum time required to run the script.
- Script Parameters: enter the parameters required by the script.
- Execution Reason: enter the reason for running this script.
- Click Execute Now to view the script execution result.
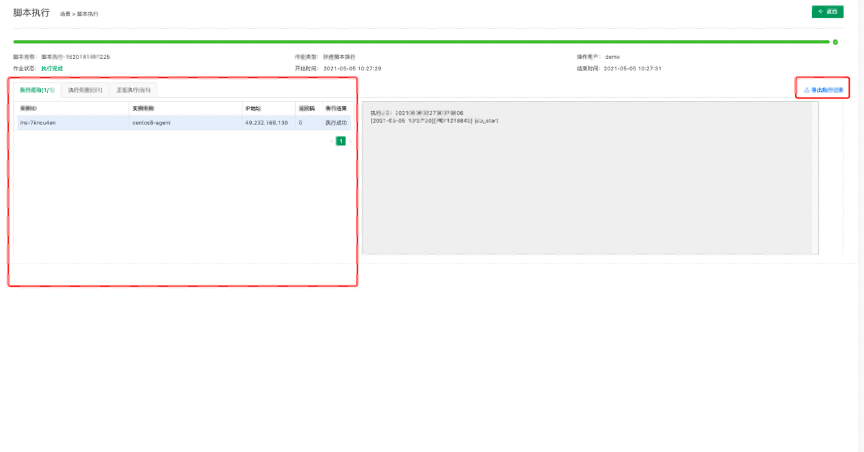
Click Export Execution Record to export the log file of the current script execution.
1.3 File Distribution
File Distribution meets one-off file transfer requirements, where you can quickly execute and get results. Distribute and synchronize files from the local machine or a managed node to other managed hosts.
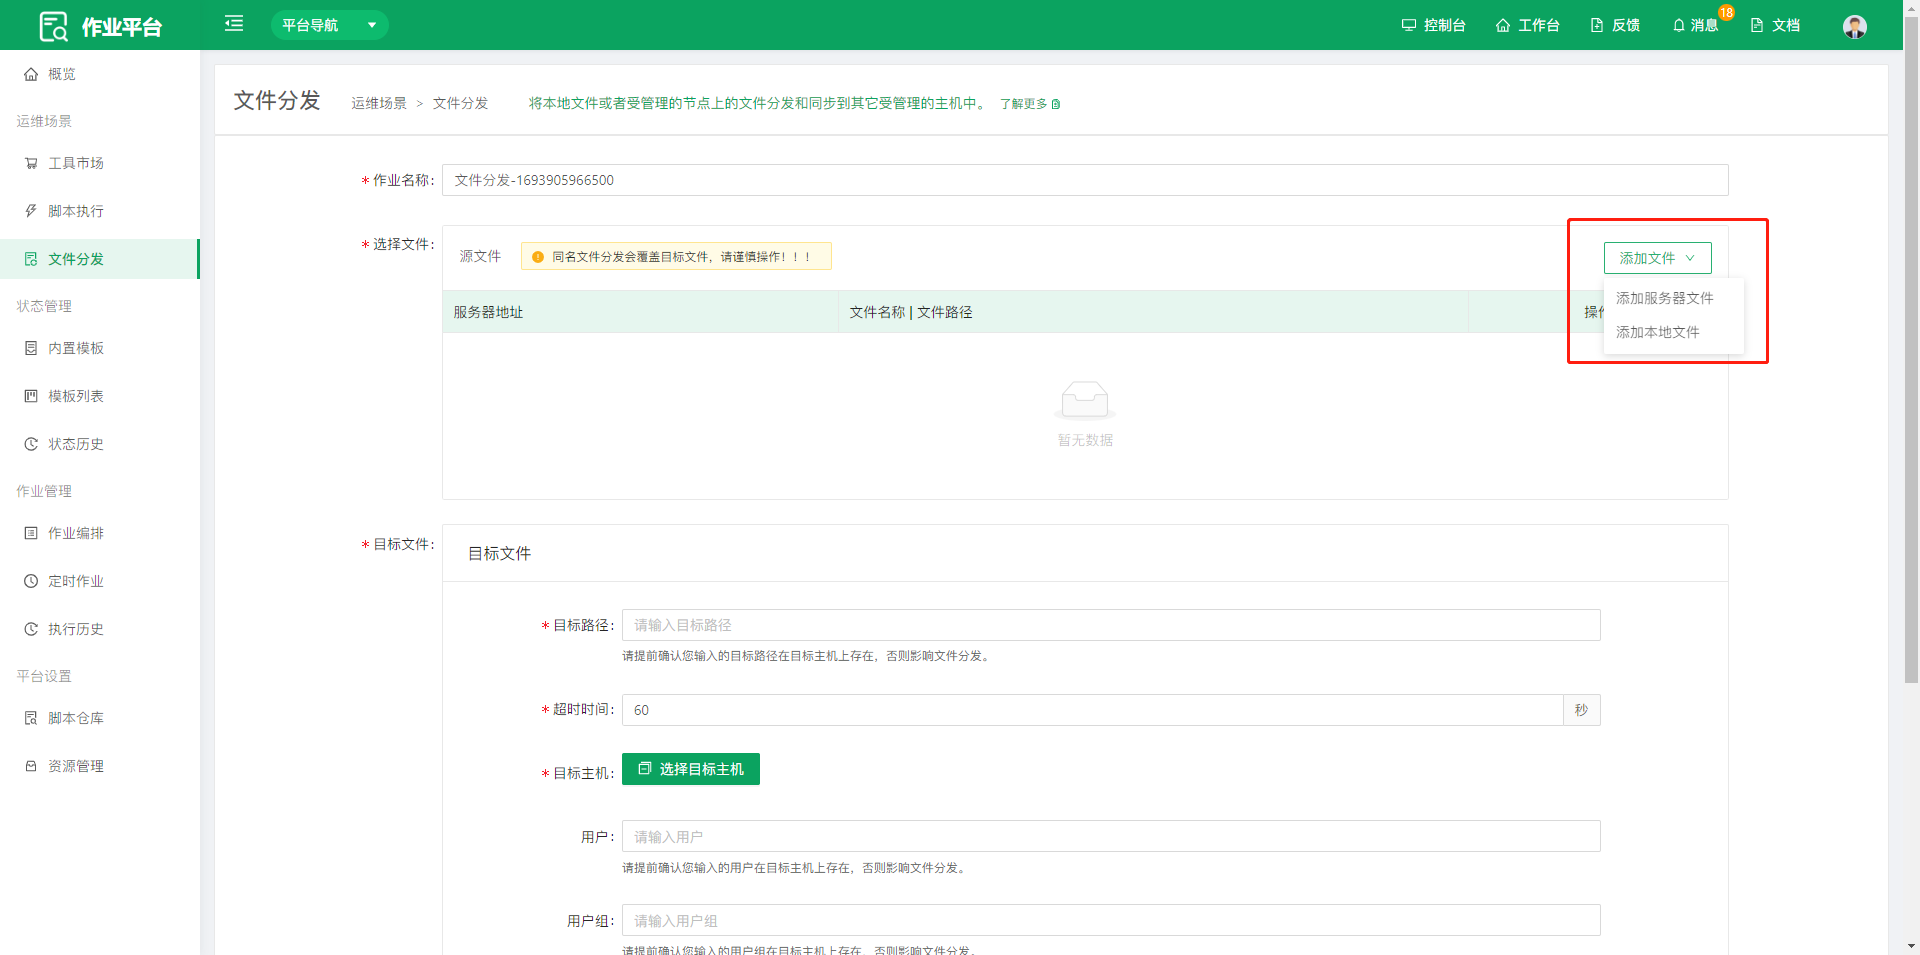
- Click Add File to select a local file or a file on a server.
- Target File: enter the absolute path on the target machine. Set the timeout and select the target hosts.
- Execution Reason: enter the reason for this operation.
- Execution Result: the result view is the same as that of script execution.
2. State Management
State Management is based on the SaltStack declarative resource management solution and helps users manage the state of hosts.
2.1 Built-in Templates
OpsAny includes common production state configuration templates written with SaltStack SLS. You can execute them directly or copy and modify them.
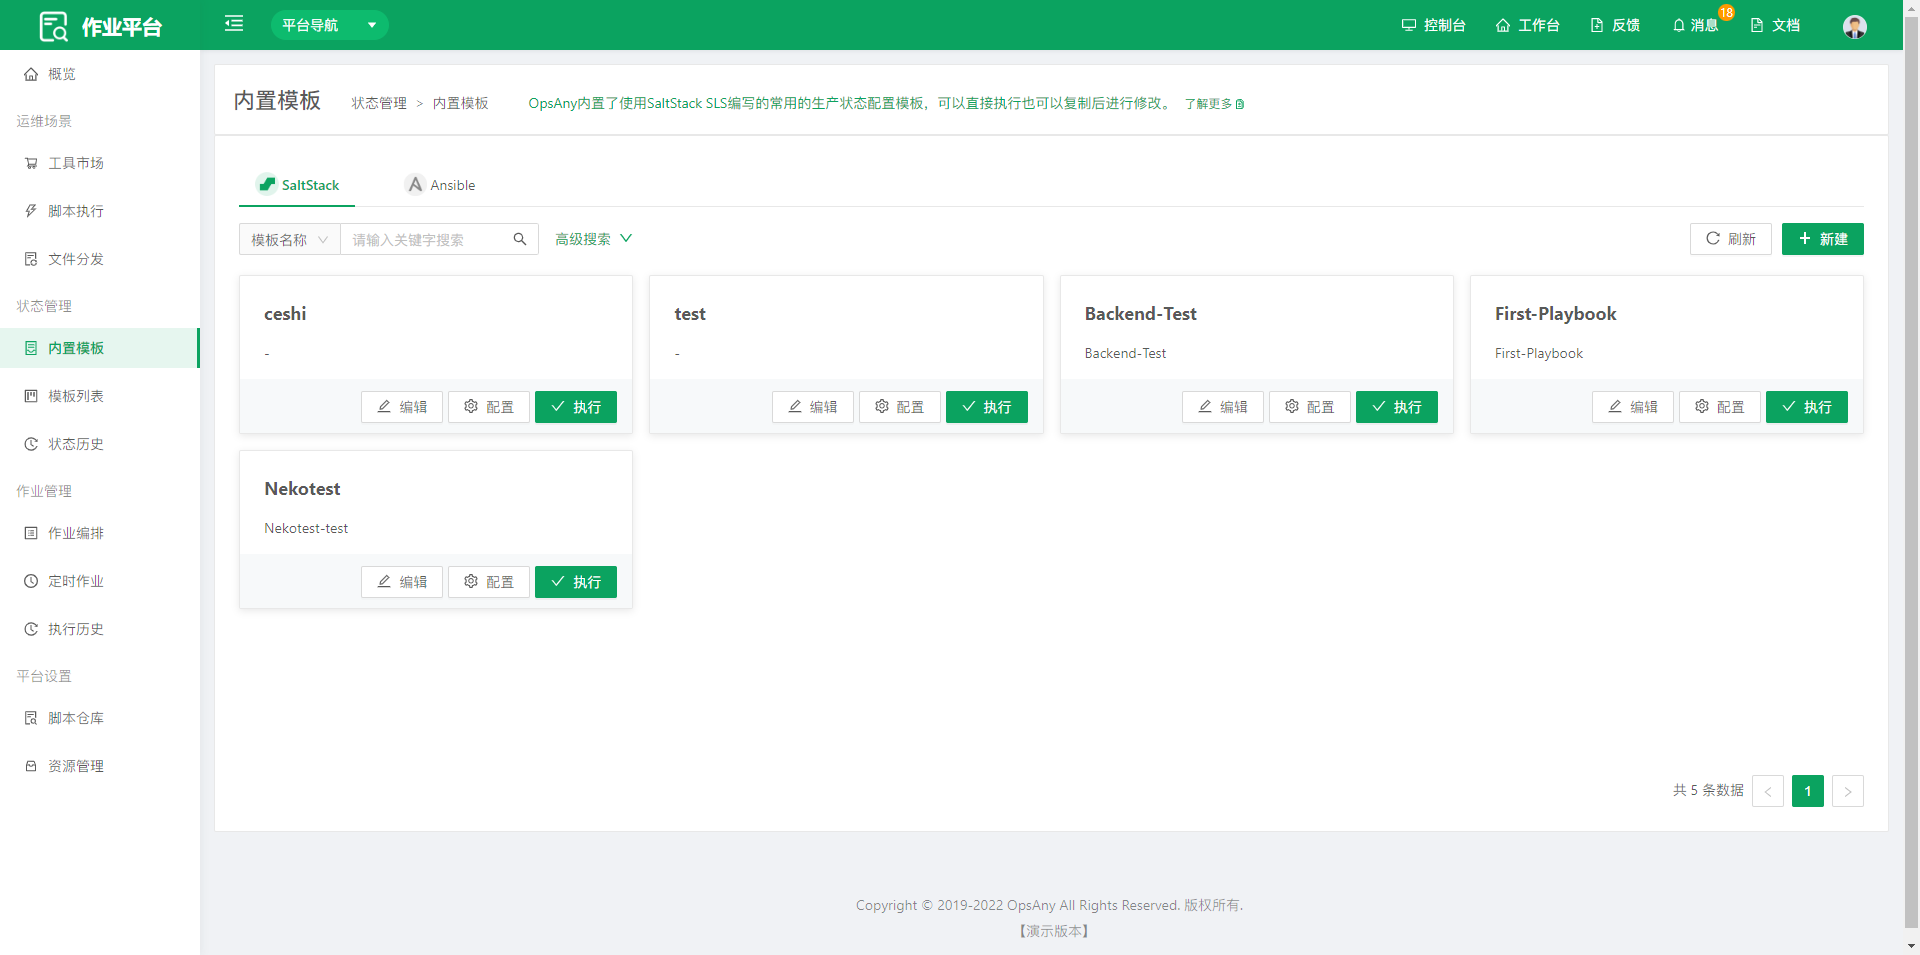
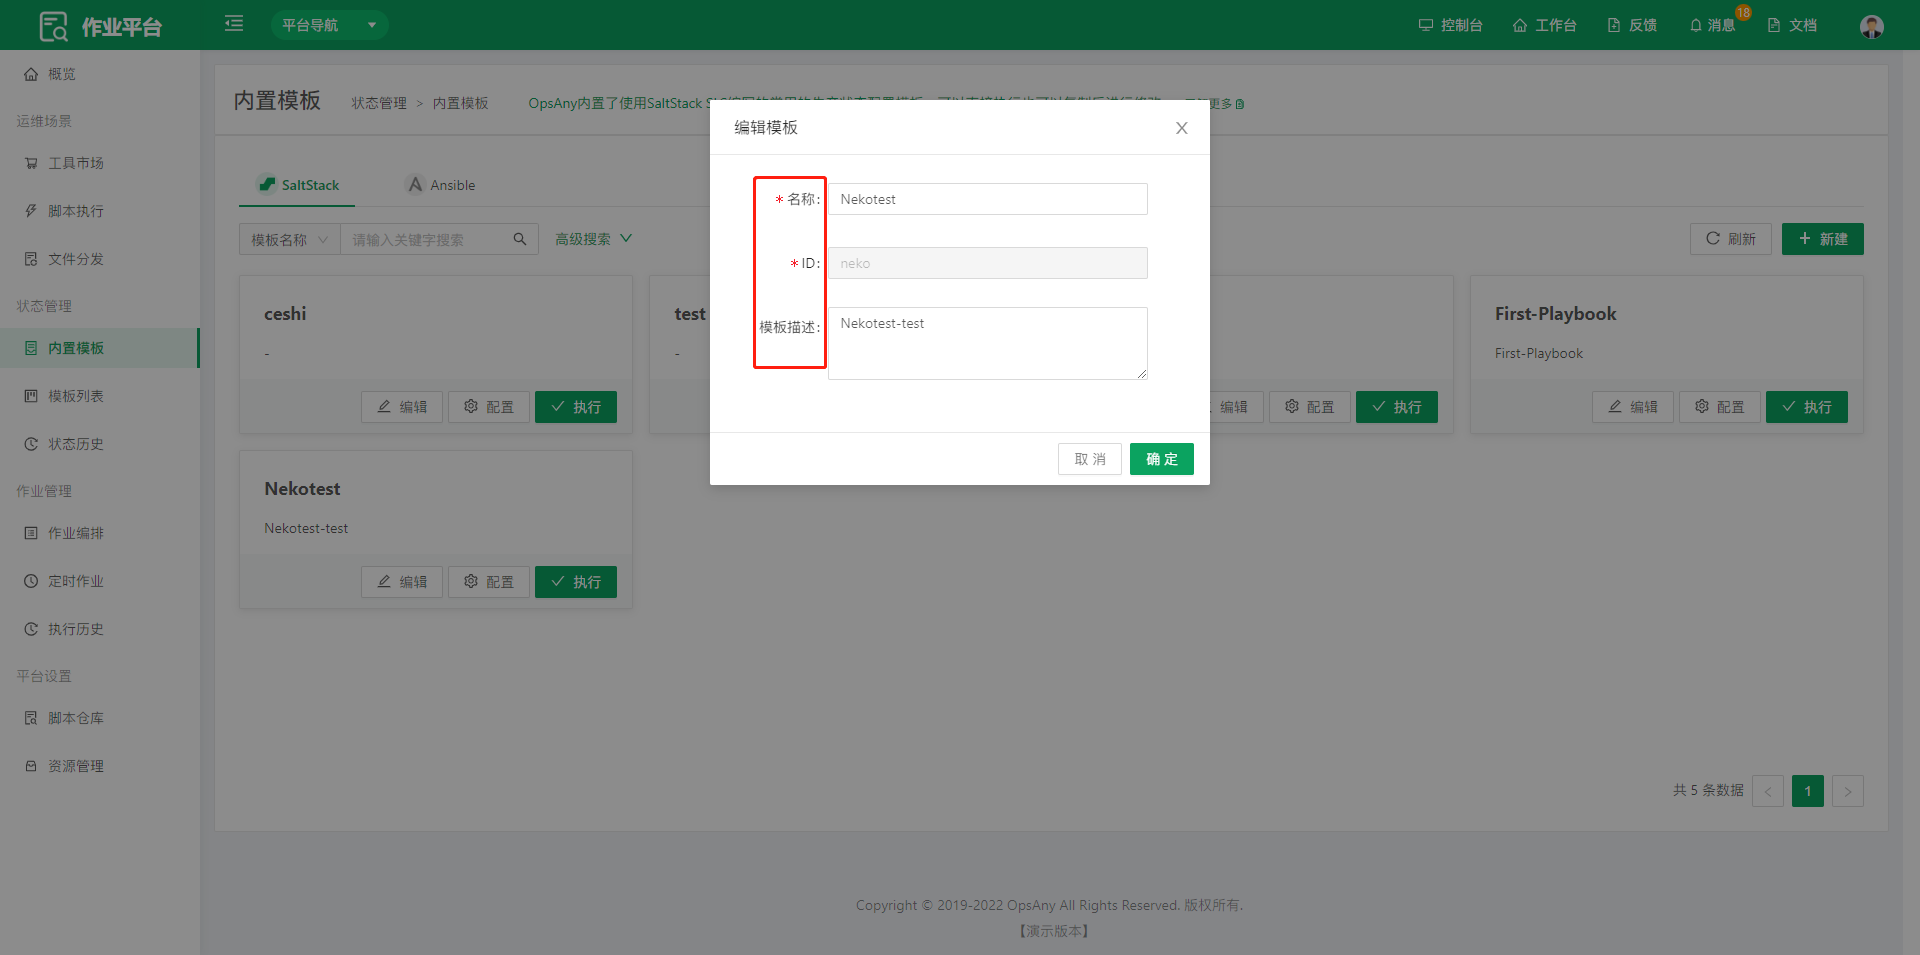
Click the edit button to edit the name, ID, and description of the current template.
Click the config button to edit the current template.
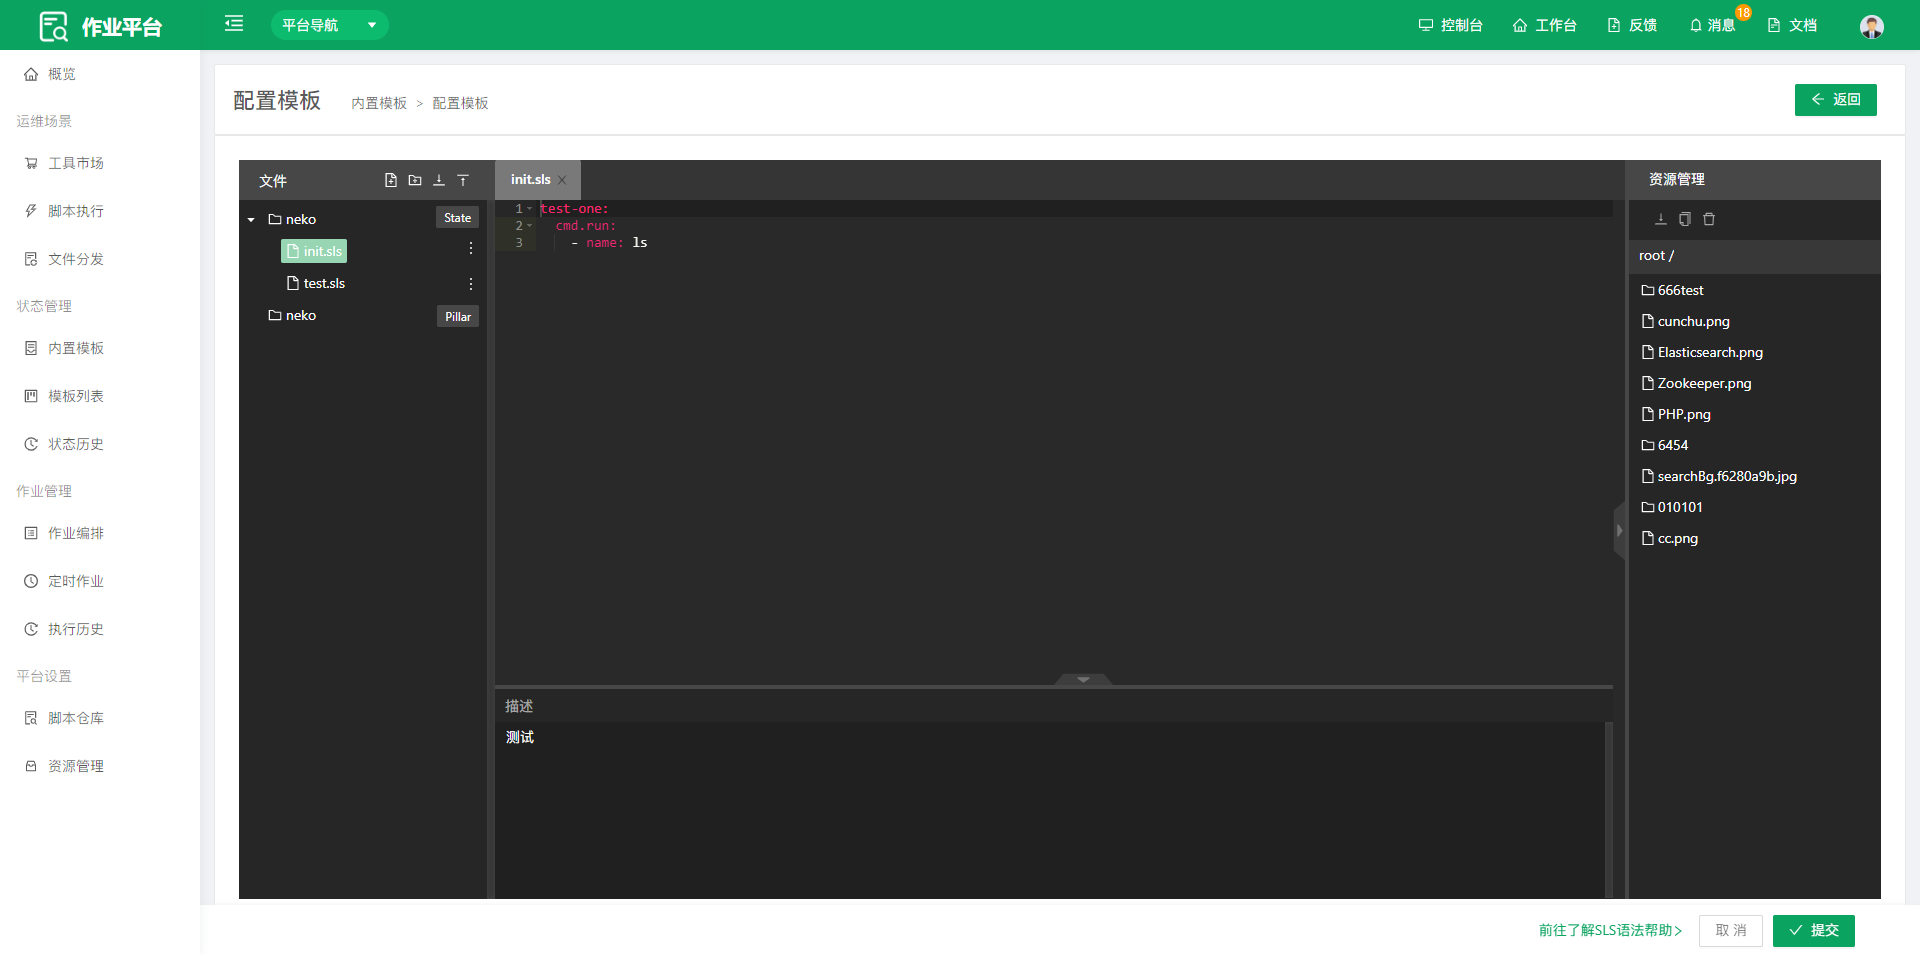
The template contains two folders: a state folder for users to write the corresponding files, and a variable folder for users to write the corresponding variable files.
2.2 Template List
Create custom state templates. Each state template can implement a specific function independently, using SaltStack configuration syntax.
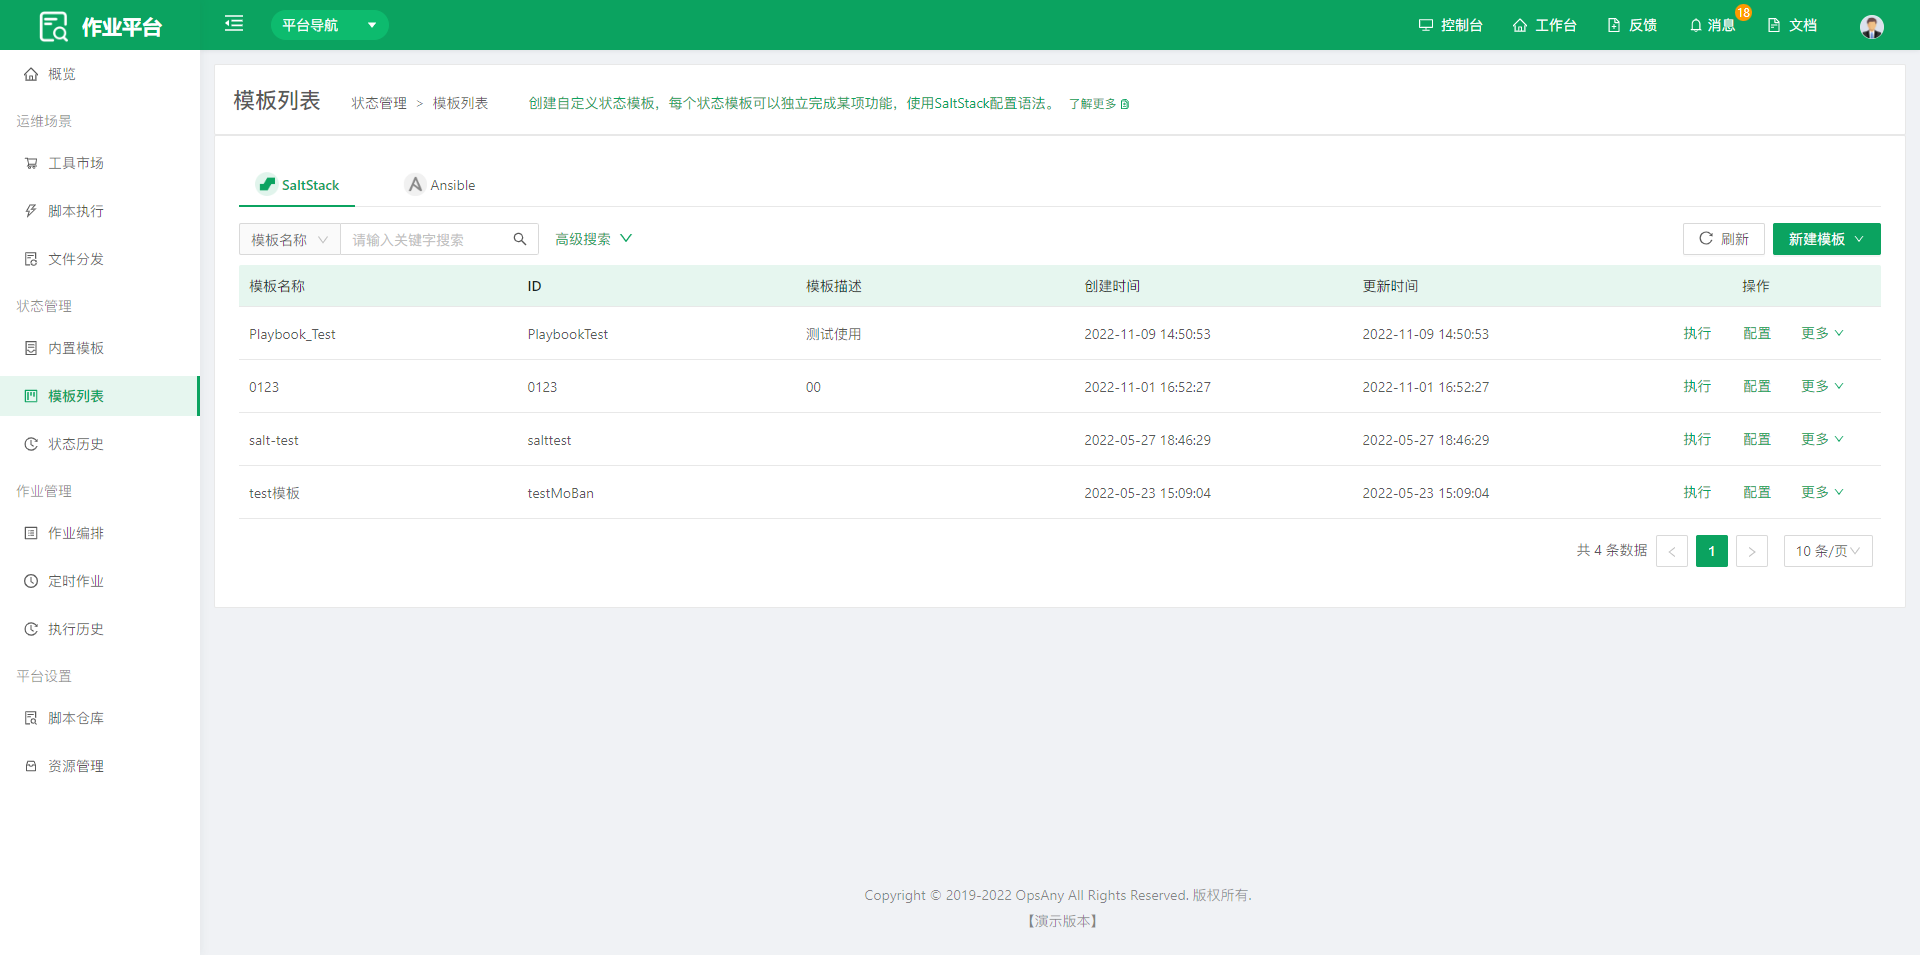
- Click Create Template to create a custom template, or copy a template from the built-in templates.
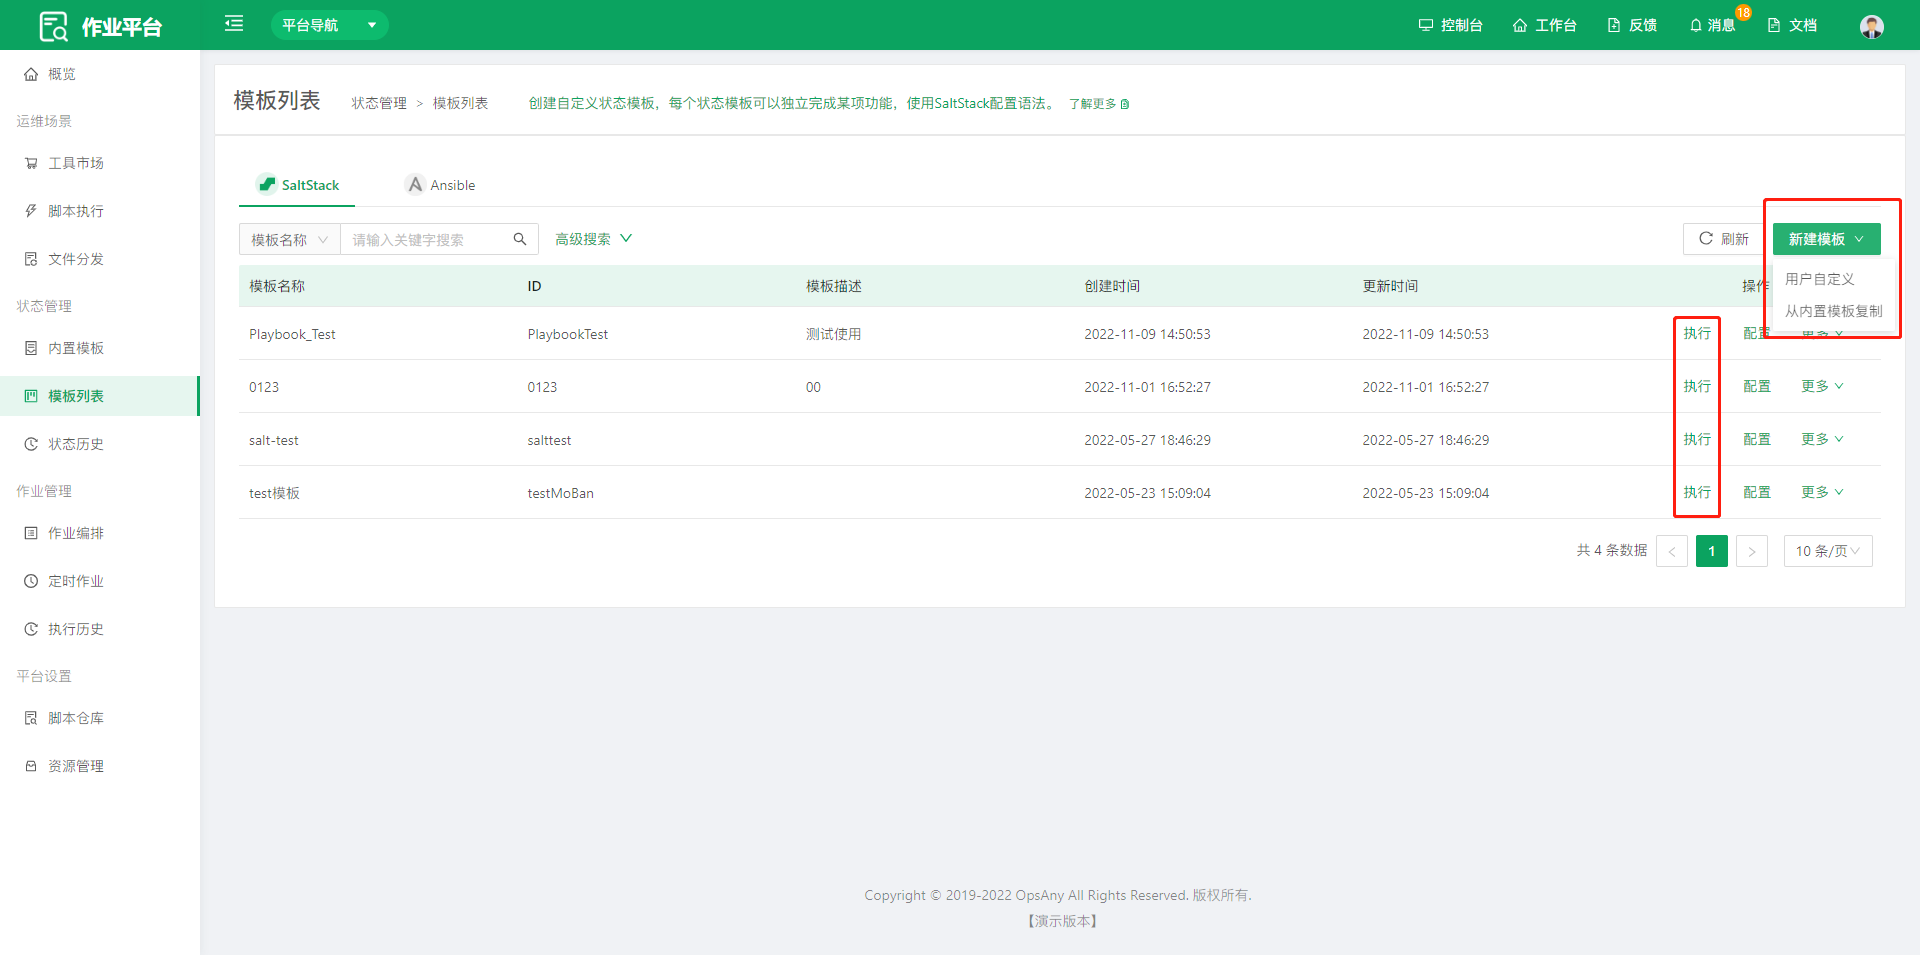
Click the execute button to enter the state execution page.
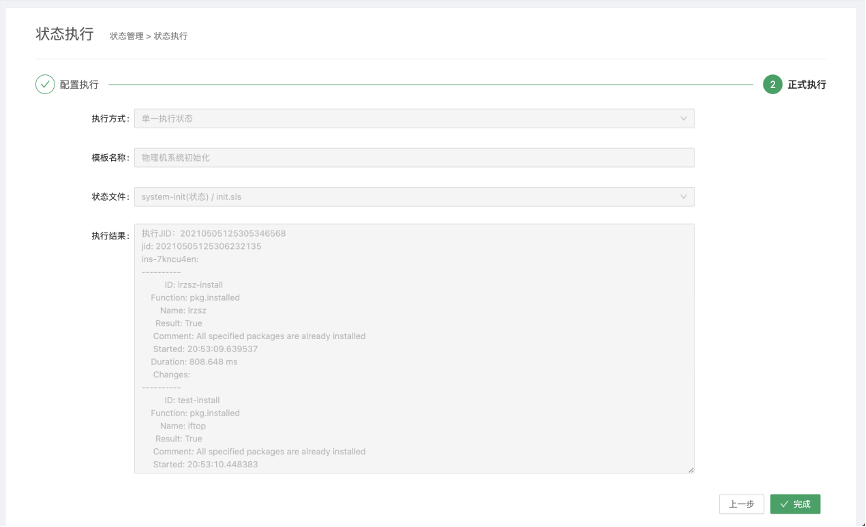
- Step 1: select target hosts, execution method, template name, template file, and enter the execution reason. Users can run a test execution before the formal execution for verification.
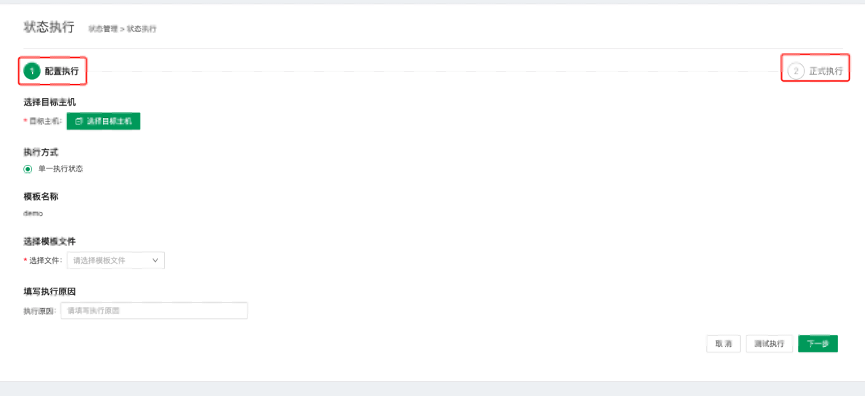
- Step 2: view the execution result. The result contains the detailed logs of the current state management template execution.
2.3 State History
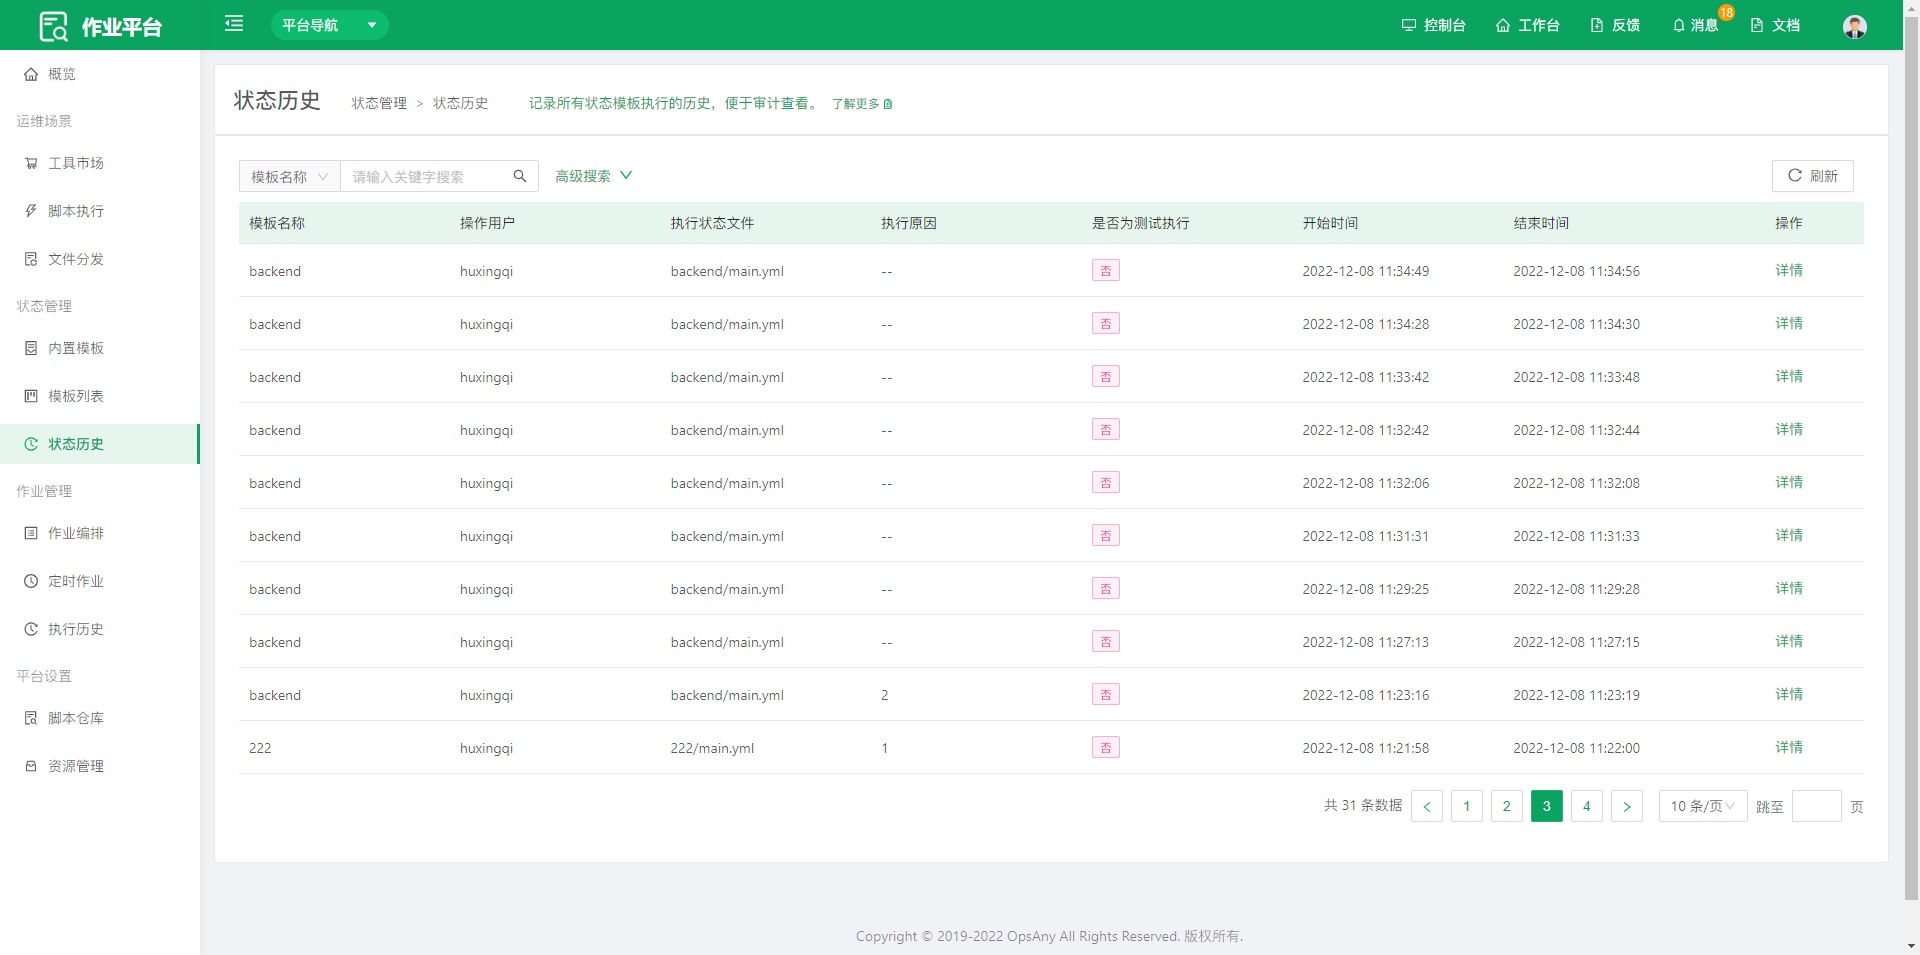
Records the execution history of all state templates for audit review.
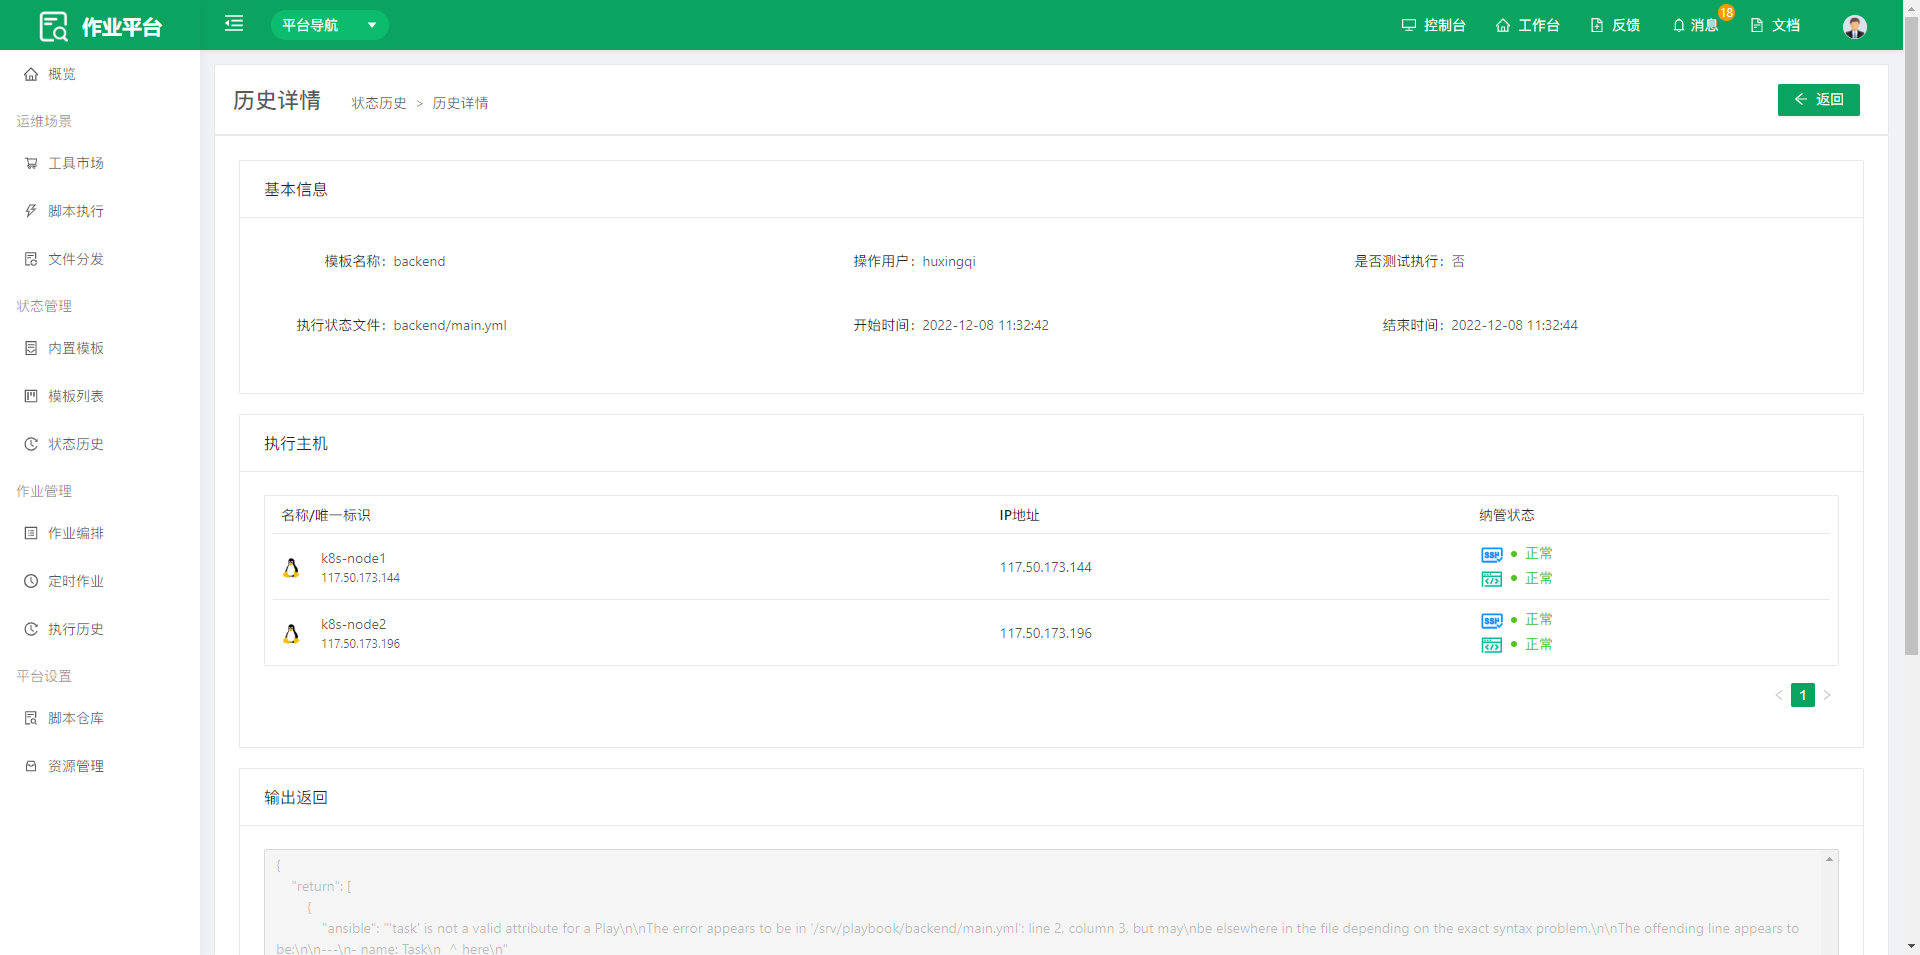
Click View Details to view the details of each execution.
3. Job Management
When an operation scenario requires multiple steps to run in sequence, clicking execute one by one manually is far too inefficient, and the process cannot be retained for continuous use and maintenance. The Job Management feature of the Job Platform solves this problem well.
3.1 Job Orchestration
Job Orchestration is one of the core capabilities of the Job Platform. The idea is to use process orchestration to combine multiple script executions or file distributions involved in an O&M scenario into a job template. This job template should include as much of the common logic related to the scenario as possible, and corresponding execution plans are derived from actual usage scenarios.
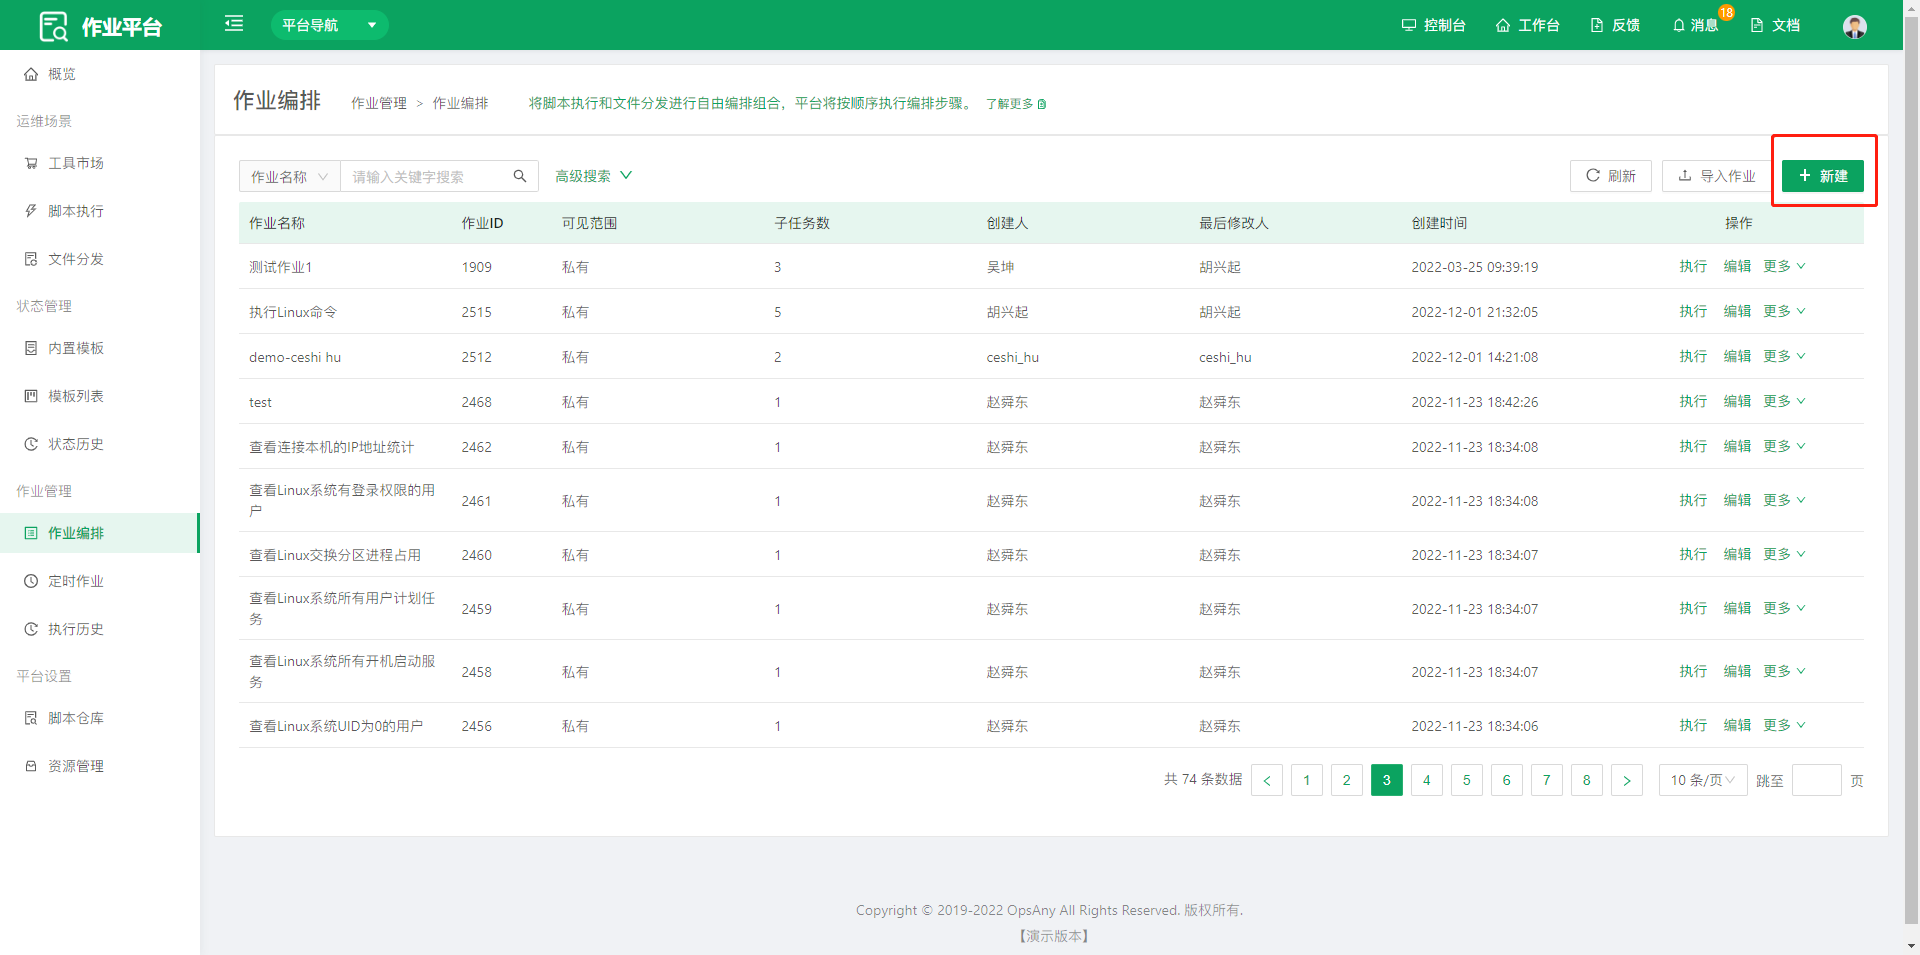
- Click the create button to enter the creation page.
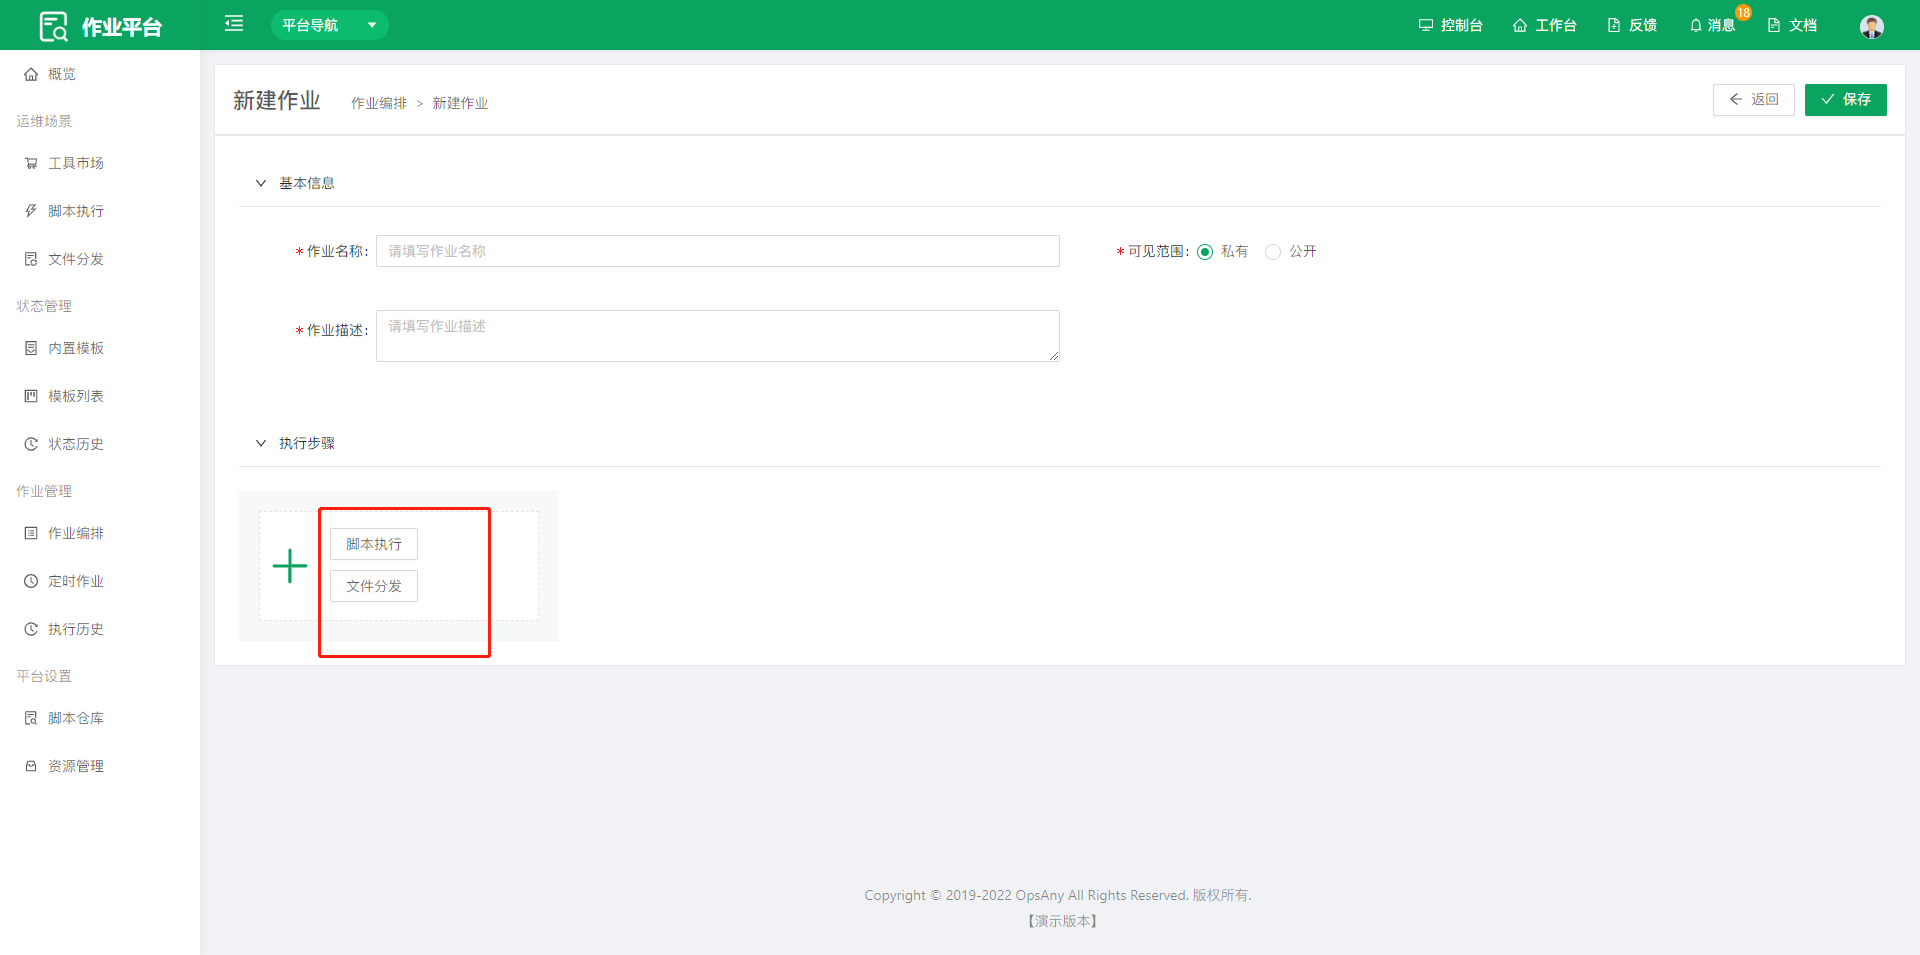
- Select an execution plan and fill in the specific execution details of the step; the fields are similar to those for script execution or file distribution.
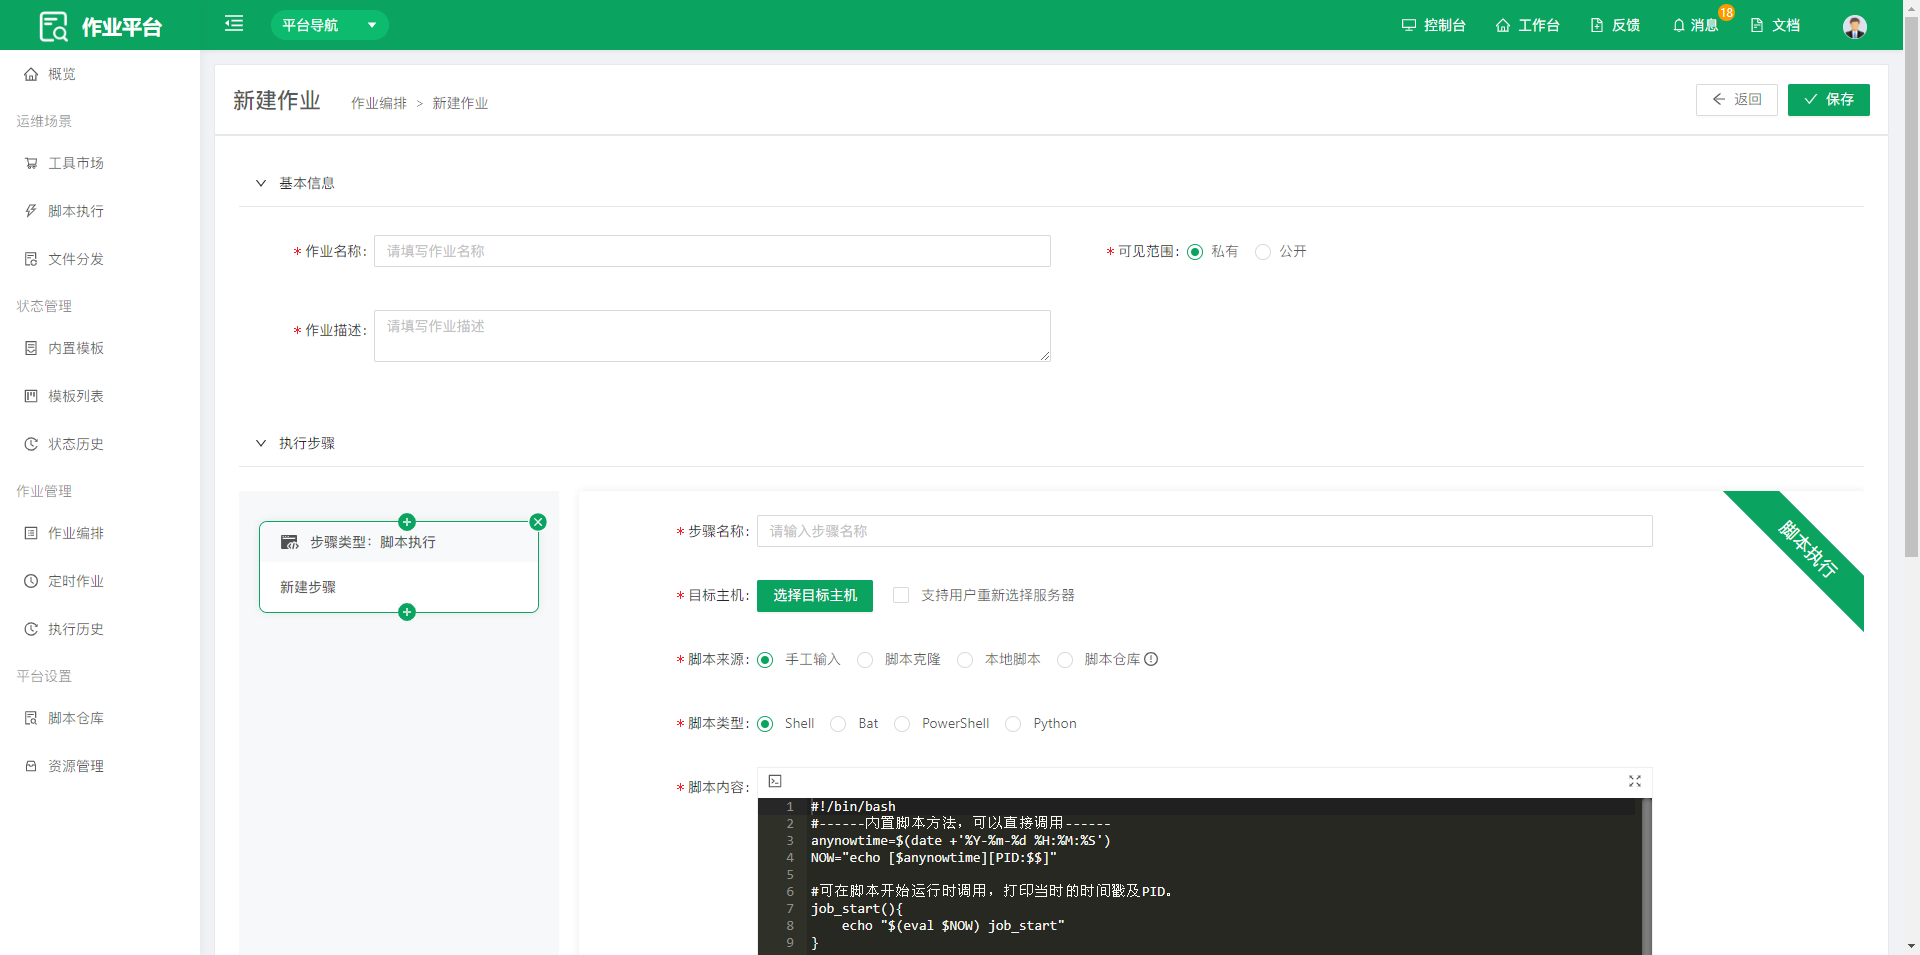
- Click the save button on the page, then go to the list to execute. Job Orchestration supports sharing, so it can be shared with other members to maximize execution efficiency.
3.2 Scheduled Jobs
Scheduled Jobs manage job tasks that run on a schedule. It retains the native Linux Crontab usage for scheduled jobs, so O&M staff can get started more smoothly and quickly.
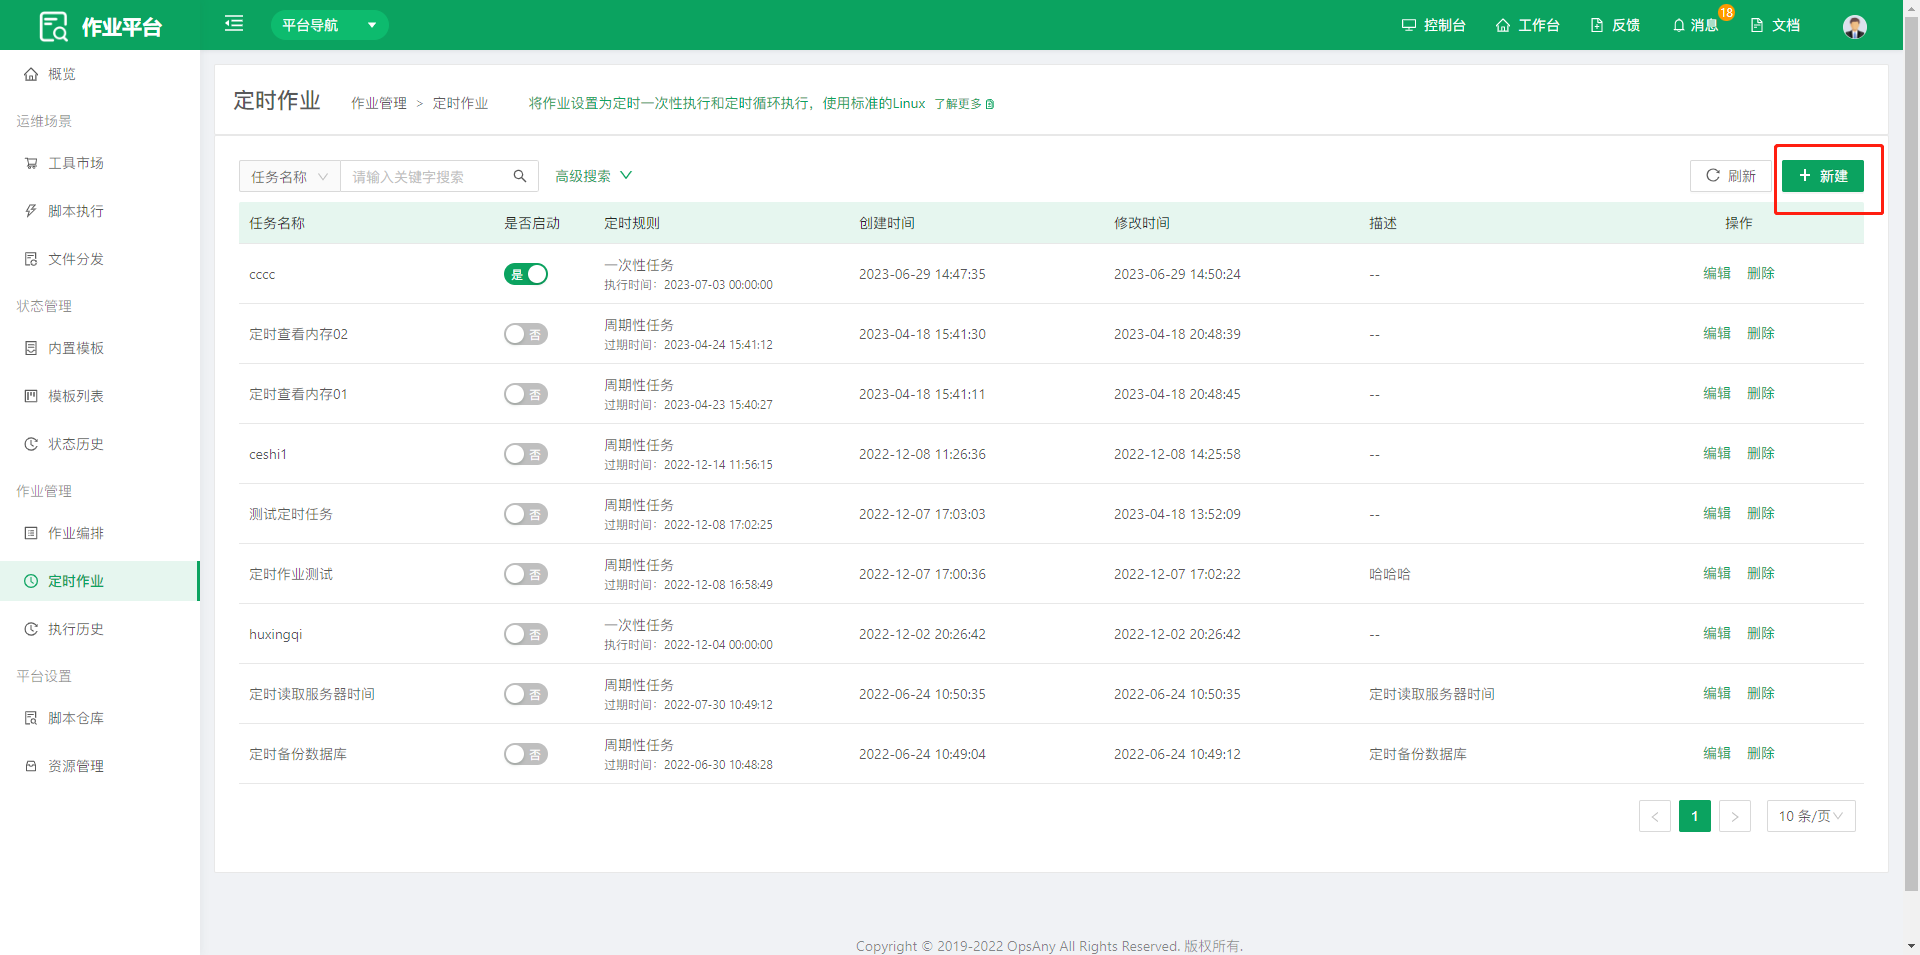
Create a Scheduled Job
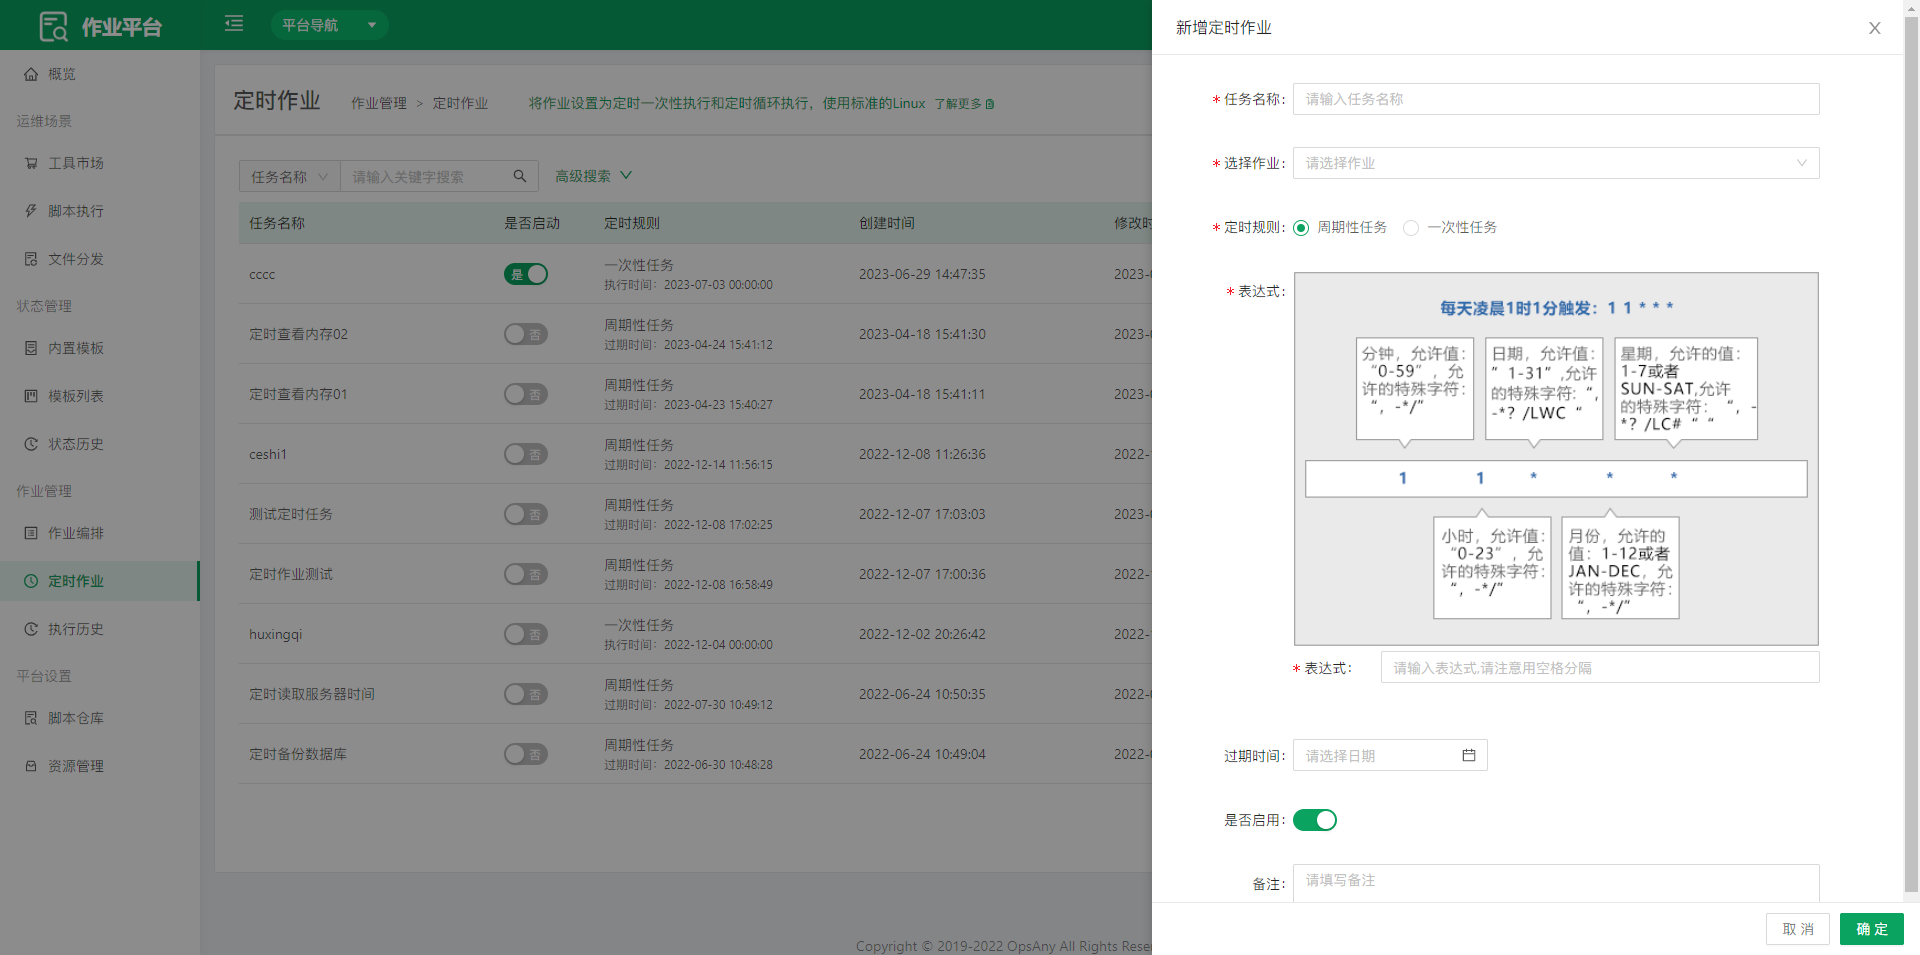
- Task Name: users can customize the task name.
- Select Job: select a job that can be executed.
- Schedule Rule: users can select a periodic task or a task that runs once at a specific time.
- Expression: uses the same expression as Linux Crontab, lowering the learning curve and making it easier to get started.
- Expiration Time: select the time to stop this scheduled task.
- Enabled: select Yes to enable it immediately.
- Remarks: users can enter remarks.
Enable or Disable a Scheduled Job
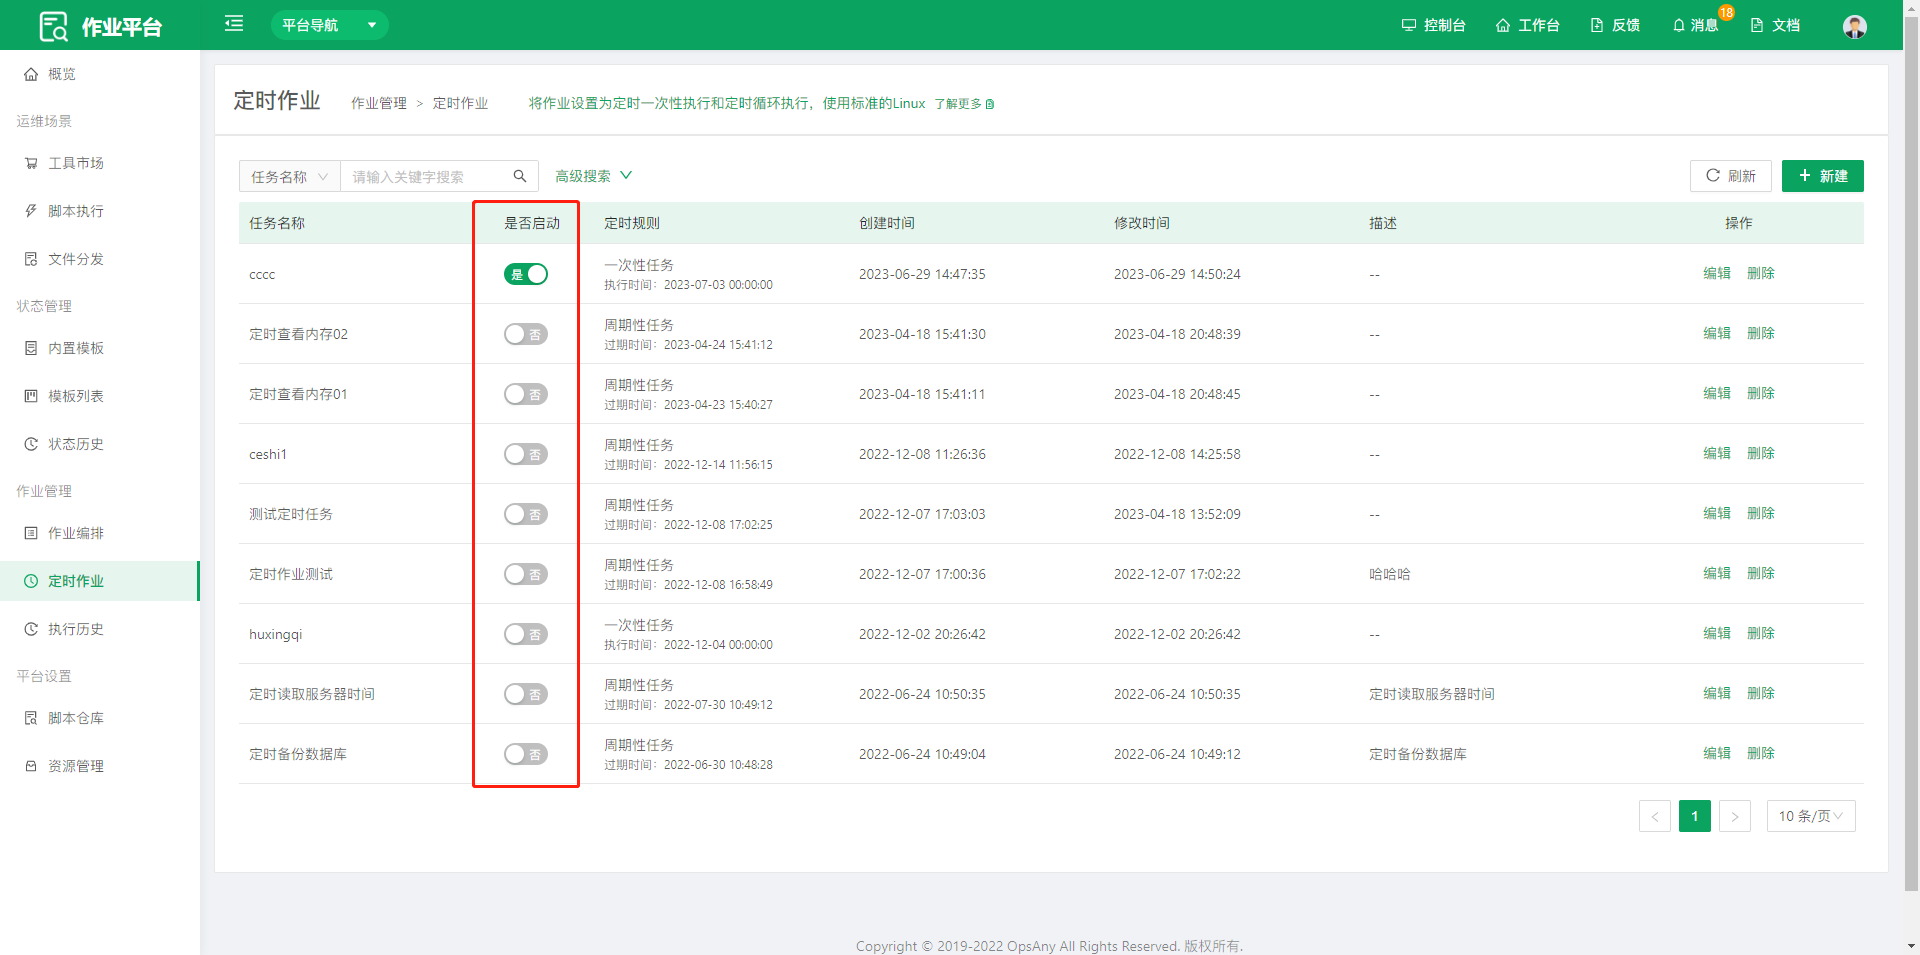
- Click the switch button on the page to enable or disable the scheduled job.
3.3 Execution History
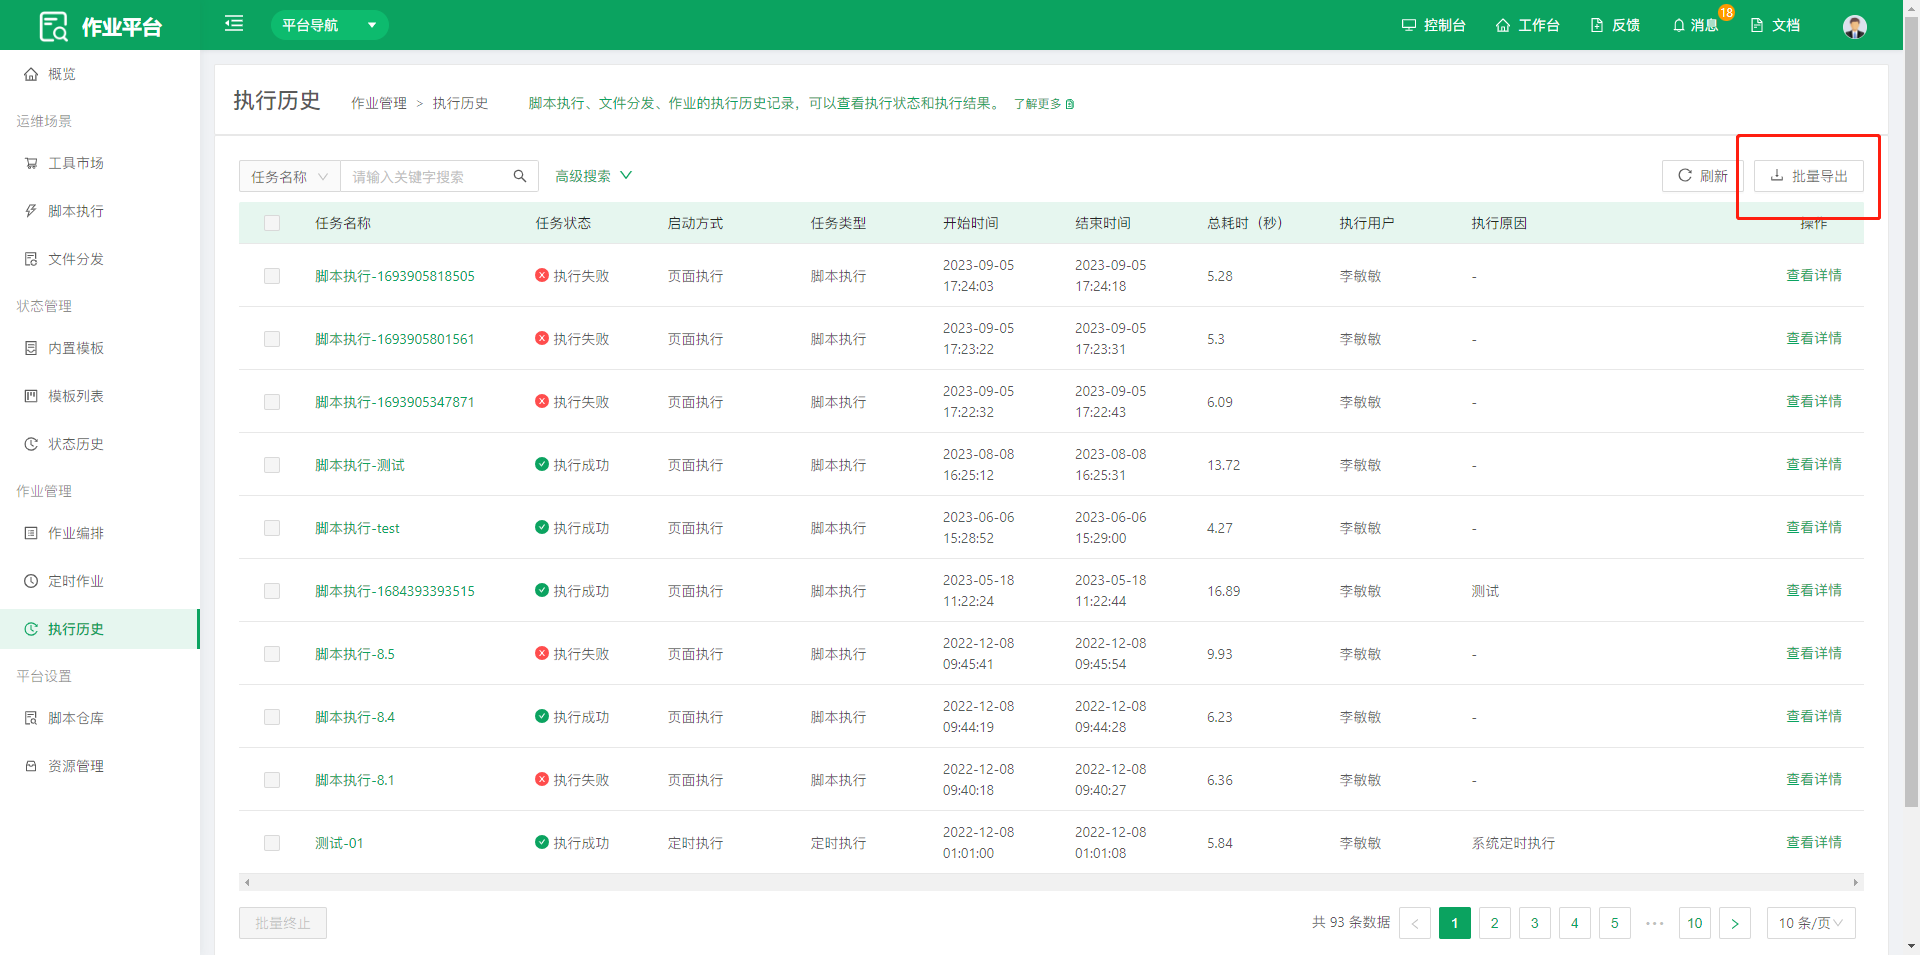
Execution History is mainly used to view the execution history of script executions, file distributions, and jobs, including execution status and results.
- Click Batch Export to export the details file of specified jobs.
4. Platform Settings
4.1 Script Repository
Stores execution scripts. Scripts can be shared with other users, and each modification generates a new version.
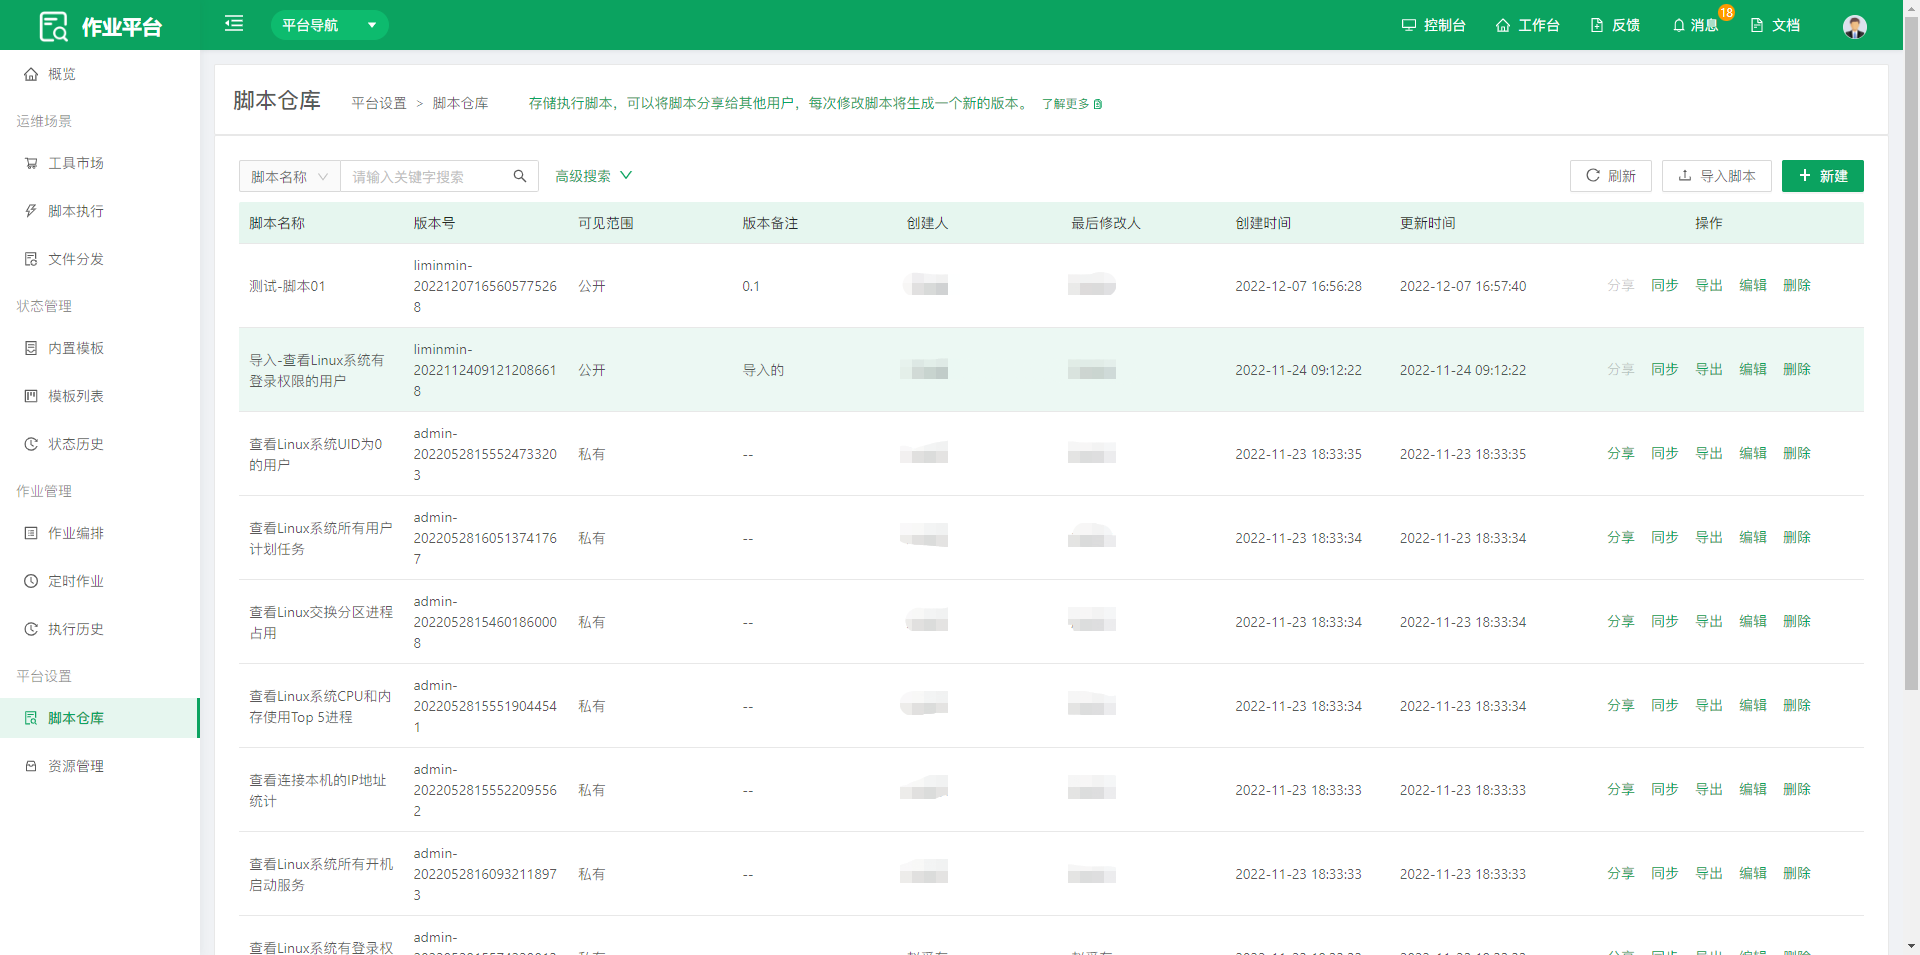
Click Create Script
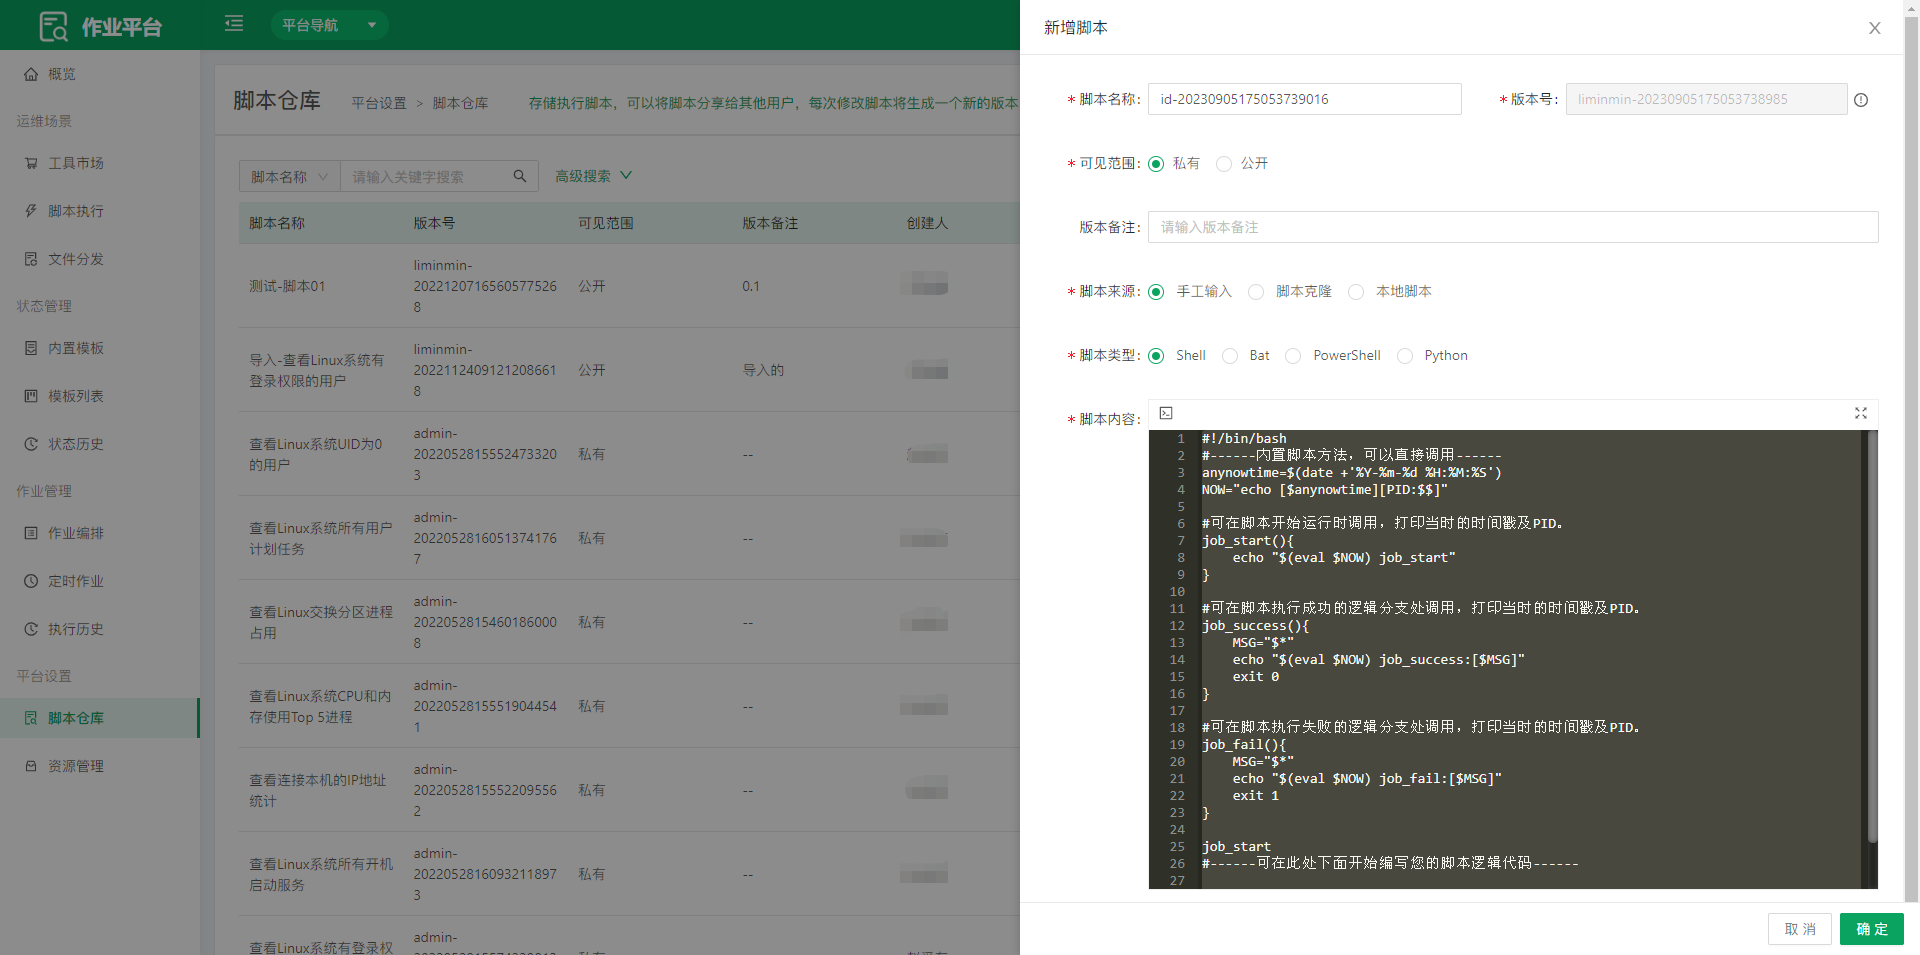
- Script Name: users can customize the script name.
- Version Number: the system generates the version number automatically.
- Script Source: three modes are supported: manual input, script clone, and local script.
- Manual input means the user writes the script content and uploads it.
- Script clone means the user selects a script, edits the selected script, and generates a new version.
- Local script means the user uploads a local script, then edits and stores it.
- Script Type: select a different script type based on the operating system.
- Script Content: users enter the script content.
Click the Share Button to Set Permissions
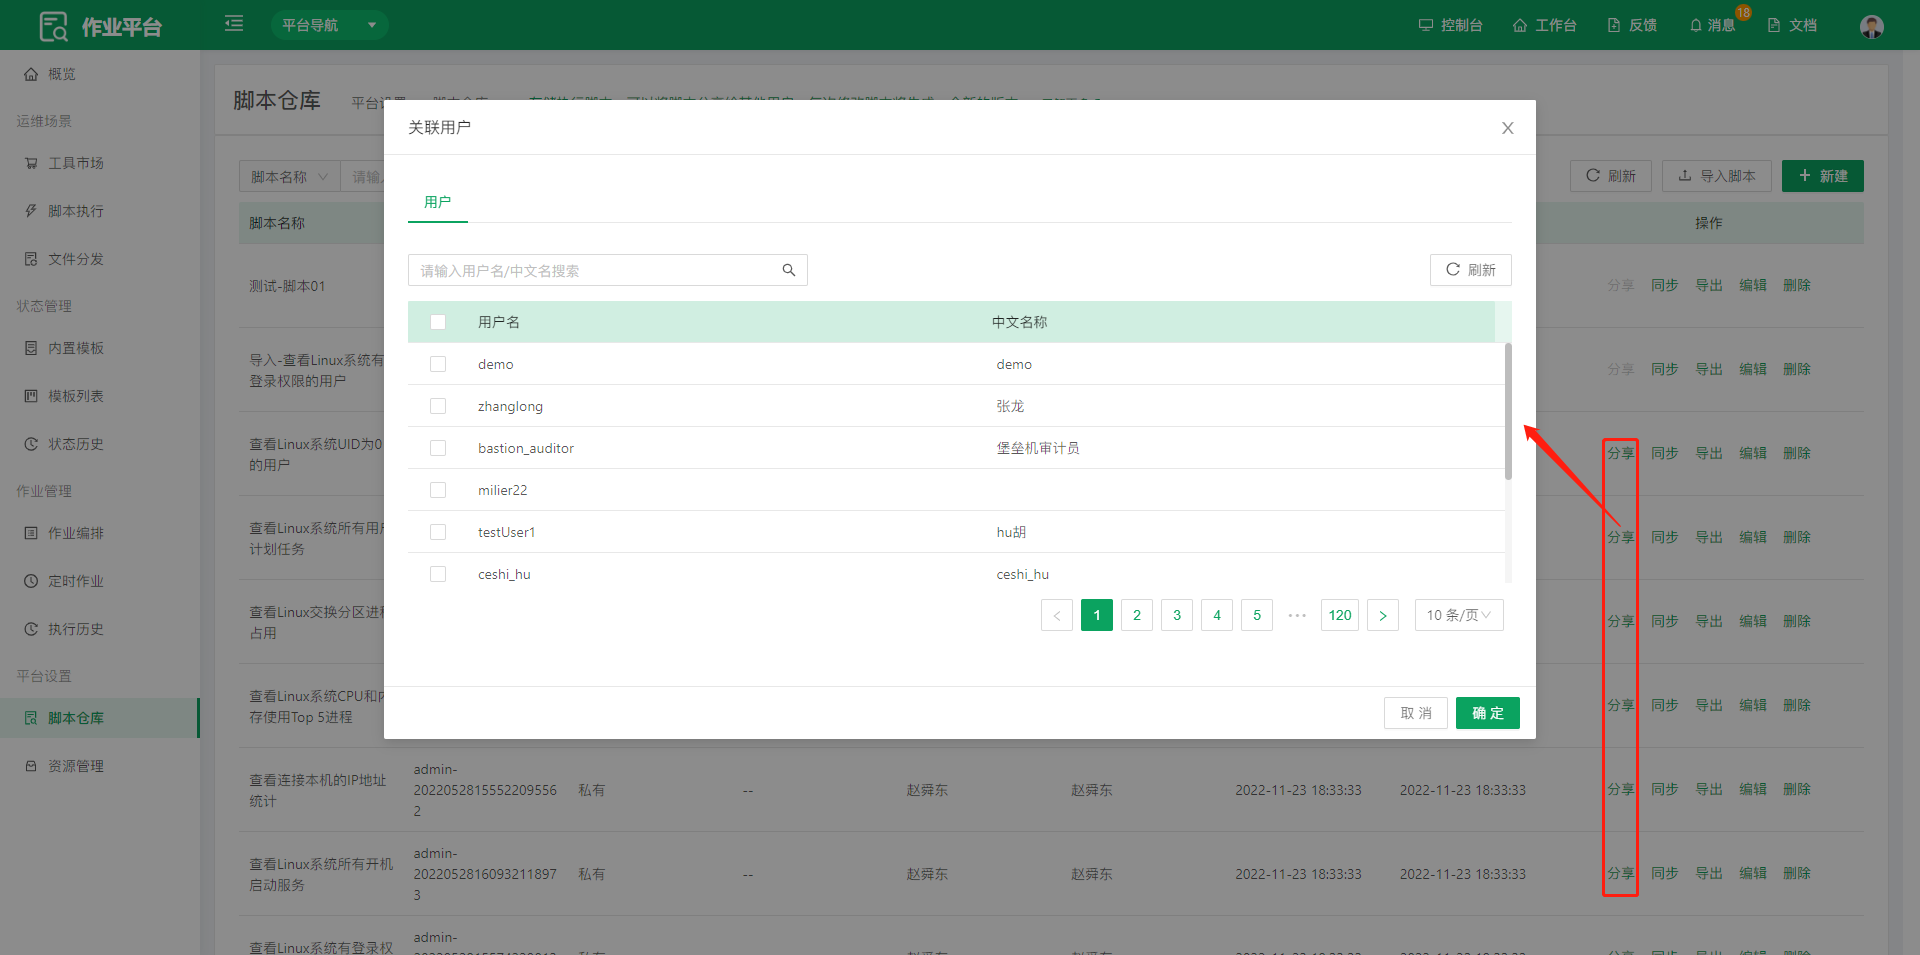
Administrators can share and authorize the current script to specific users.
Click Sync
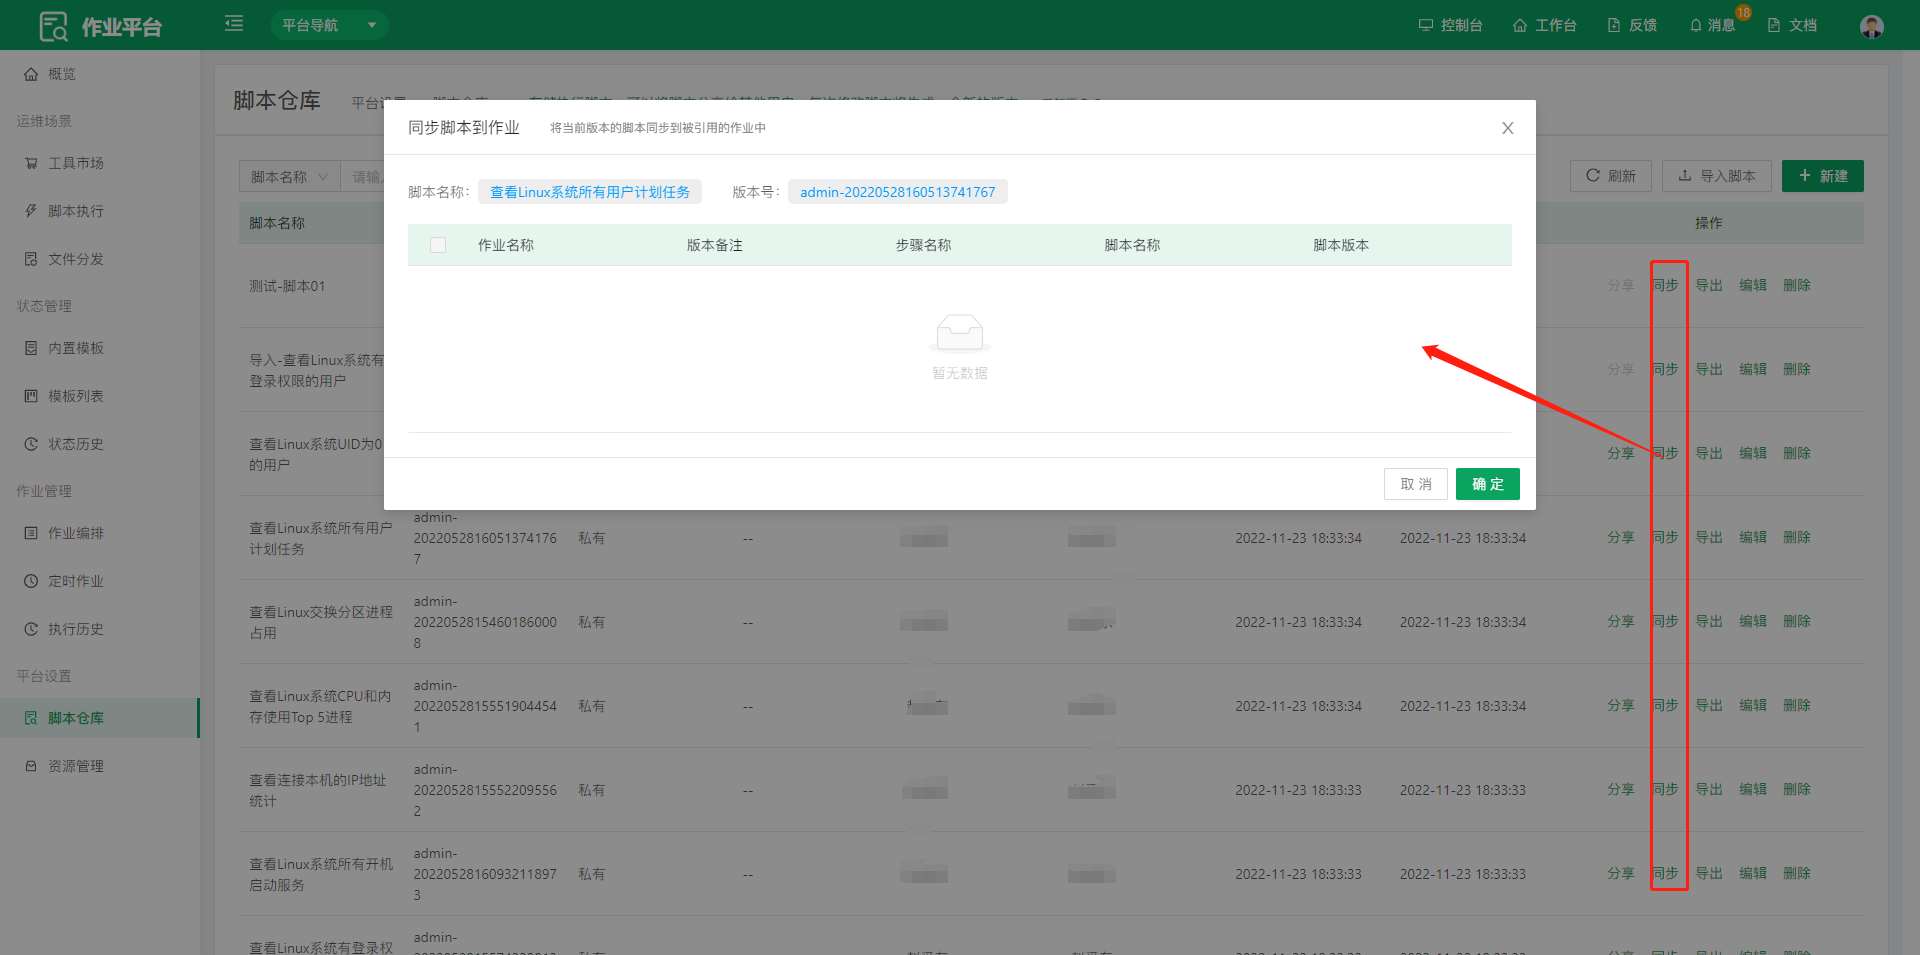
Users can sync this script to a job to replace the specified script.
4.2 Resource Management
Resource Management is mainly used to maintain common files, scripts, and packages, which are provided for access and download over HTTP on the platform. Users manage them in a directory structure.
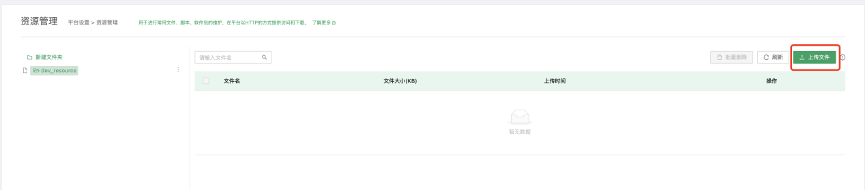
- Select a group in the left tree, click Upload File in the upper-right corner to upload a local file, which can then be accessed and downloaded over HTTP on the platform.