












Unified Permissions
Unified Permissions helps you manage OpsAny users. Permissions mainly include user permissions and menu permissions. Permission rules can be customized for your own scenarios, giving you flexible management.
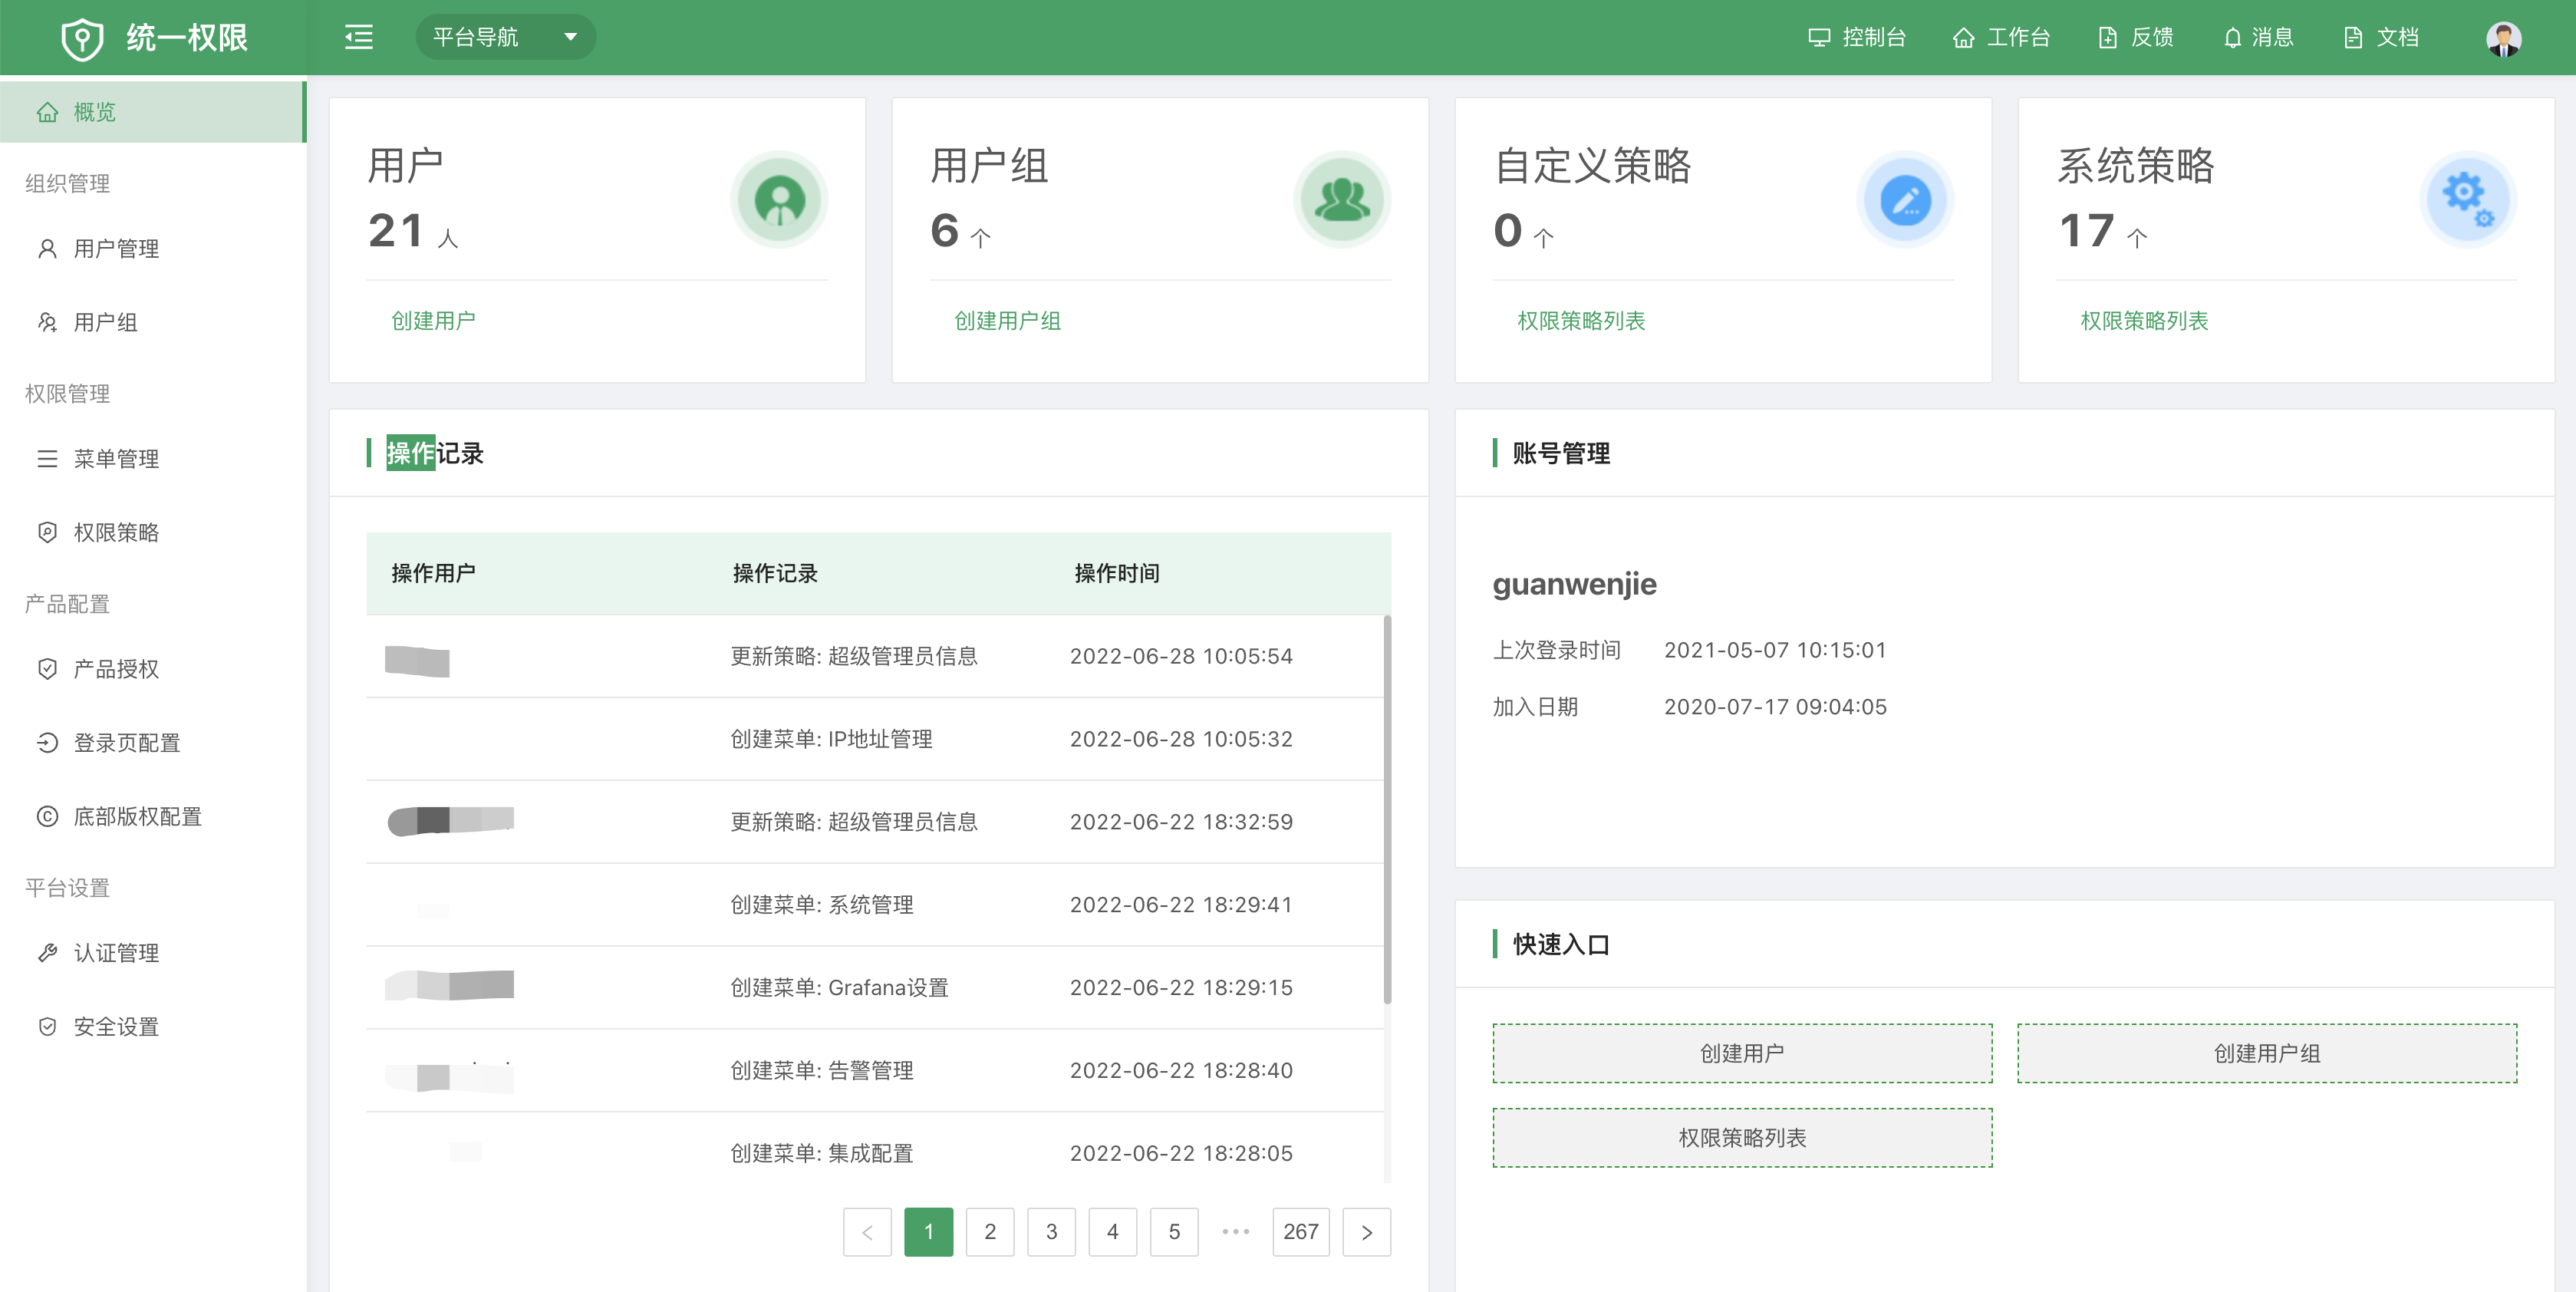
1. Organization Management
Organization management is the process of establishing an organizational structure, defining positions or job titles, and clarifying responsibilities and authority so that organizational goals can be achieved effectively. Specifically, it means designing, establishing, and maintaining an organizational structure. Organization management includes user management and user group management.
1.1 User Management
User management helps you build a complete member management system, so you can model your enterprise organizational structure and manage members more efficiently.
Click Create Department to create departments from the top down across the enterprise.
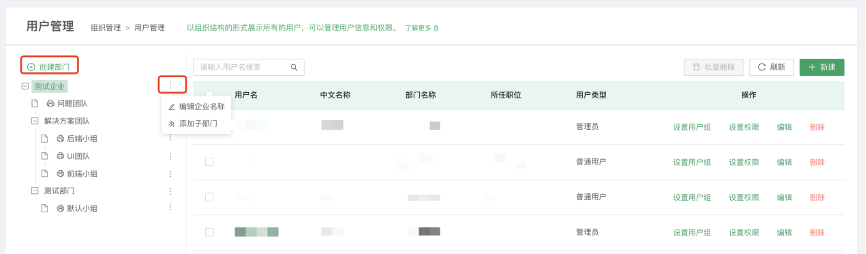
Click Create on the right side of the page to create a user.
Step 1 of creating a user
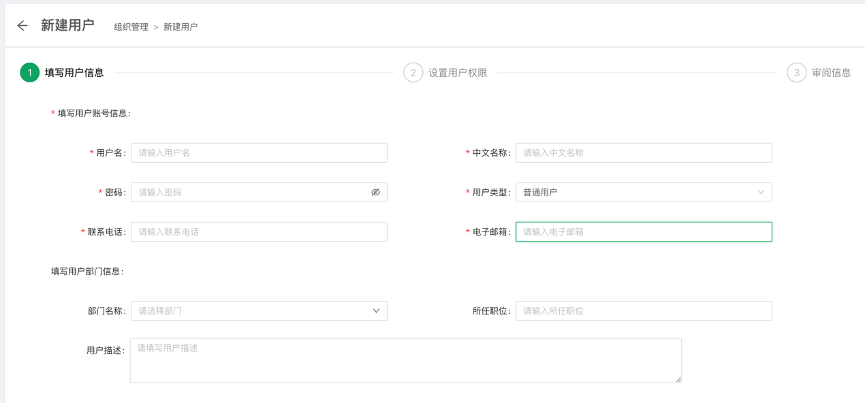
- Username: the account name the user signs in with. Chinese characters are not supported.
- Chinese Name: the Chinese name of the user.
- Password: the password used to sign in.
- User Type: three types are available — Administrator, Normal User, and Developer.
- Contact Number: the user's commonly used phone number.
- Email: enter a real email address so the user can receive emails and notifications.
- Department Name: select from the departments you have created.
- Position: a custom job title with no restrictions.
- User Description: any necessary description.
Step 2 of creating a user
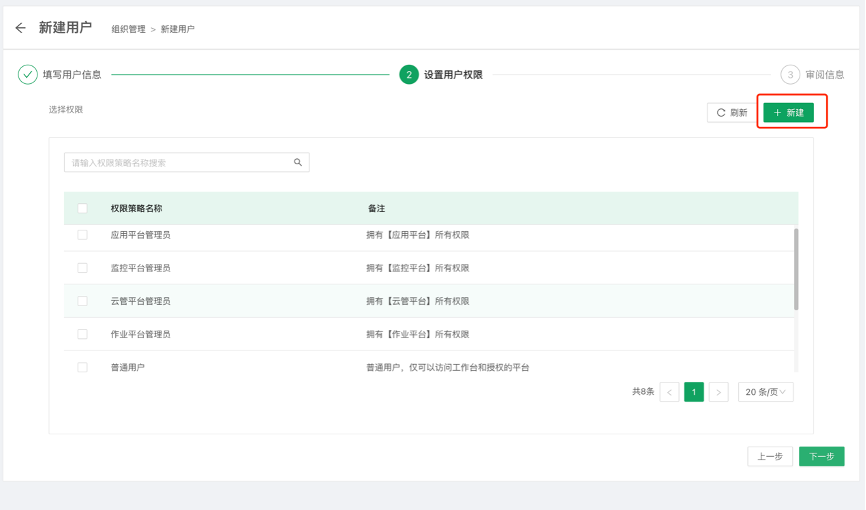
Select the permissions the user needs. Permissions come from permission policies. Click Create to create a new permission policy for the user.
Step 3 of creating a user
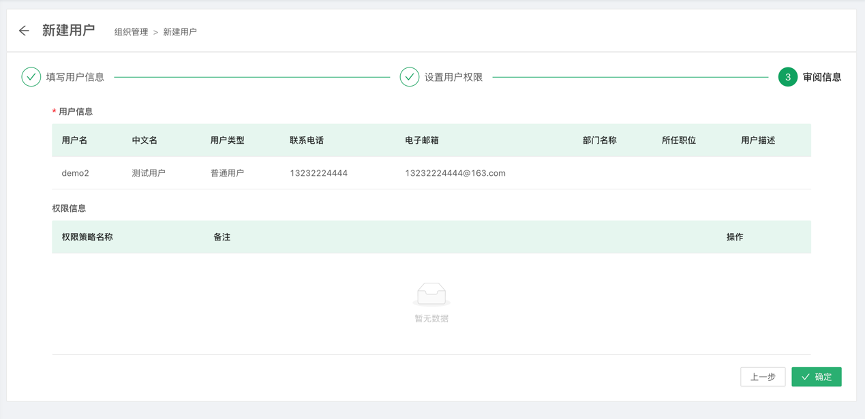
Verify the information you entered, then save the user.
Click Set User Group
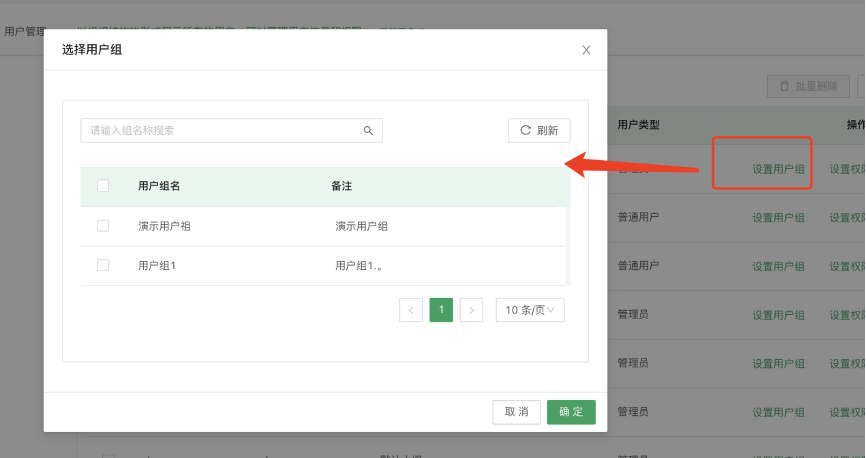
Administrators can assign a newly created user to a user group for easier management.
Click Set Permission
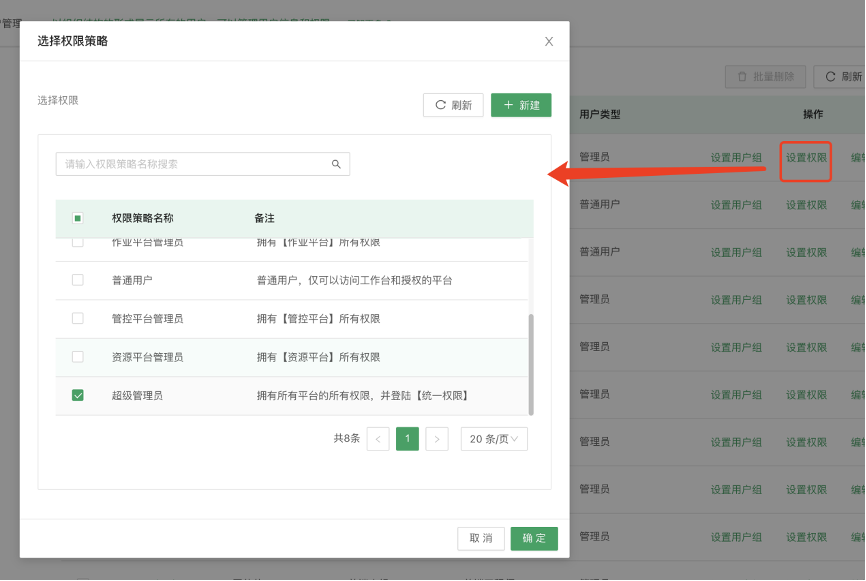
Administrators can set permissions for the target user.
Click a username to view the user's details.
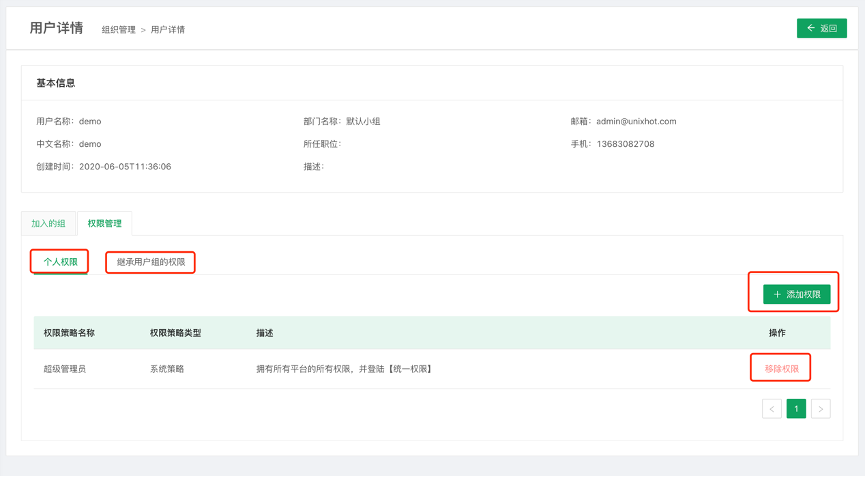
- Click Add Permission to grant the target user the permissions they need.
- Click Remove Permission to remove a permission from the target user.
- Inherit User Group Permissions means the target user also holds the permissions of certain user groups.
1.2 User Groups
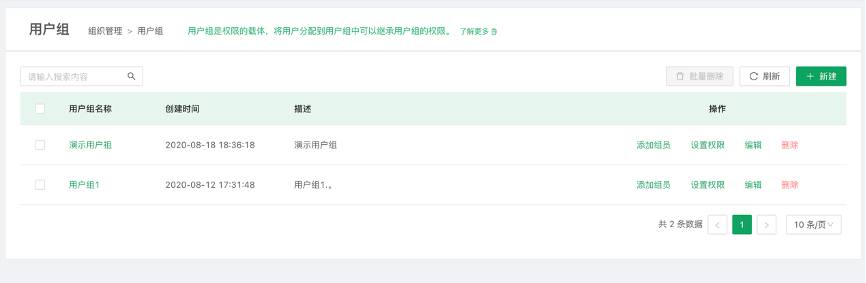
User groups make it easier for administrators to manage OpsAny users. Group-based management reduces permission assignment work. A user group carries permissions, and users assigned to a group inherit the group's permissions.
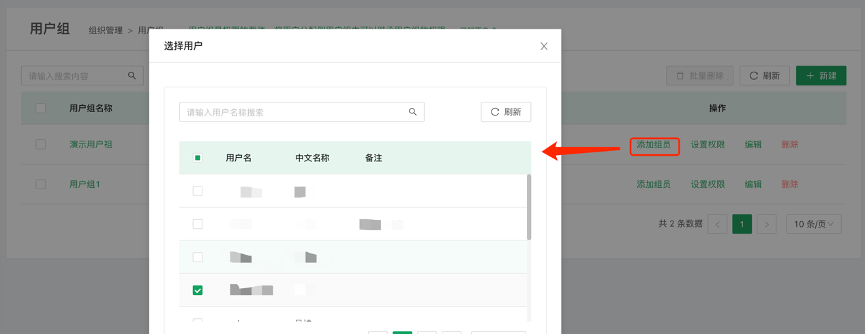
Click Add Member to add members to the current group.
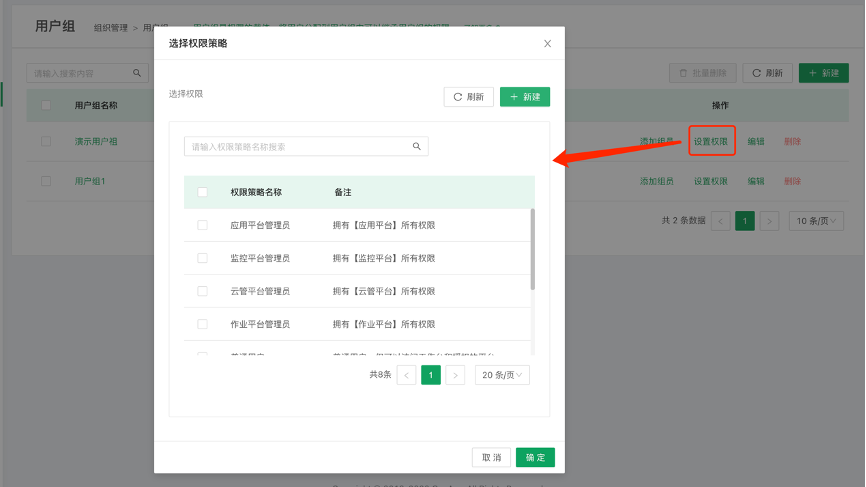
Click Set Permission to modify the permissions of the current group.
Click Create to start step 1 of creating a user group

- User Group Name: a custom name for the user group that is easy to manage.
- Remarks: describes the purpose of the group.
Click Next to start step 2 of creating a user group
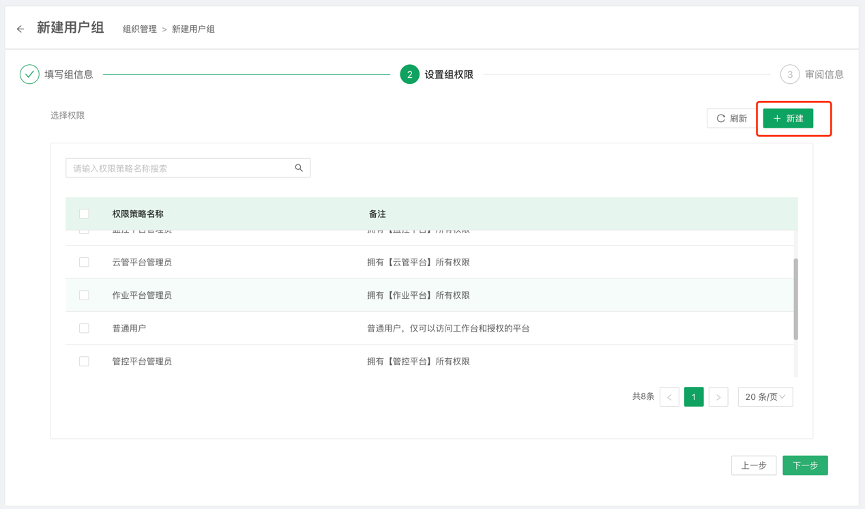
Select the permissions for the target user group. Click Create to jump to the permission policy creation page.
Click Next to start step 3 of creating a user group
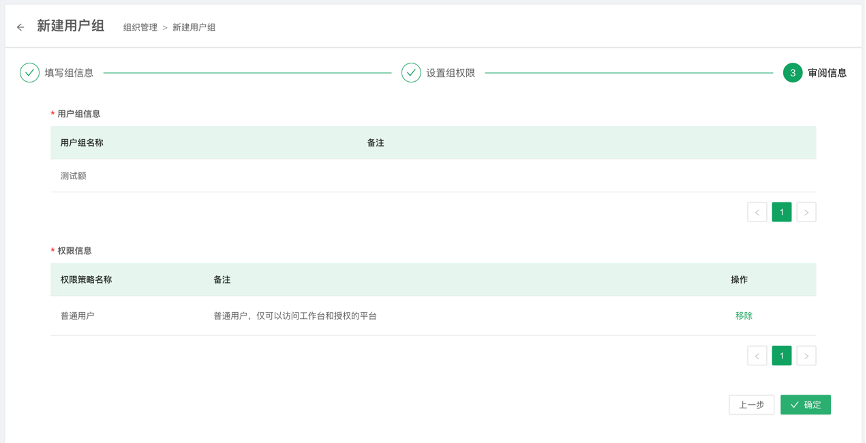
Verify that the current information is accurate.
Click a user group name to view its details.
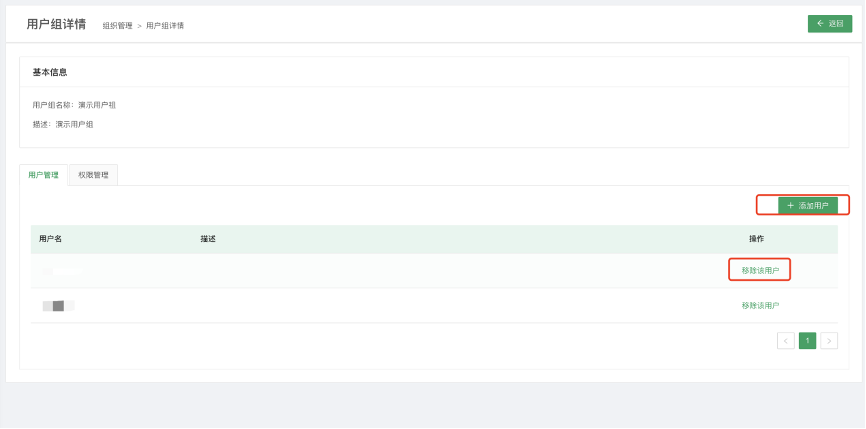
- Click Add User to add members to the current user group.
- Click Remove User to remove the target user from the current group.
2. Permission Management
From the perspective of control scope, permission management falls into two categories:
- Function-level permission management.
- Data-level permission management.
From the perspective of control direction, permission management also falls into two categories:
- Reading data from the system, such as querying tickets or querying resources.
- Submitting data to the system, such as deleting tickets or modifying resources.
2.1 Menu Management
Menu management manages the menus of every platform included in OpsAny, and lets you add your own components and embed them in menus.
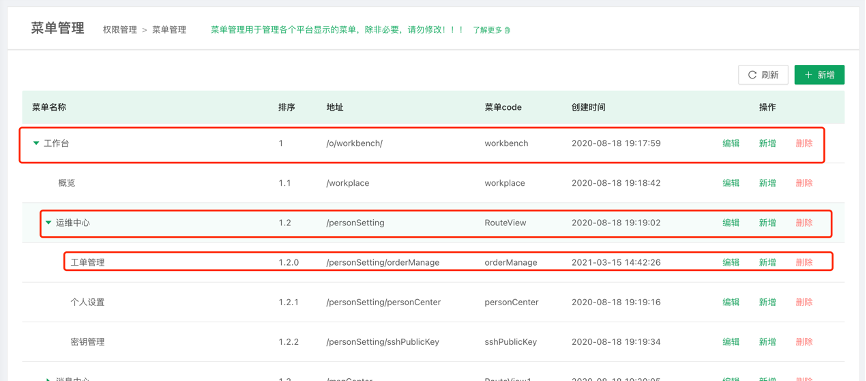
OpsAny organizes the menus of each platform into three levels. Custom menu management is supported for day-to-day use.
Click Add to create a menu at the current level. The outermost level is root, which represents the top-level directory structure. When you add a menu under a different level, the Parent Menu field shows the level under which the menu will be created.
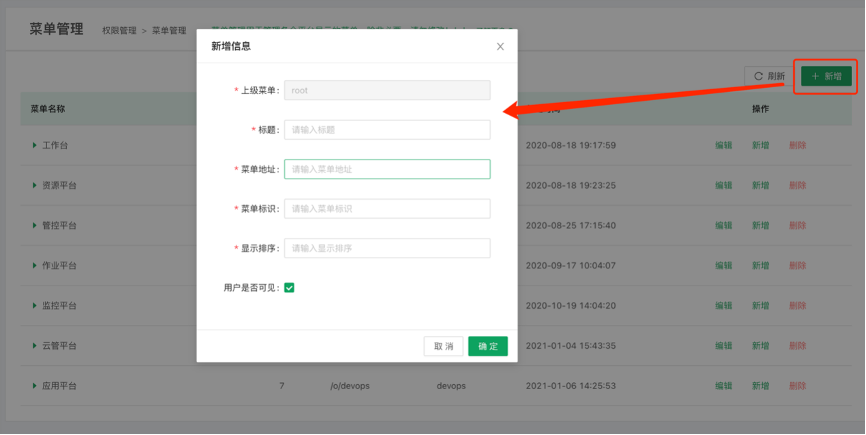
- Title: a custom name for the menu.
- Menu URL: enter an accurate address to make sure the menu is reachable.
- Menu Identifier: the unique identifier of the menu.
- Display Order: filled in by level, for example 1.1.1.
- Visible to Users: mainly used to hide menus so that certain menus are not used.
2.2 Permission Policies
Permission policies let you define a custom permission system and control permissions for every operation, making it easier for administrators to manage platform users.
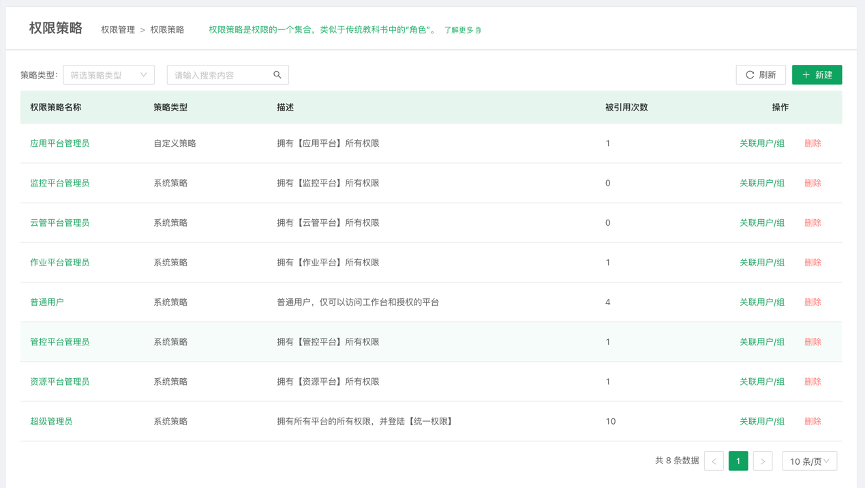
Click a policy name to view its details.
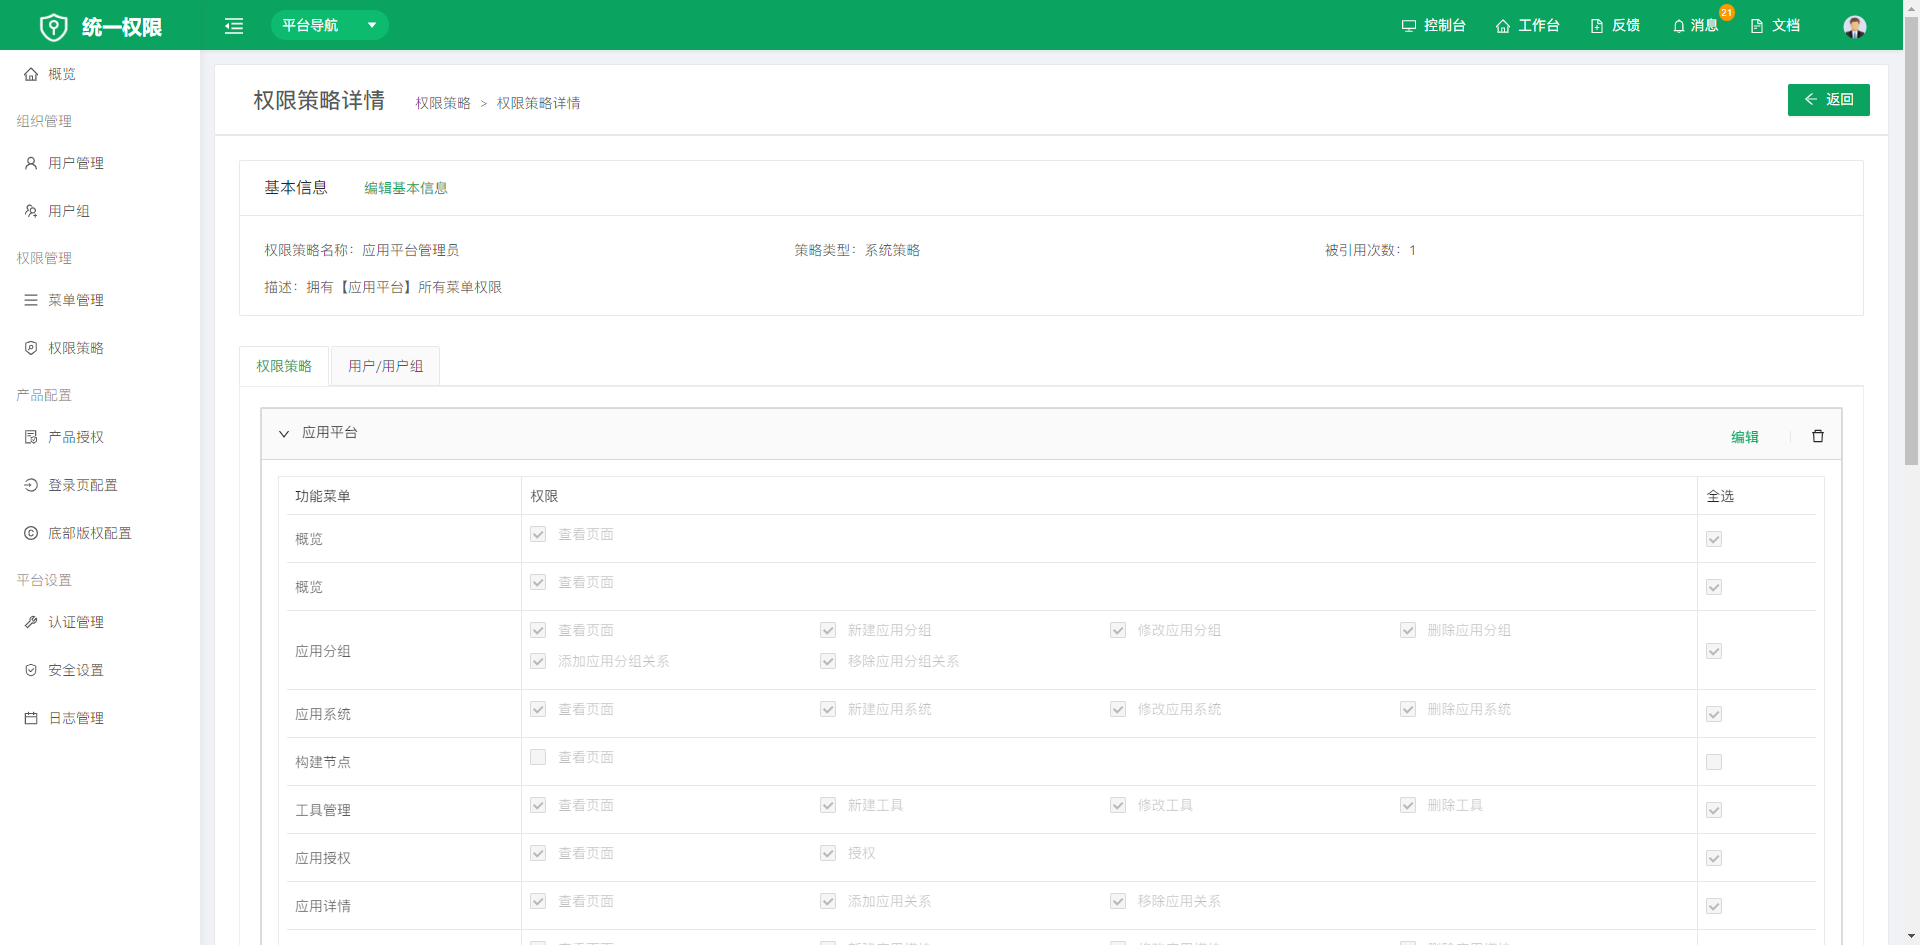
Click Create to start step 1 of creating a permission policy
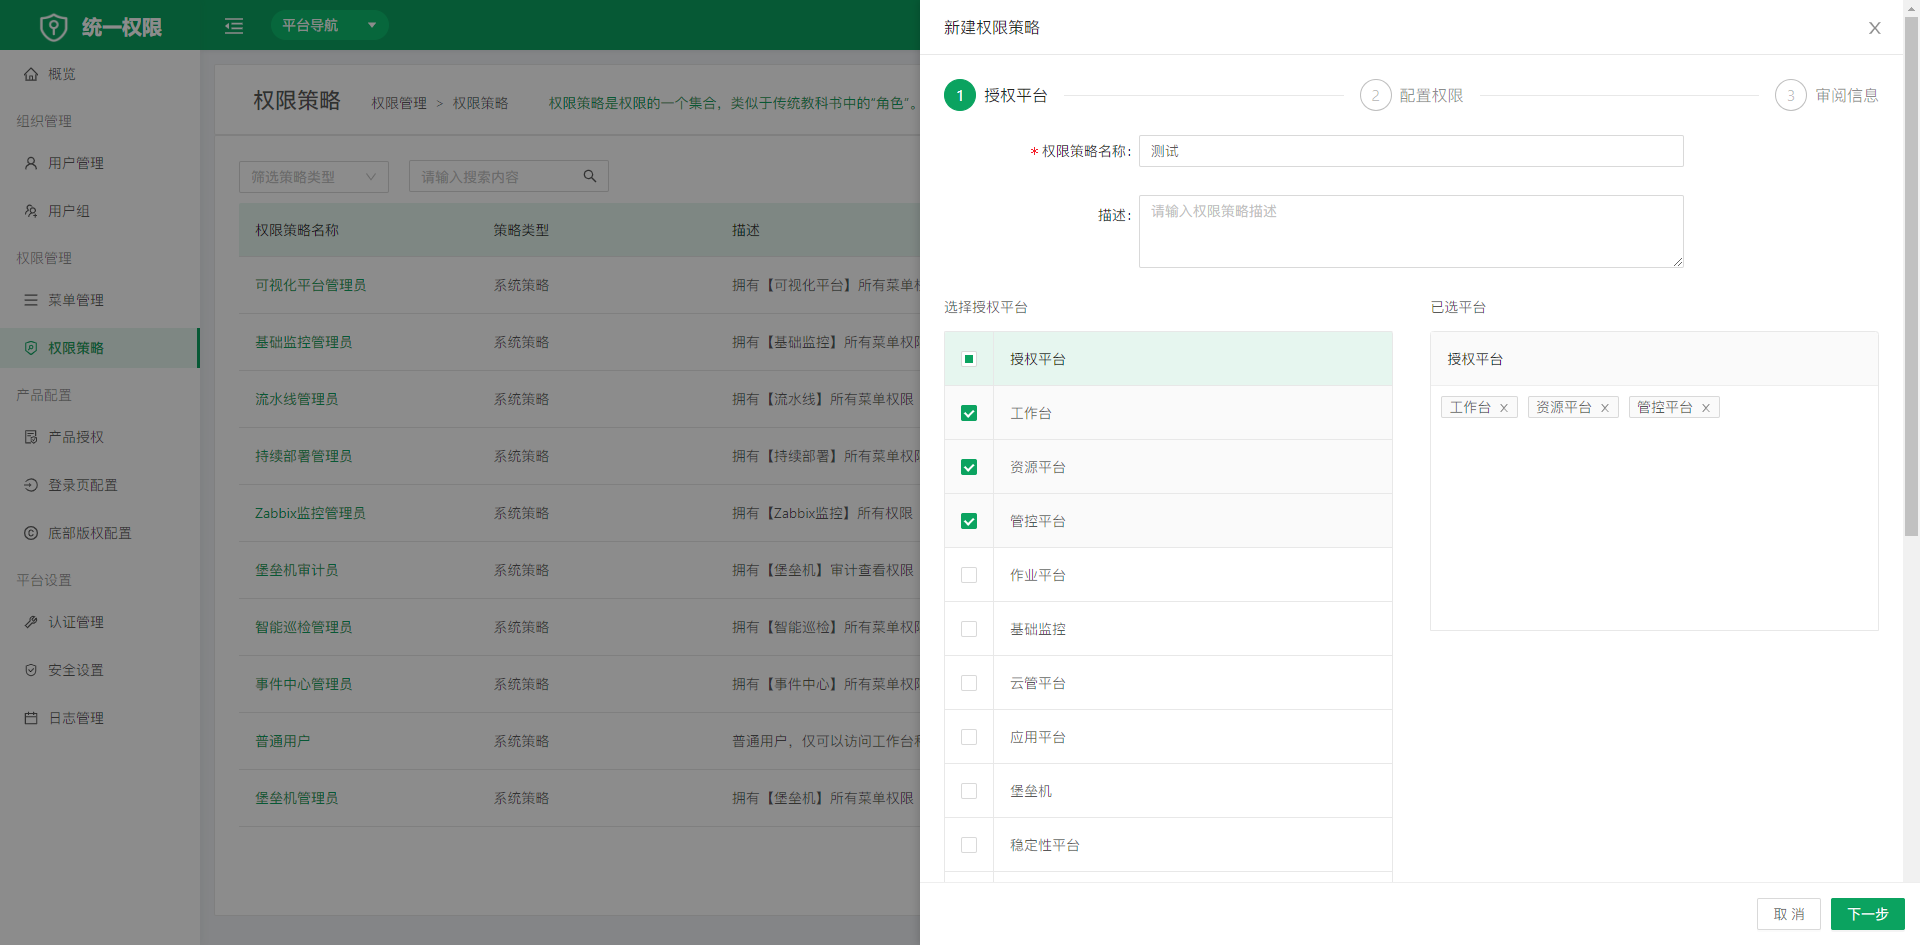
- Policy Type: System Policy or Custom Policy.
- Policy Name: a custom name for the policy.
- Policy Description: describe the policy for your specific scenario.
- Select Authorized Platforms: select items on the left, and the selected platforms appear in the Selected Platforms list on the right.
Click Next to start step 2 of creating a permission policy
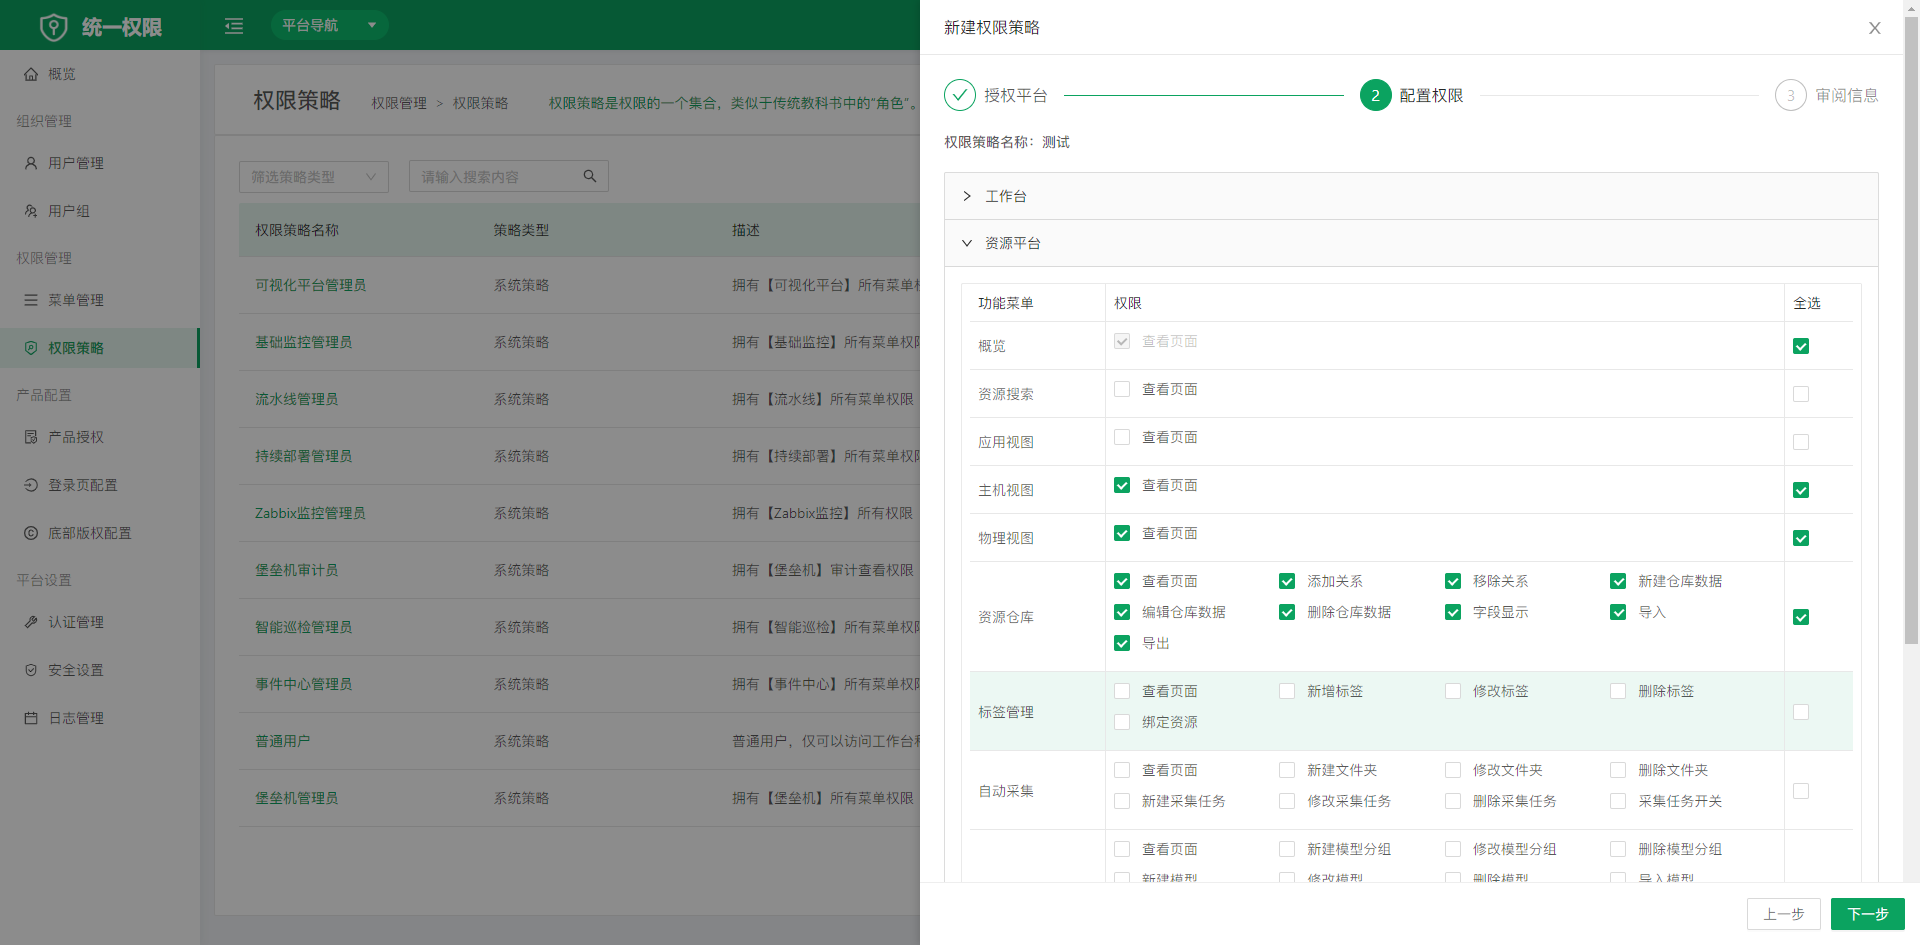
- Select the operations to authorize for the corresponding menu, and check the checkboxes to complete authorization.
Click Next to start step 3 of creating a permission policy
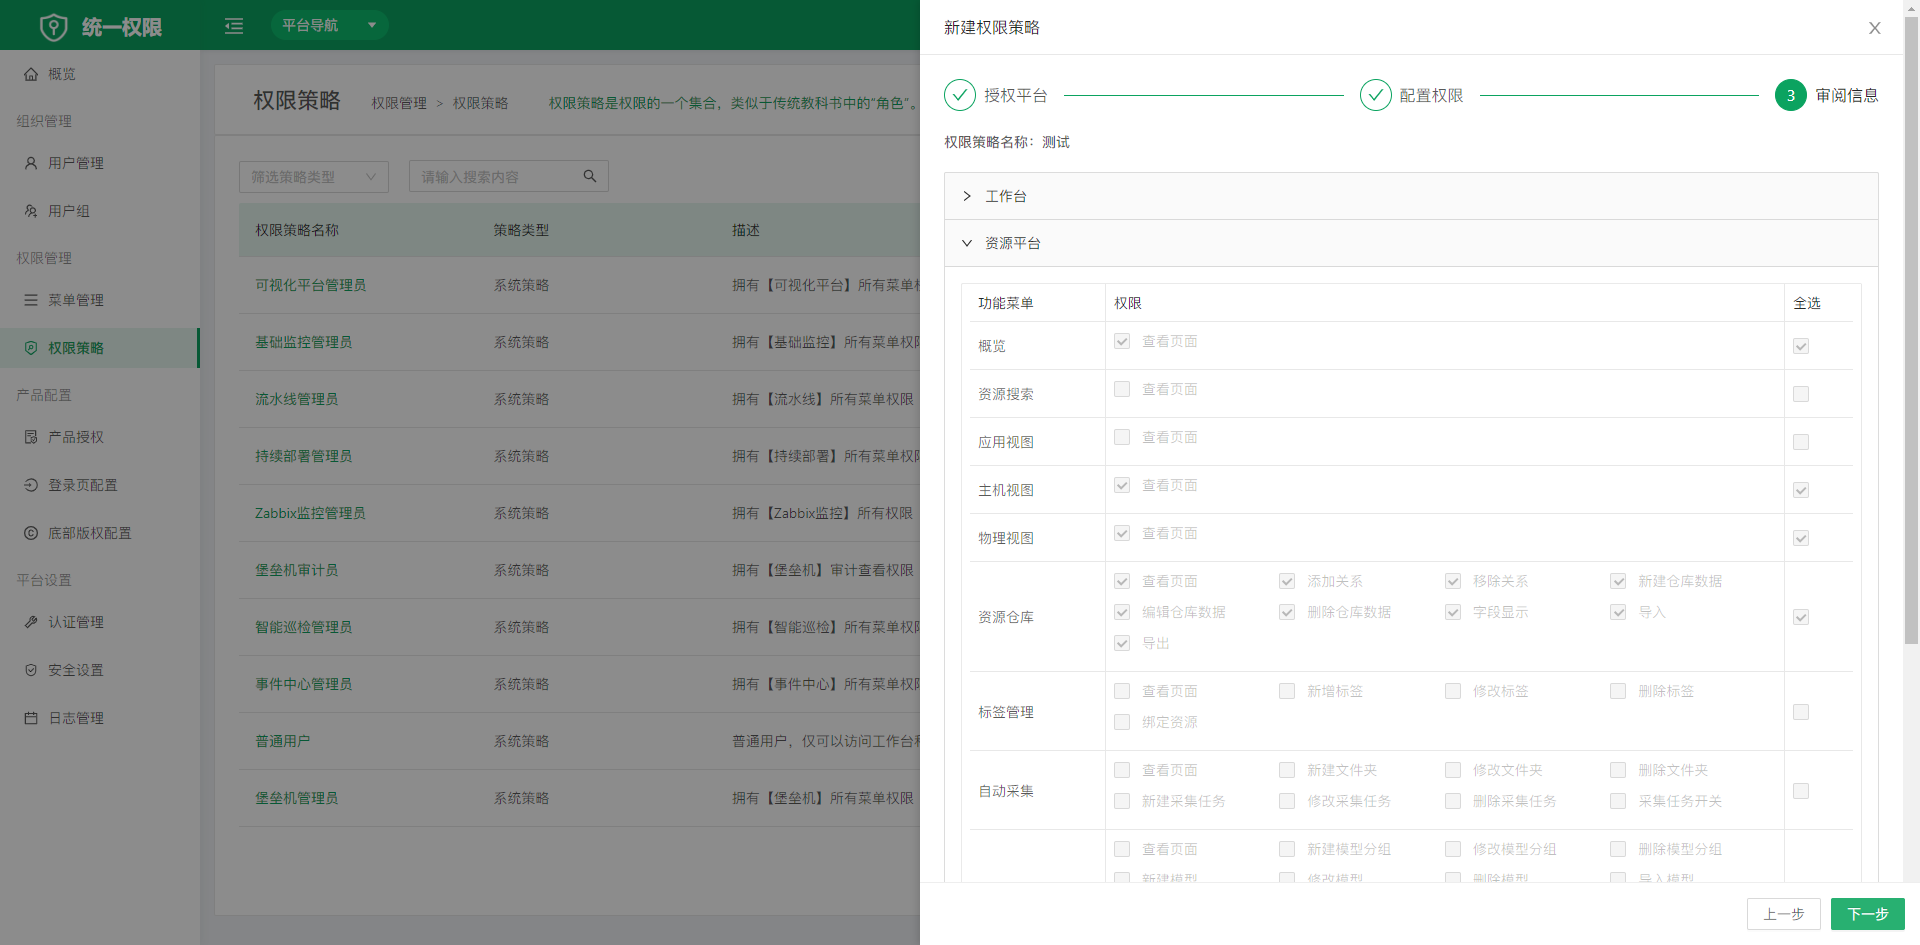
- Check that the permission information is correct. If not, return to the previous step and select again.
Click Associate Users and Groups to associate users and user groups with the current policy.
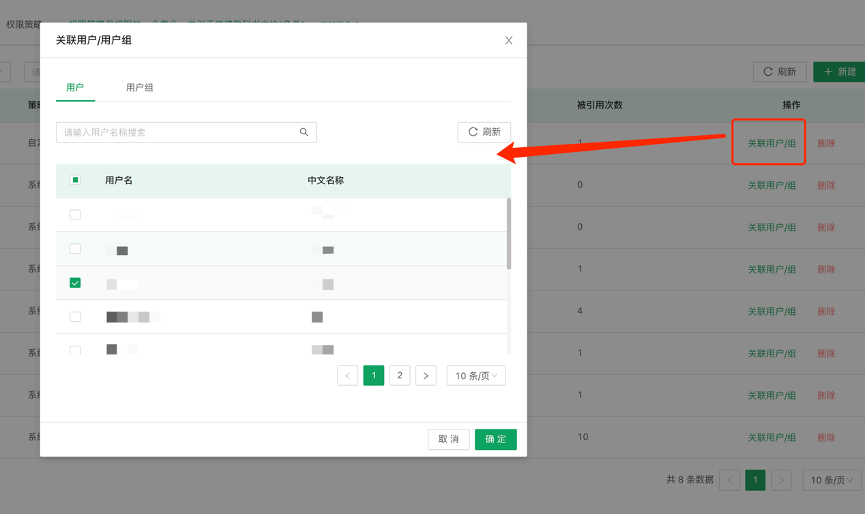
- Choose which users or user groups the created permission policy is granted to.
3. Product Configuration
3.1 Product Licensing
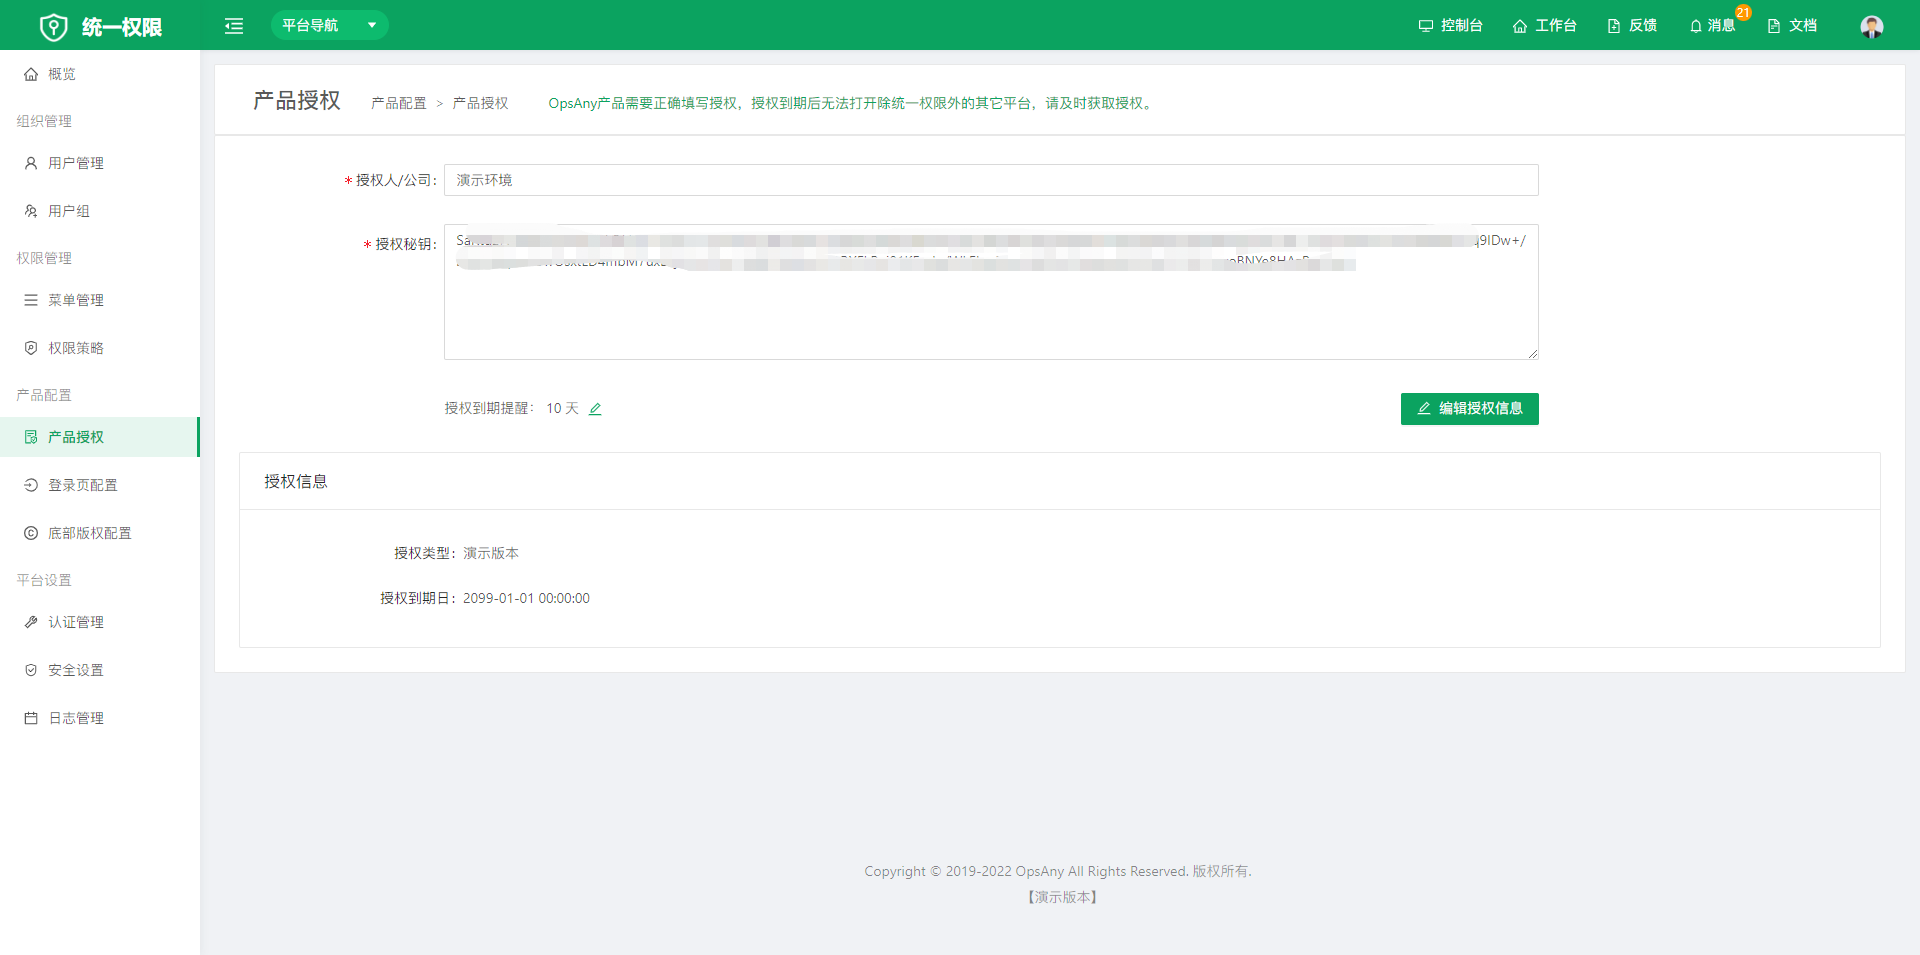
You must enter a valid license for OpsAny. After the license expires, no platform other than Unified Permissions can be opened, so obtain a license in time.
3.2 Login Page Configuration
You can customize the login page. Upload images of the recommended size as prompted for a better display.
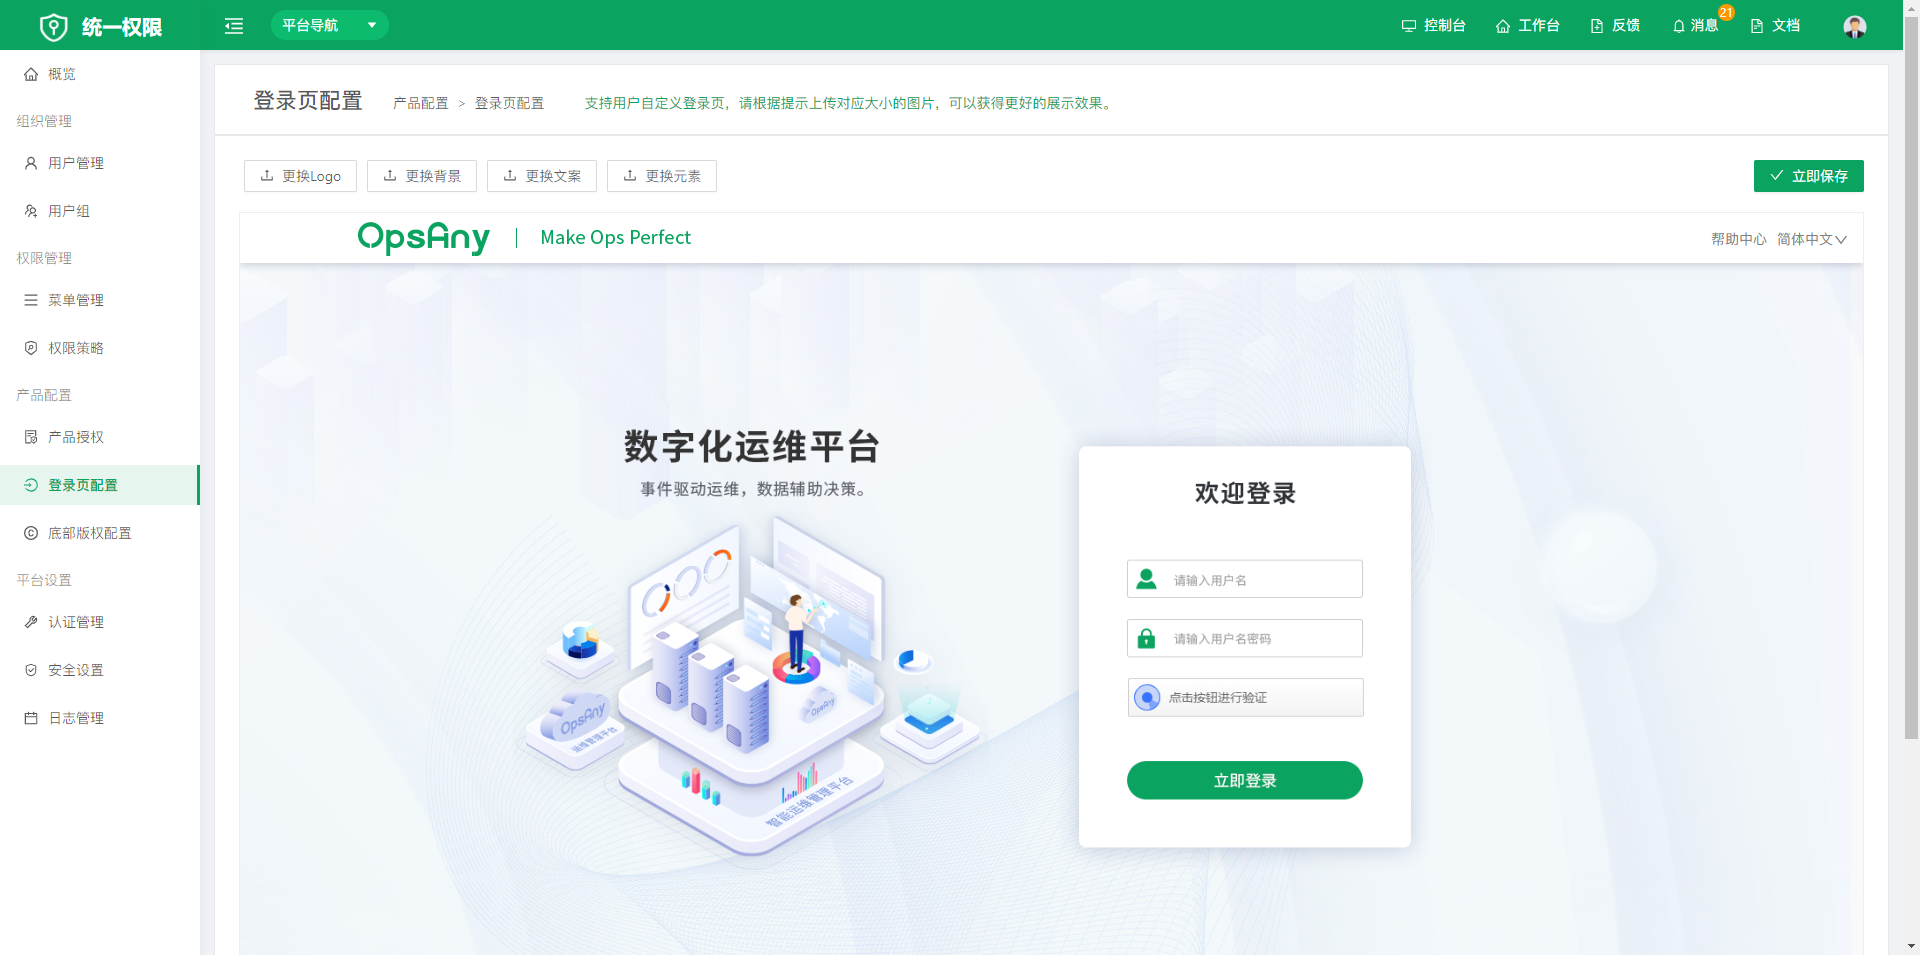
- Click Change Logo: upload a custom logo for the upper-left corner of the login page.
- Click Change Background: upload a custom background image for the login page.
- Click Change Copy: upload custom copy for the login page.
- Click Change Element: upload custom elements for the login page.
- Click Save Now: save the updated image data above.
3.3 Footer Copyright Configuration
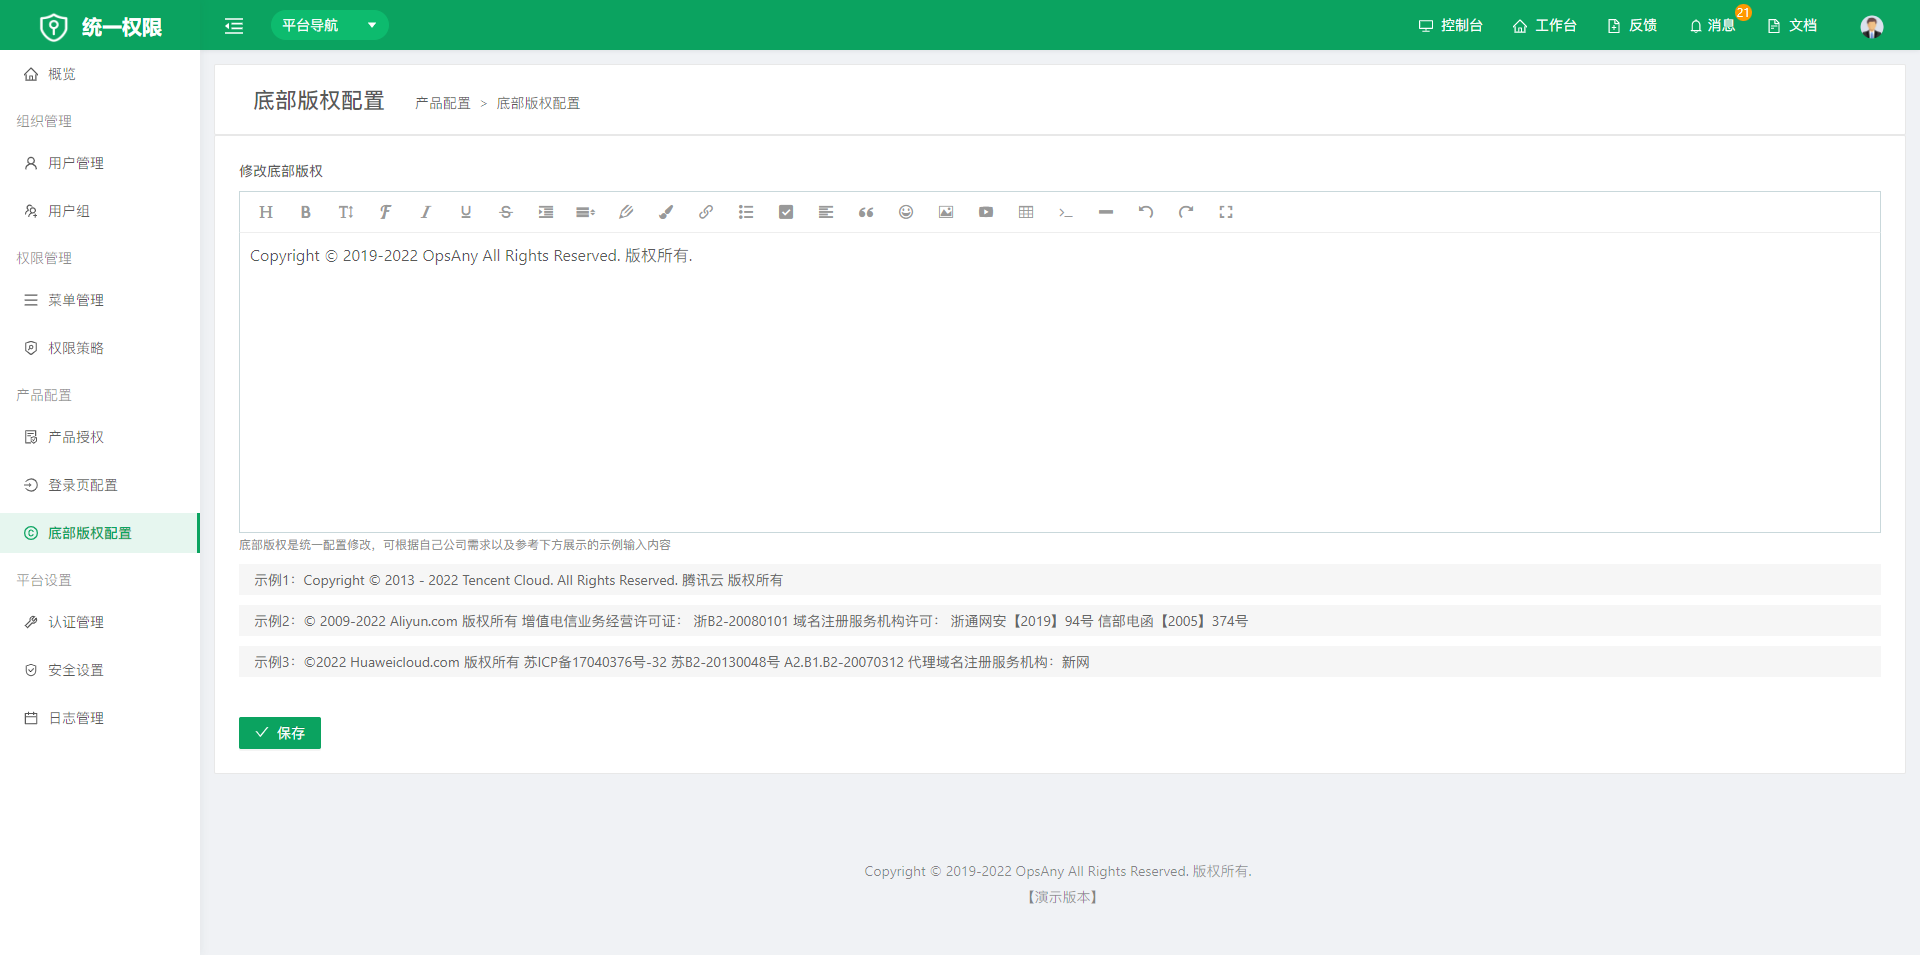
You can customize the footer copyright information of the product.
3.4 Global Configuration
Site-wide Configuration
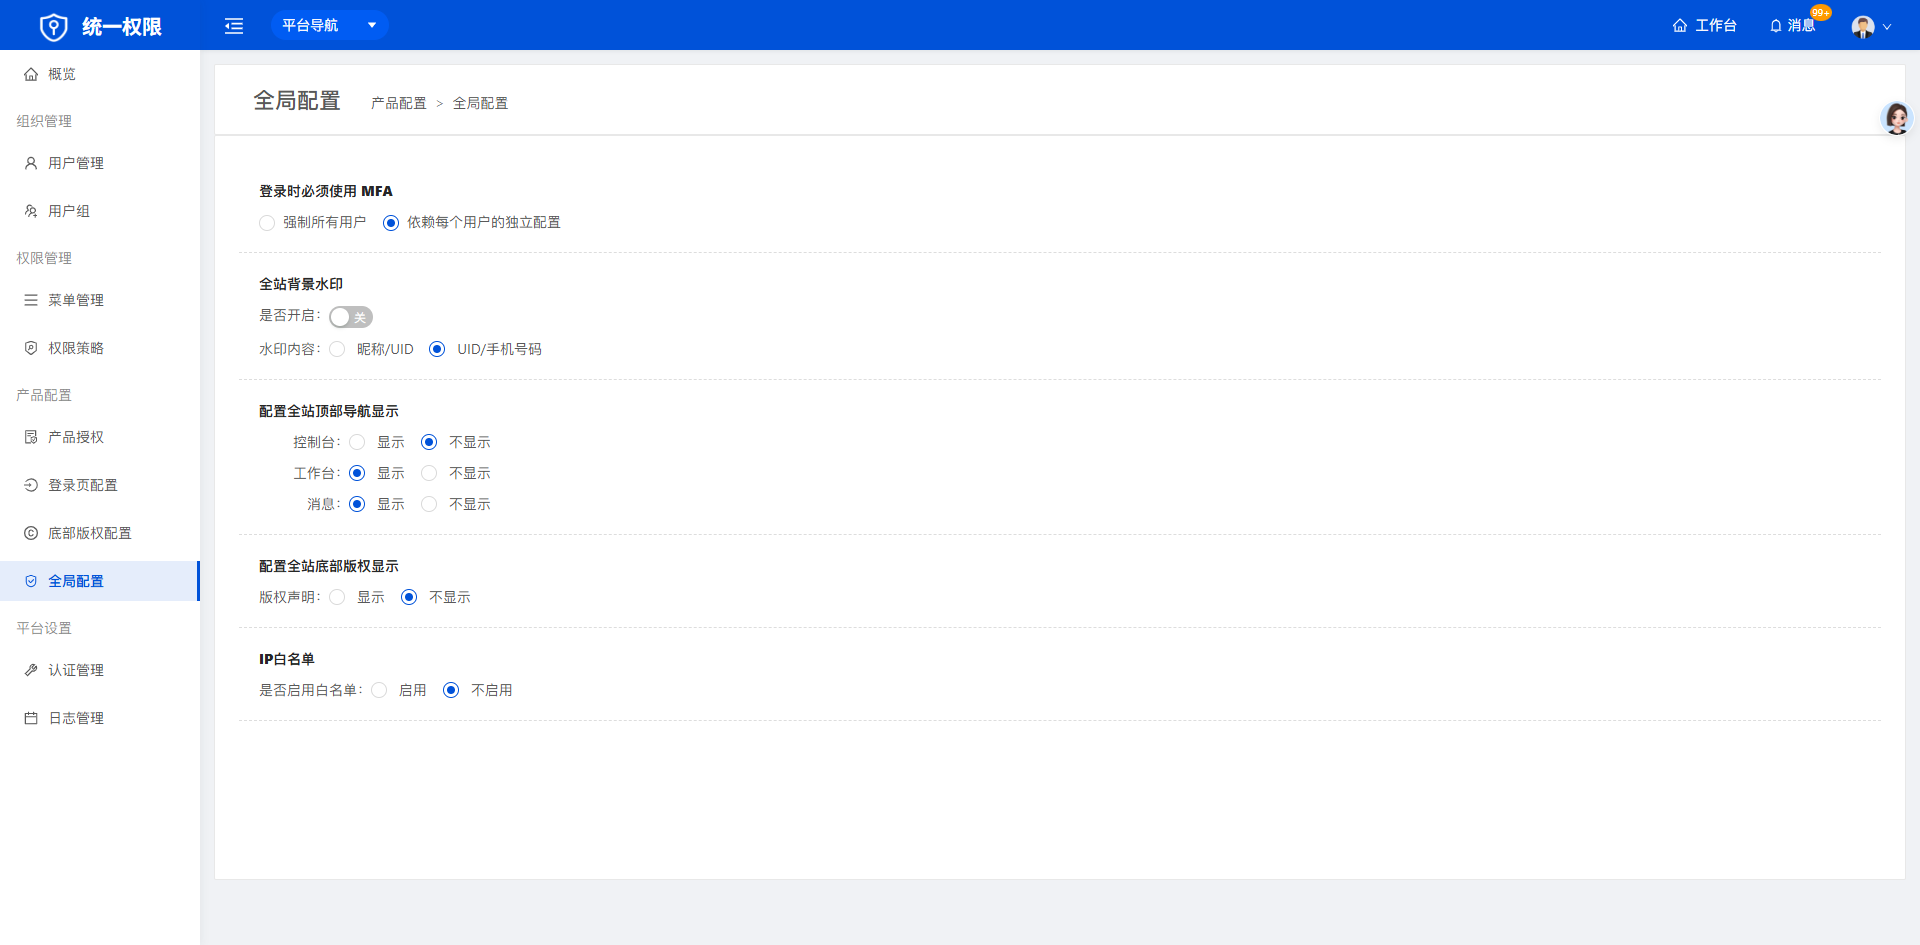
On this page you can configure the whole platform, for example: the MFA method all users must use when signing in, whether to enable a site-wide background watermark, the content of the site-wide top navigation, whether to display the site-wide footer copyright, and whether to use a whitelist when users sign in.
Security Settings
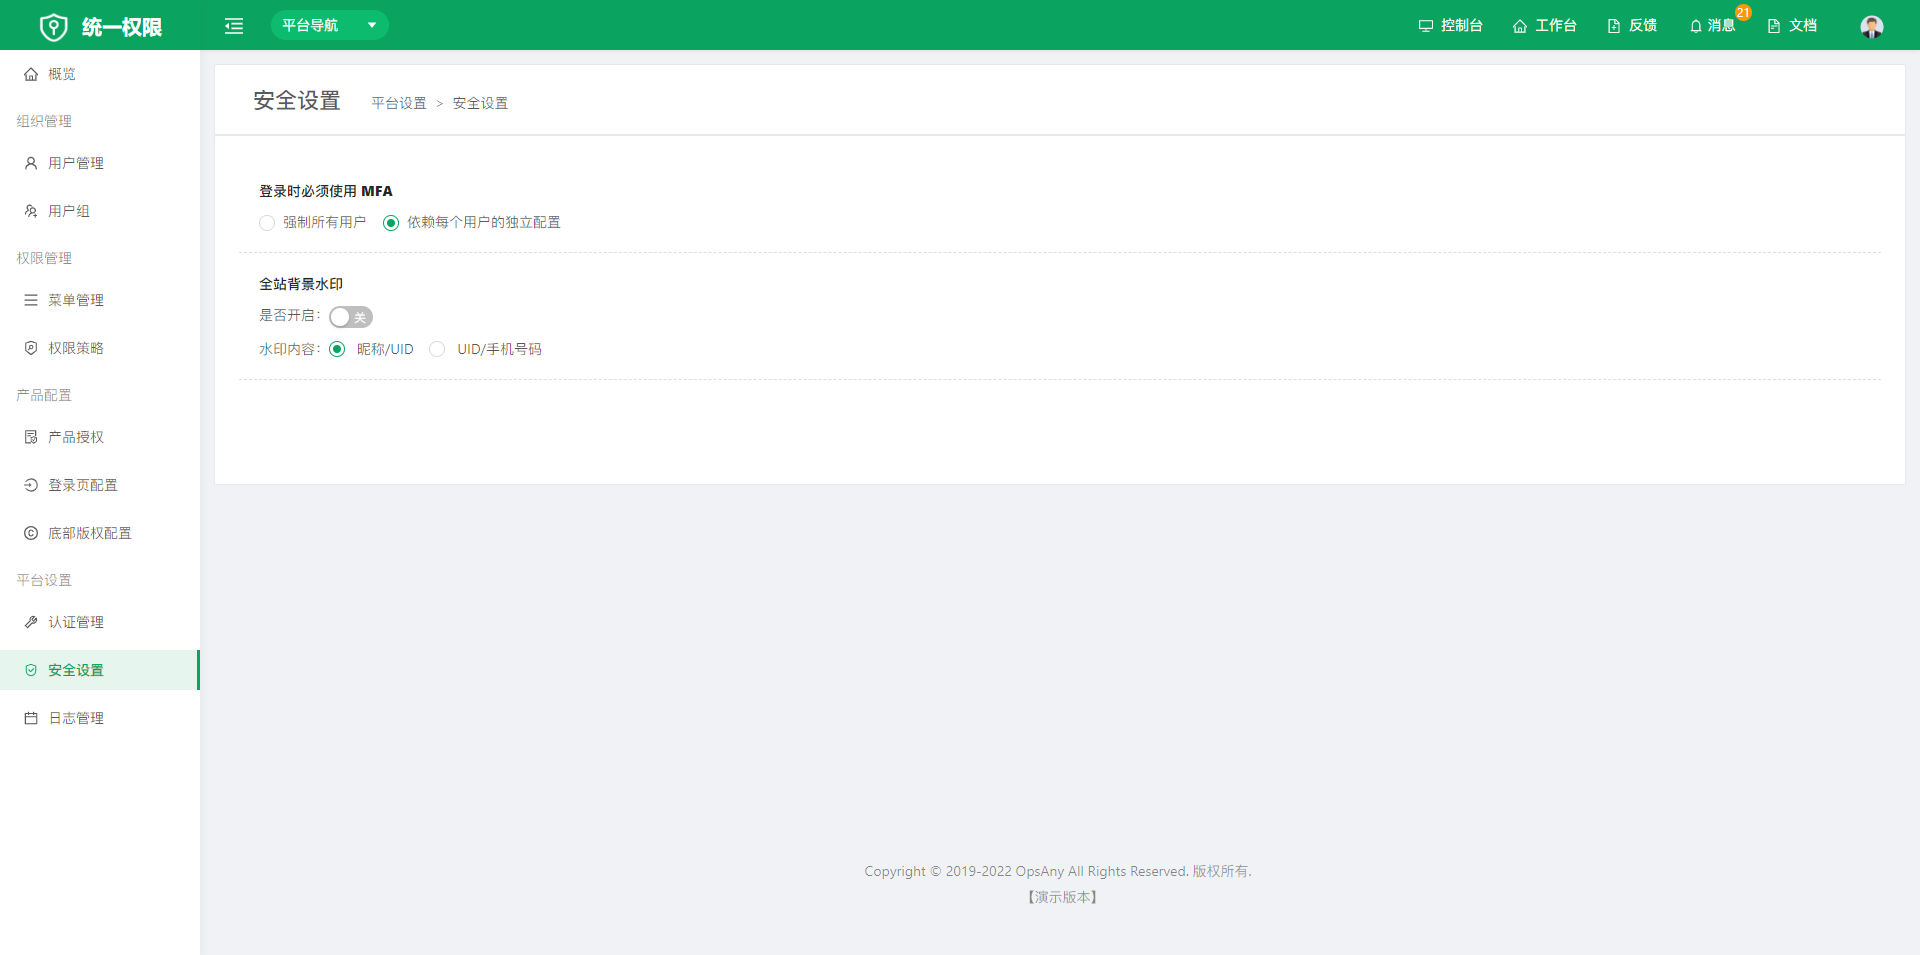
- Whether to require MFA at login
- Whether to remember the MFA verification status for 7 days
- Password length; the password must not contain the username
- CAPTCHA display policy; number of password retries
4. Platform Settings
4.1 Authentication Management
You can add multiple authentication sources, such as multiple LDAP servers, WeCom, OAuth, Active Directory, SSO, Alibaba Cloud IDaaS, IAM, and DingTalk. Local authentication is the default.
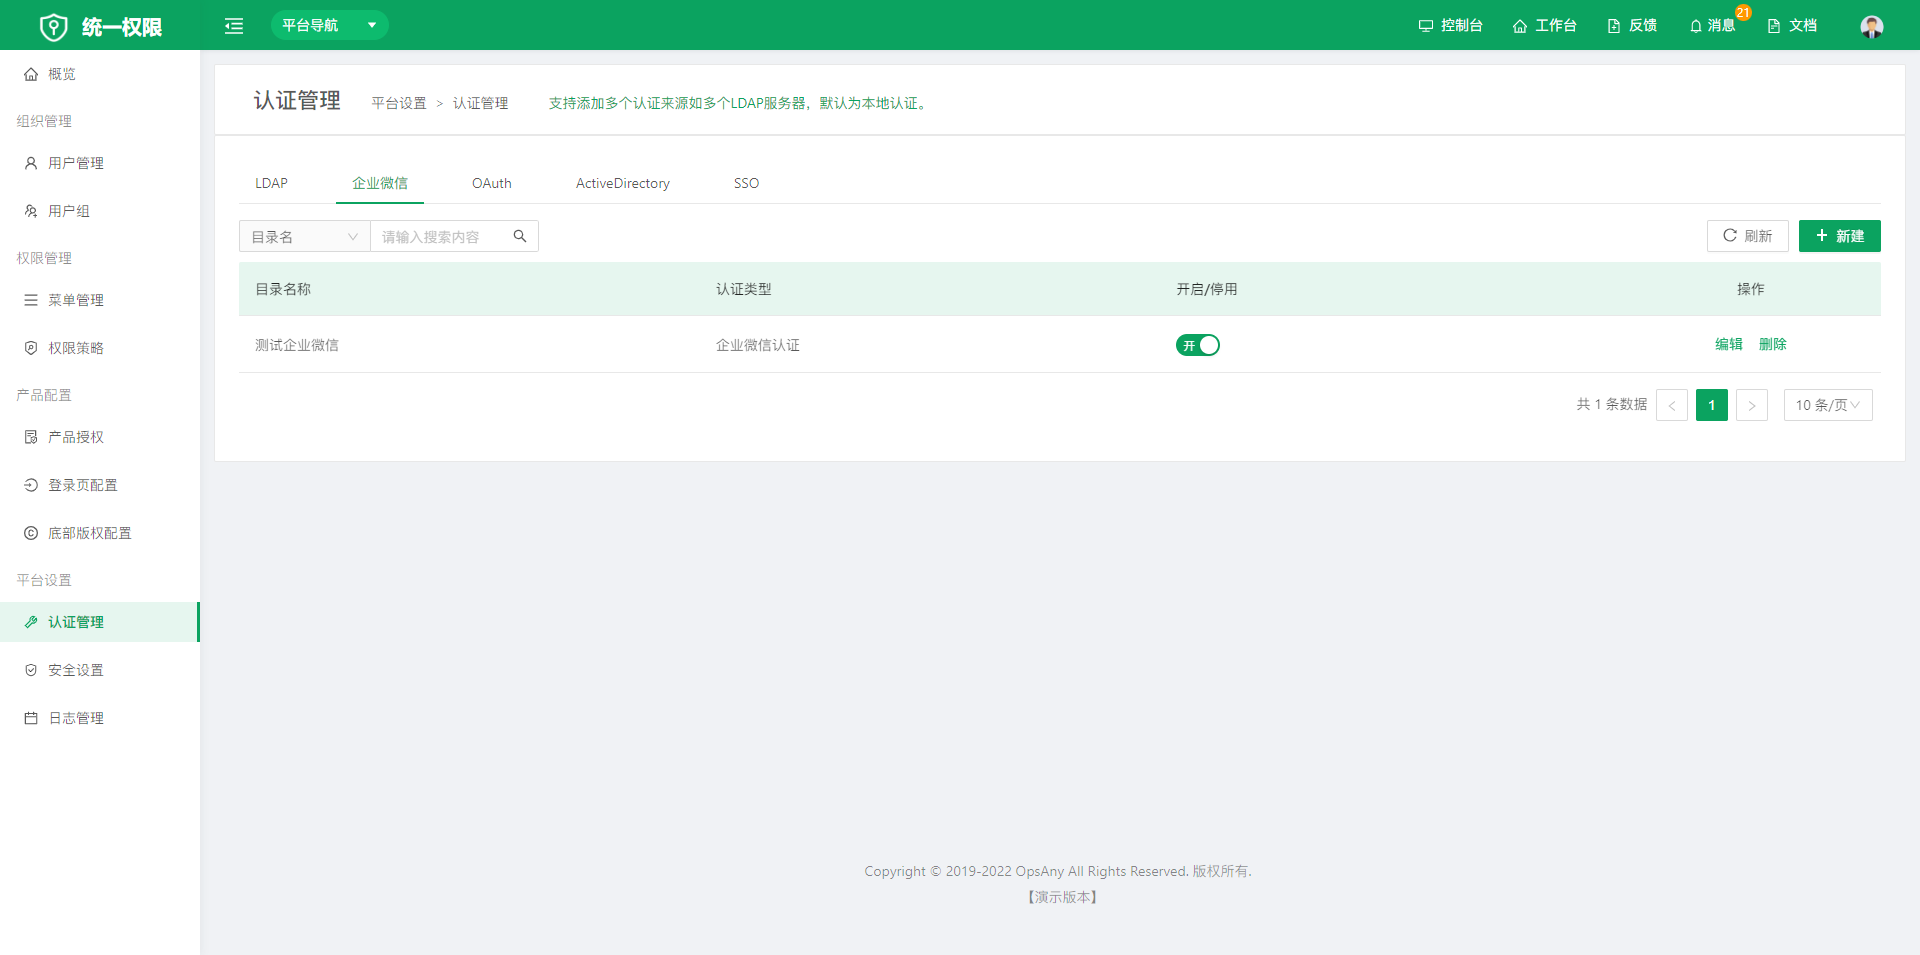
Open Authentication Management, switch to the target tab, and click Create in the upper-right corner of the page. Then complete the creation by following the steps on the page.
4.1.1 WeCom Login
OpsAny supports WeCom (WeChat Work) login to meet enterprise office integration needs.
-
Note:
-
WeCom authentication requires that both the Login and RBAC services can access the WeCom API.
- User information is created in OpsAny only after the first successful WeCom login. At that point the user has normal user permissions, and you need to configure the appropriate permissions for the user in RBAC.
-
Only one WeCom authentication source can be created. The Community Edition does not support multiple WeCom sources.
-
Configure the authentication method:
-
Go to RBAC -> Authentication Management -> WeCom tab, click Create, enter your directory name, login domain, and other information, then click Next.
-
Enter the Corp ID, AgentId, and Secret.
-
To get the Corp ID:
-
Visit: WeCom (qq.com)
-
The Corp ID is displayed at the bottom of the page, as shown below:

-
To get the AgentId and Secret:
-
Visit: WeCom (qq.com)
- At the bottom of the page, in the Self-built section, click Create App. If you already have an app, you can use it.
- Upload a logo, enter the app name and other information, and click Create App. (Skip this step if you already have an app.)
-
Click your app to open the details page, where the AgentId and Secret are displayed:

-
Authorize WeCom login:
-
At the bottom of the app details page, click WeCom Authorized Login Settings:

-
Click Set Authorized Callback Domain:

-
Note: if your deployment address is
https://yourdomain/, enteryourdomainhere without thehttps://prefix, then click Save. -
Configure trusted corporate IPs:
-
At the bottom of the app details page, click Trusted Corporate IP Configuration:

-
After the configuration is complete, click Test Connection. If
Auth Successappears, your configuration is correct and you can click Save. If a message such asinvalid xxxx hint:[xxx] ...appears, your configuration is incorrect. Visit the address in the test message to check the specific error on the official WeCom site.
-
-
Your WeCom configuration is now complete. Click Save.
4.1.2 DingTalk Login
- Set a custom DingTalk directory name (shown as the top-level directory name in user management) and a custom login domain (when users are synchronized, the username is generated from the userid and the configured login domain).
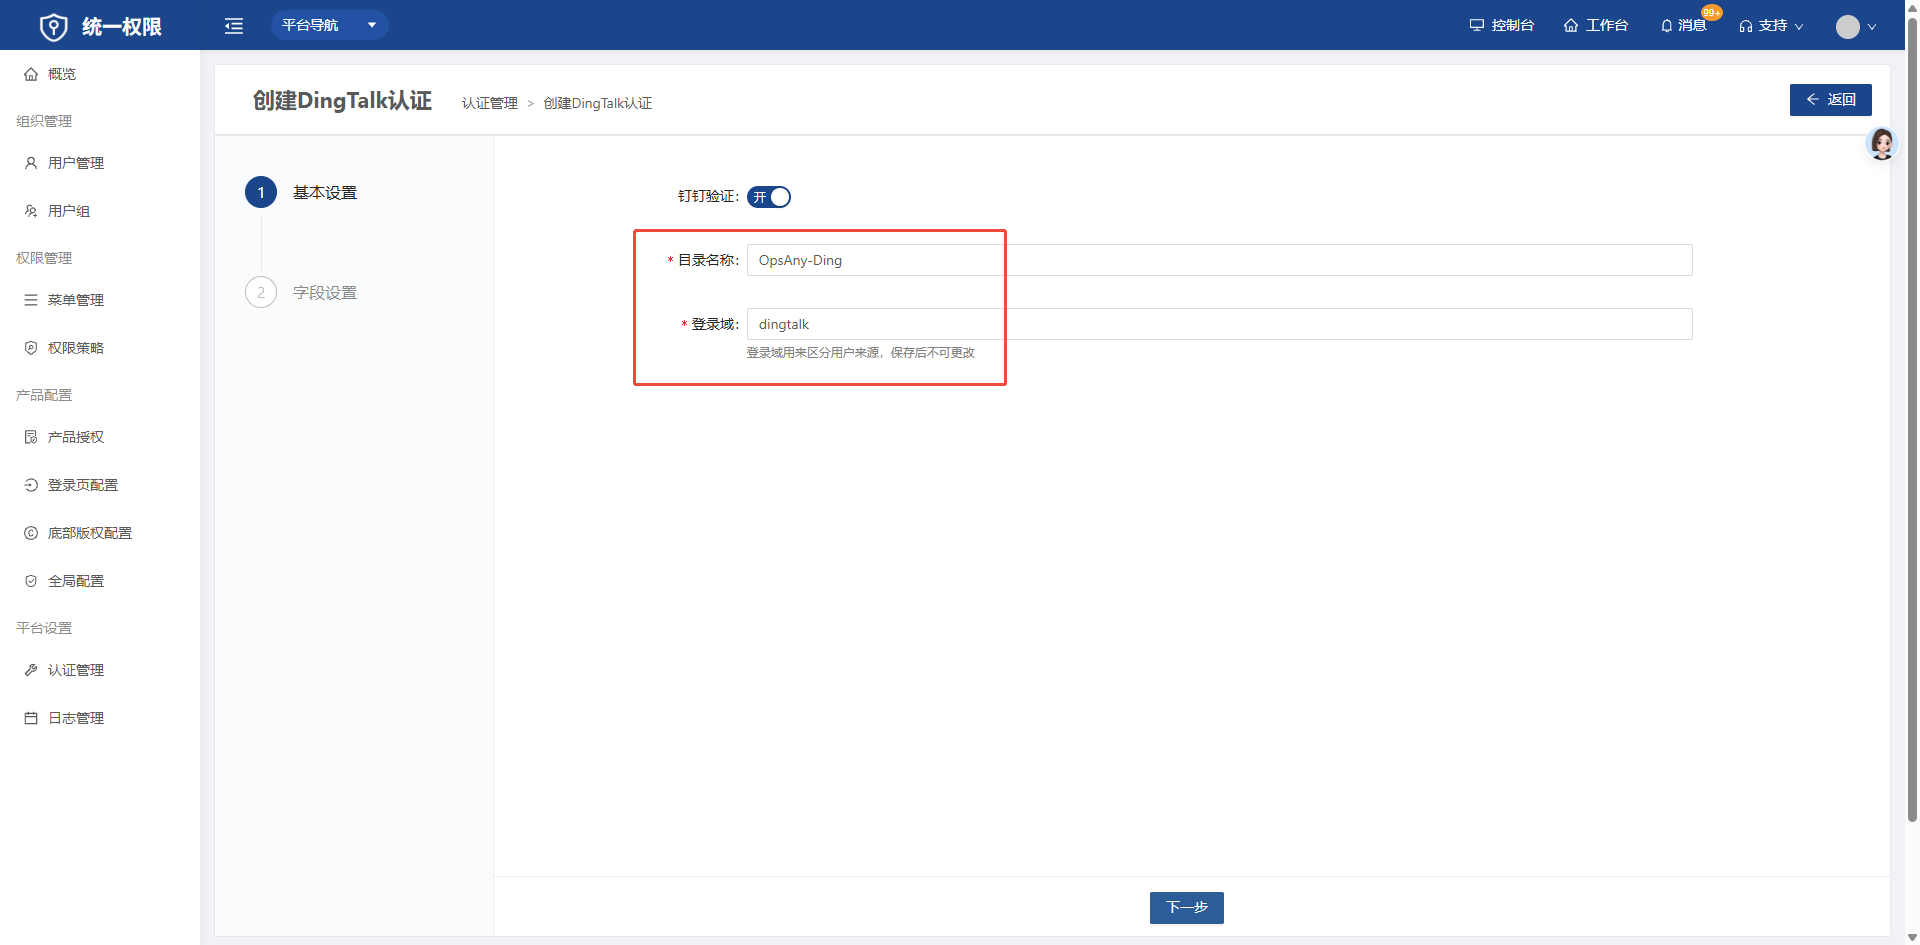
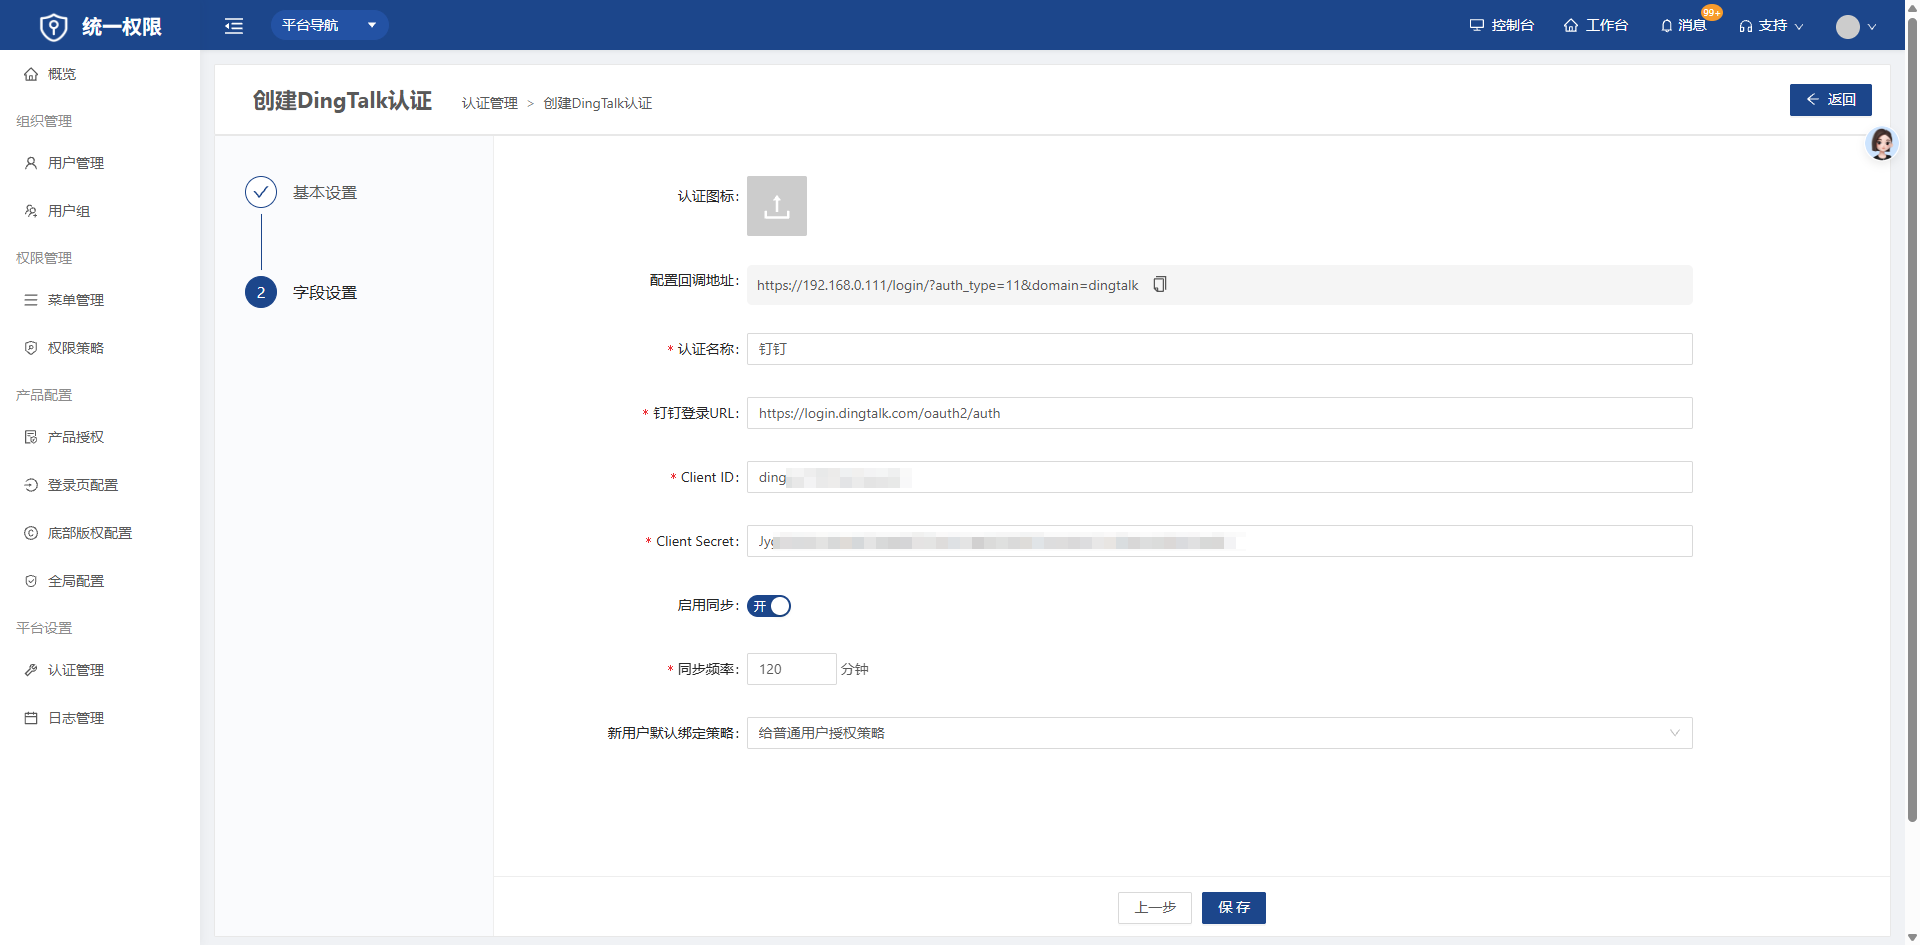
- Upload an icon, copy the callback URL (used when creating the app in DingTalk), and enter the Client ID and Client Secret (see the figure below).
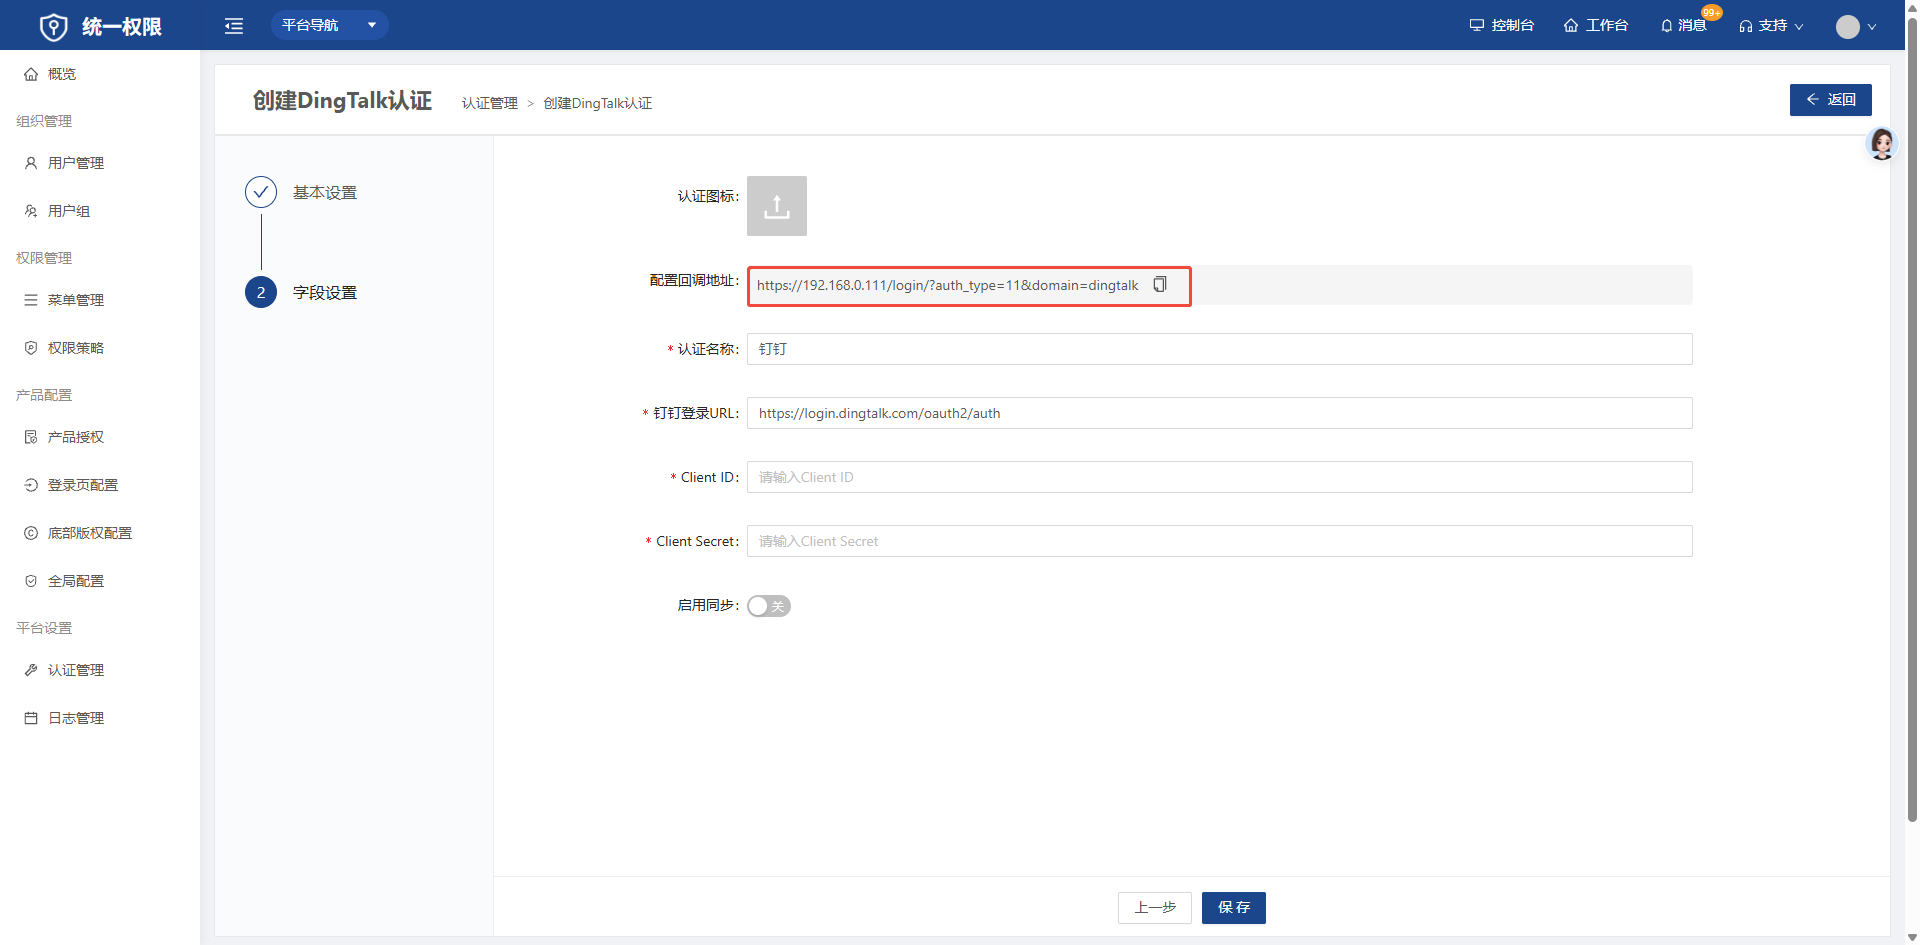
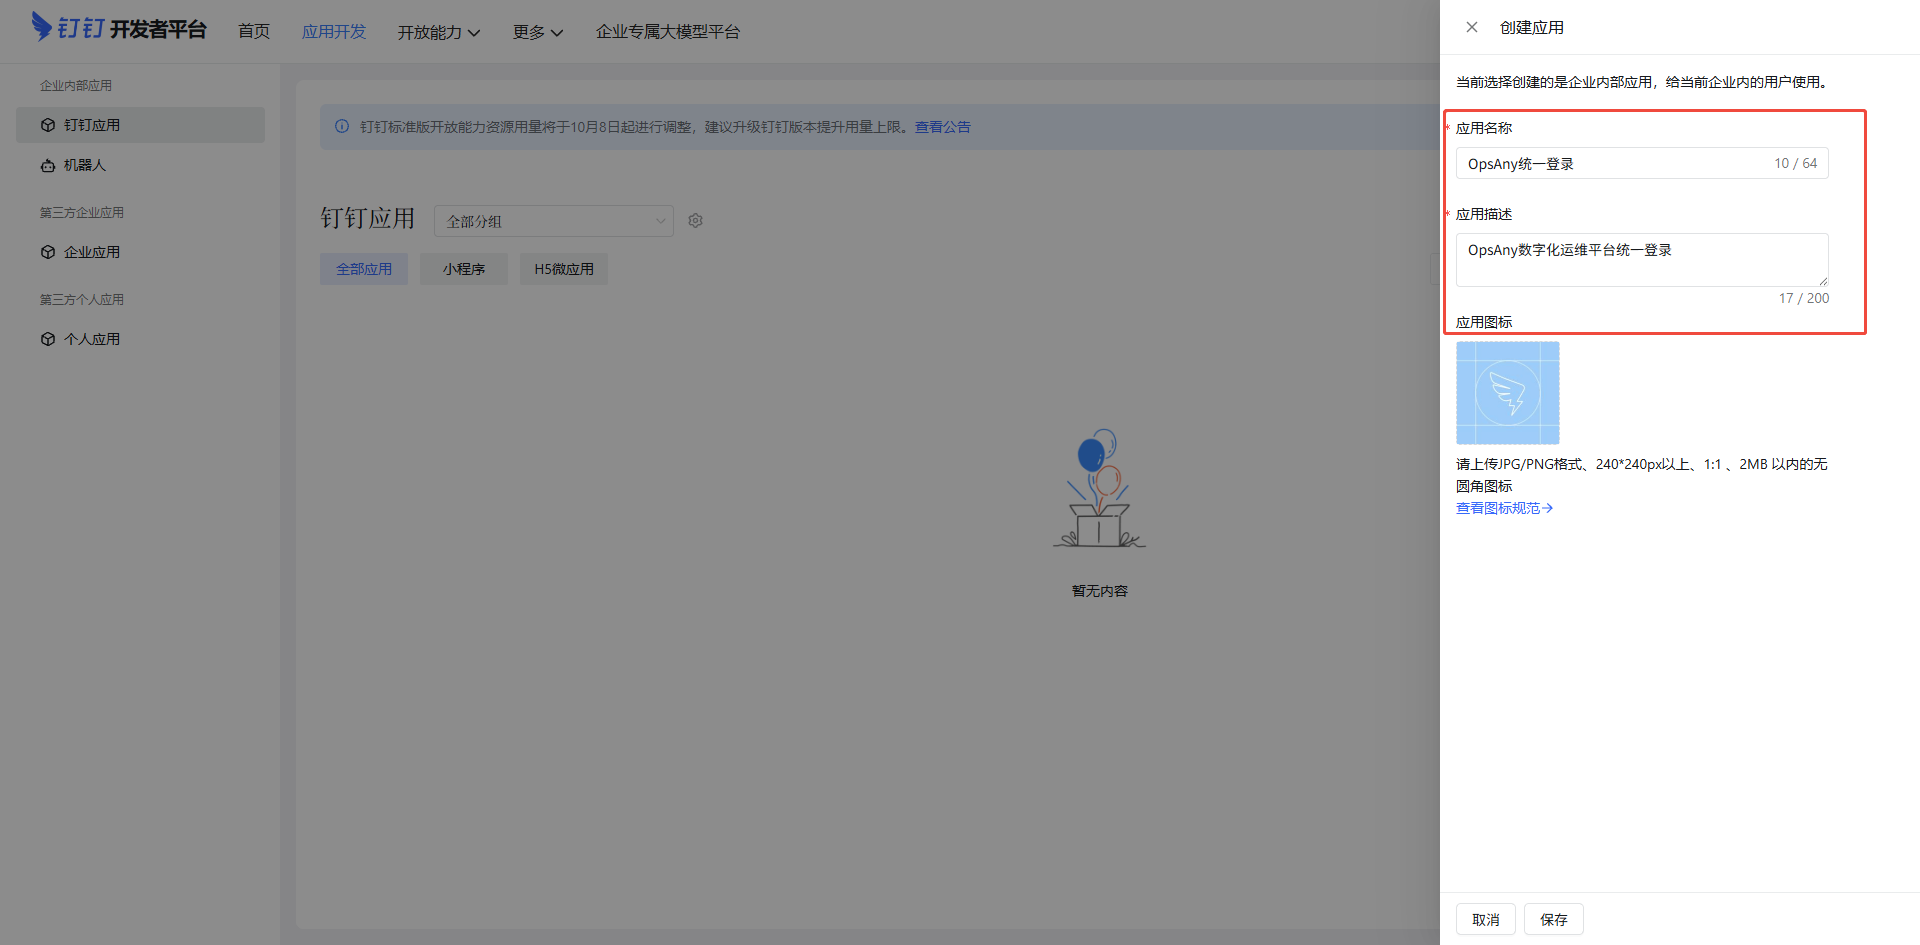
- Open the DingTalk Developer Platform: https://open-dev.dingtalk.com. Create a DingTalk app under App Development - DingTalk Apps. If you already have a DingTalk app, open it, obtain the Client ID and Client Secret, add the callback URL, and grant the API permissions.
- Under Development Configuration - Security Settings, configure the Redirect URL (callback domain). Paste the callback URL copied in step 2 into "Redirect URL (callback domain)" and save.
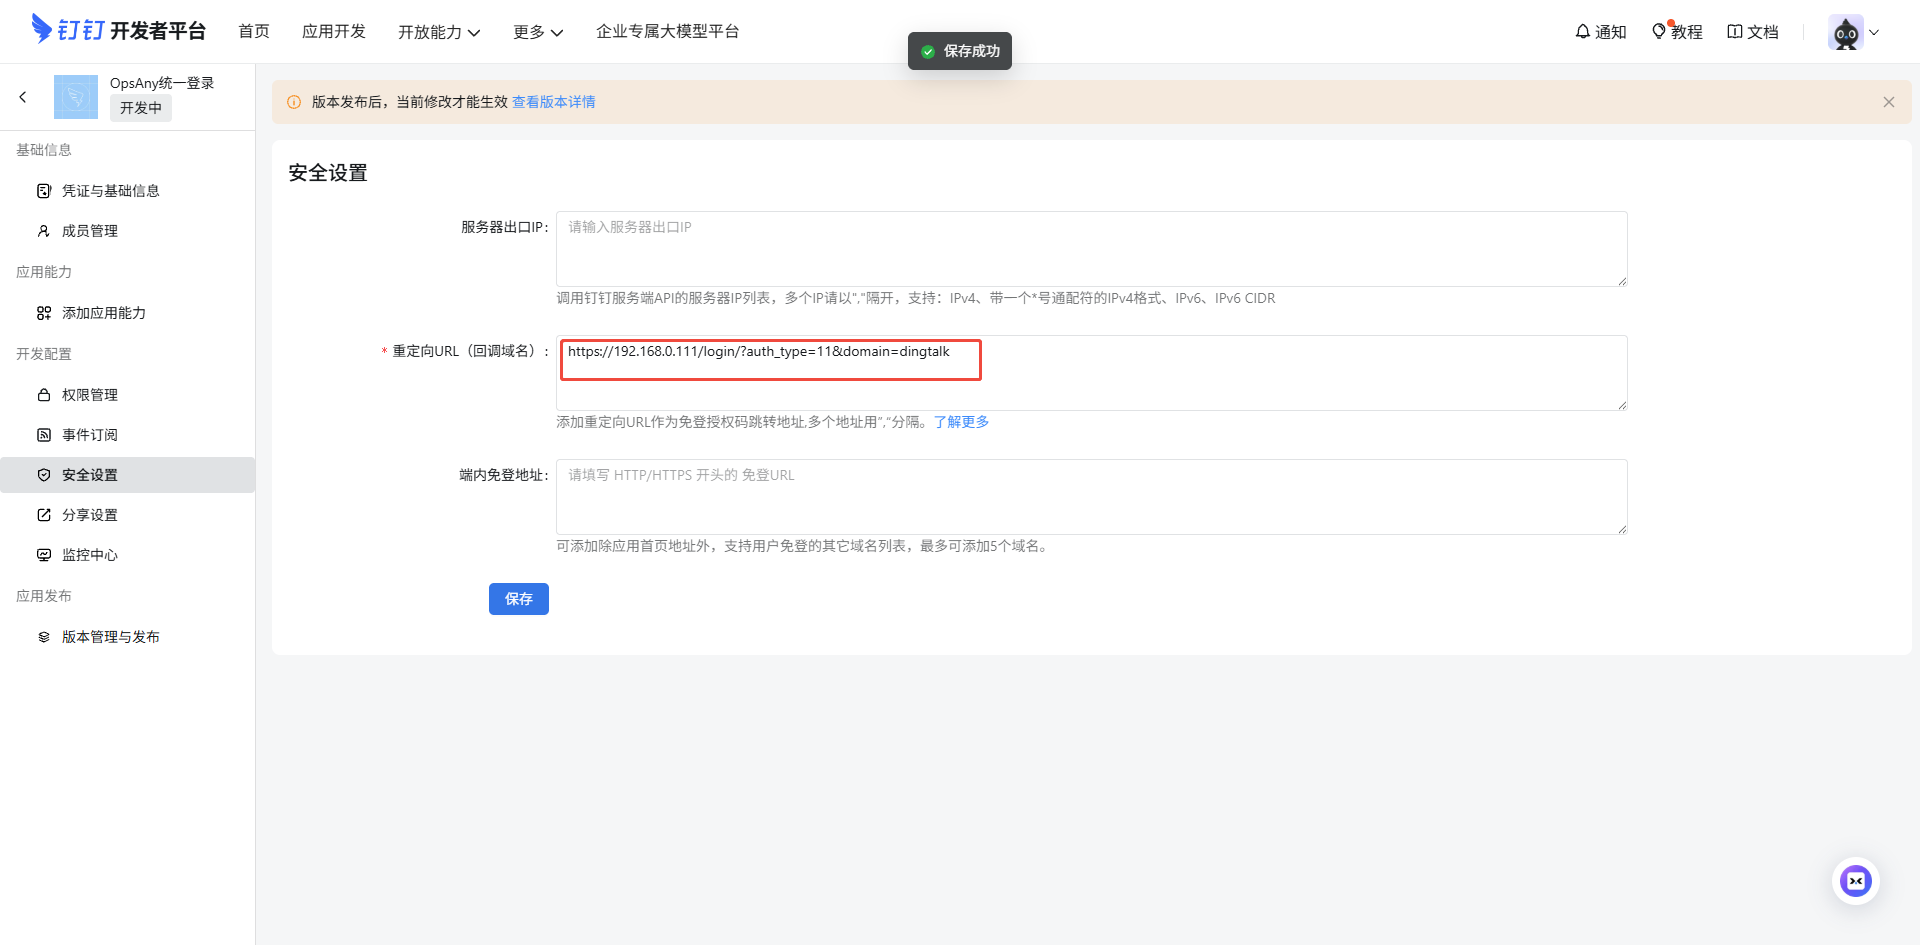
- Under Development Configuration - Permission Management, grant the following API permissions:
Basic permissions required to call SNS APIs, basic permissions to call enterprise APIs, basic permissions to obtain user access credentials for DingTalk Open APIs, access to user personal information and personal mobile number, read permission for contact department information, read permission for member information, read permission for department members in contacts, read permission for personal information in contacts, employee mobile number, email, and other personal information.
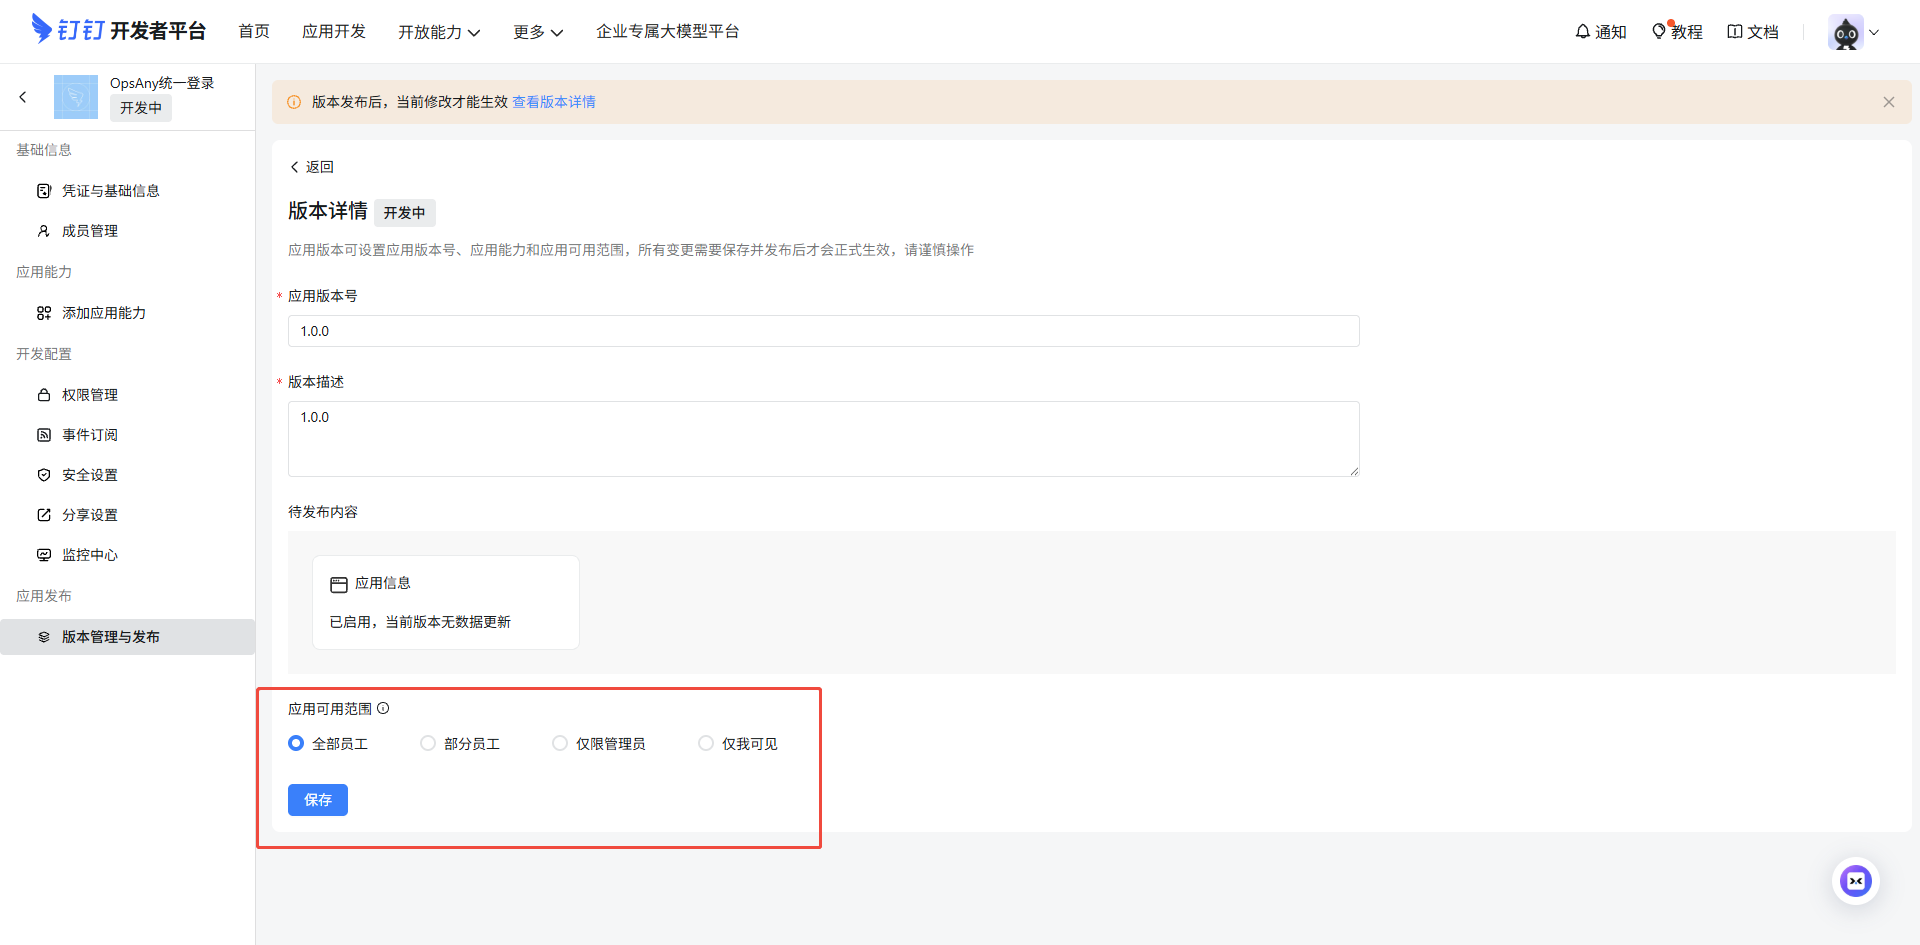
- Under Version Management and Release, create a new version and publish it.
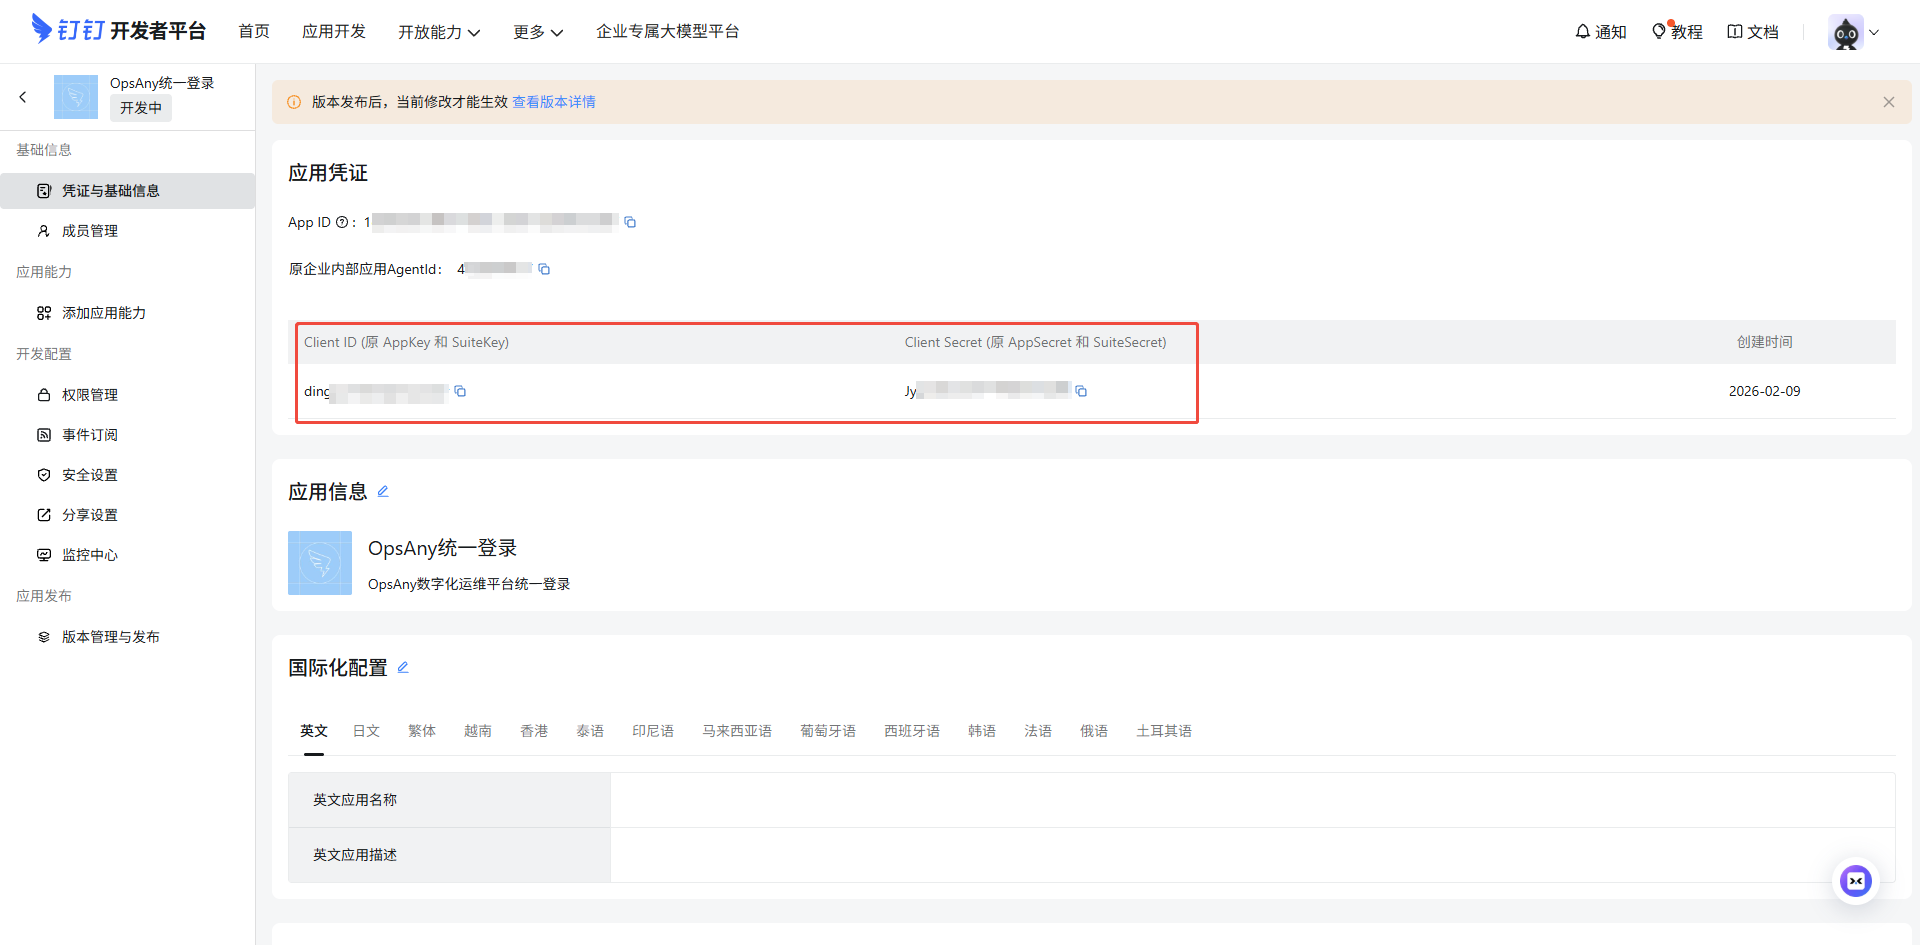
- Under Credentials and Basic Information, copy the Client ID and Client Secret into the DingTalk configuration you created on the platform and save.
-
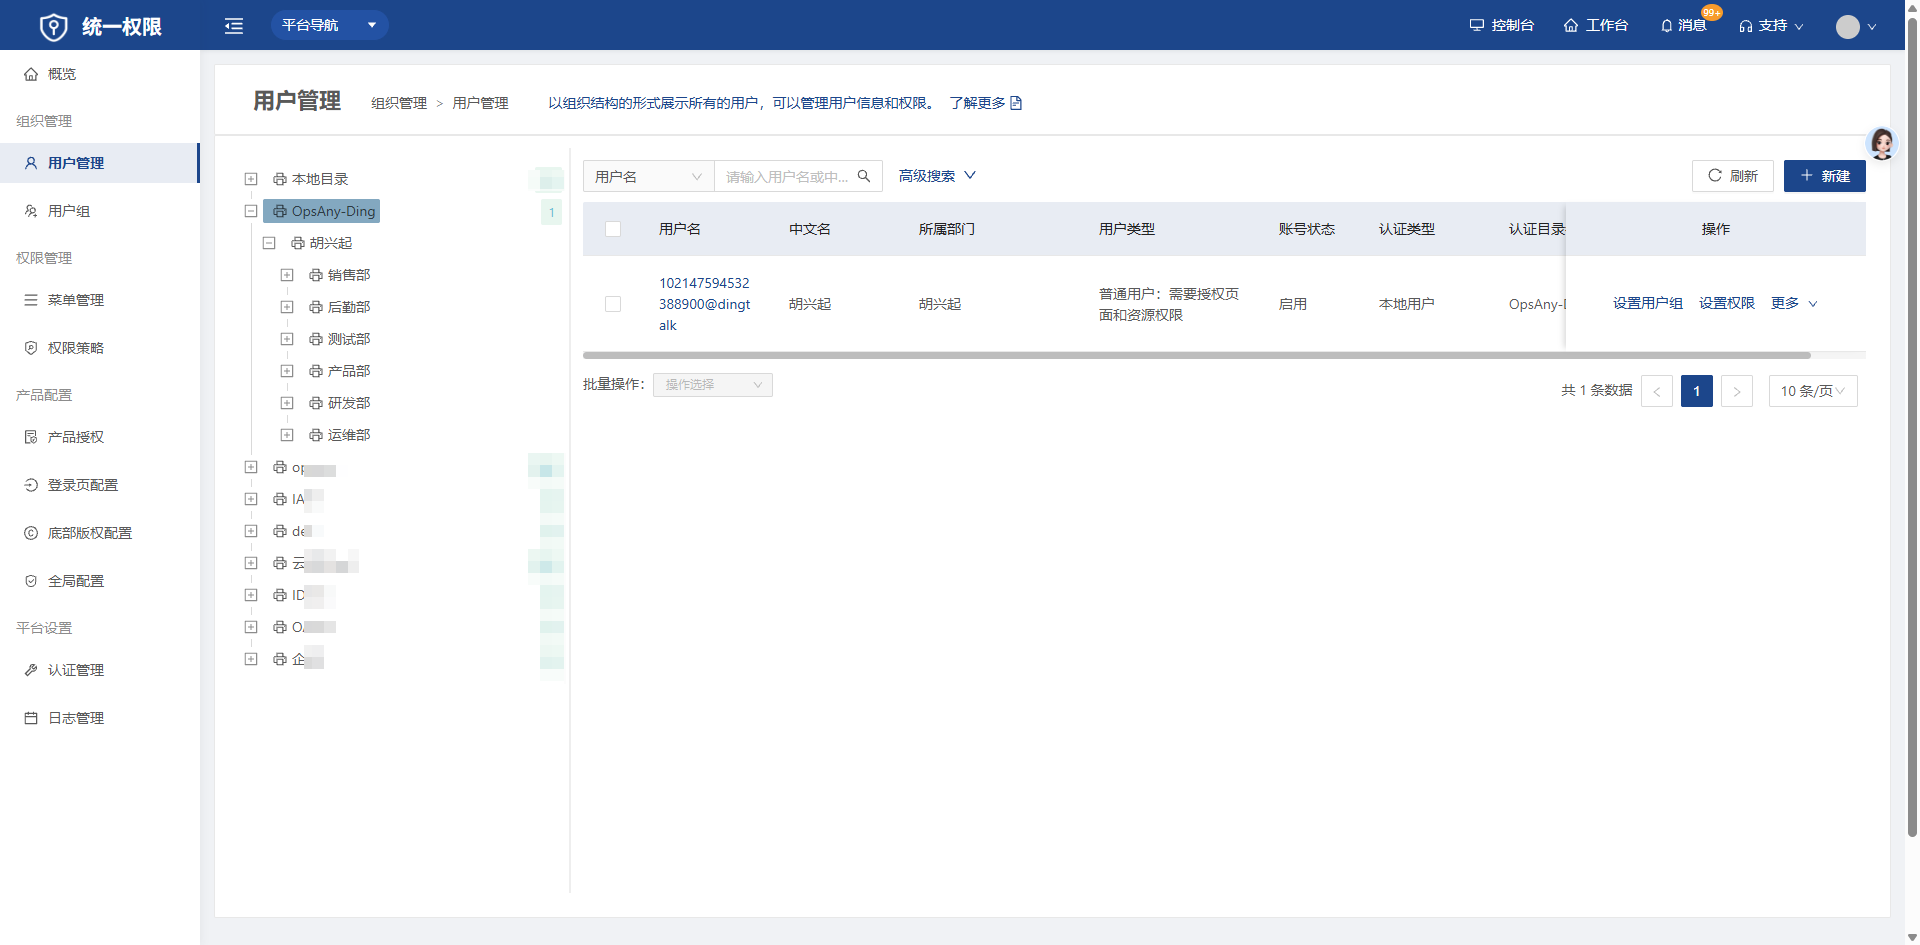
Department and user data after synchronization (the current version uses the department that ranks first in the sort order).
-
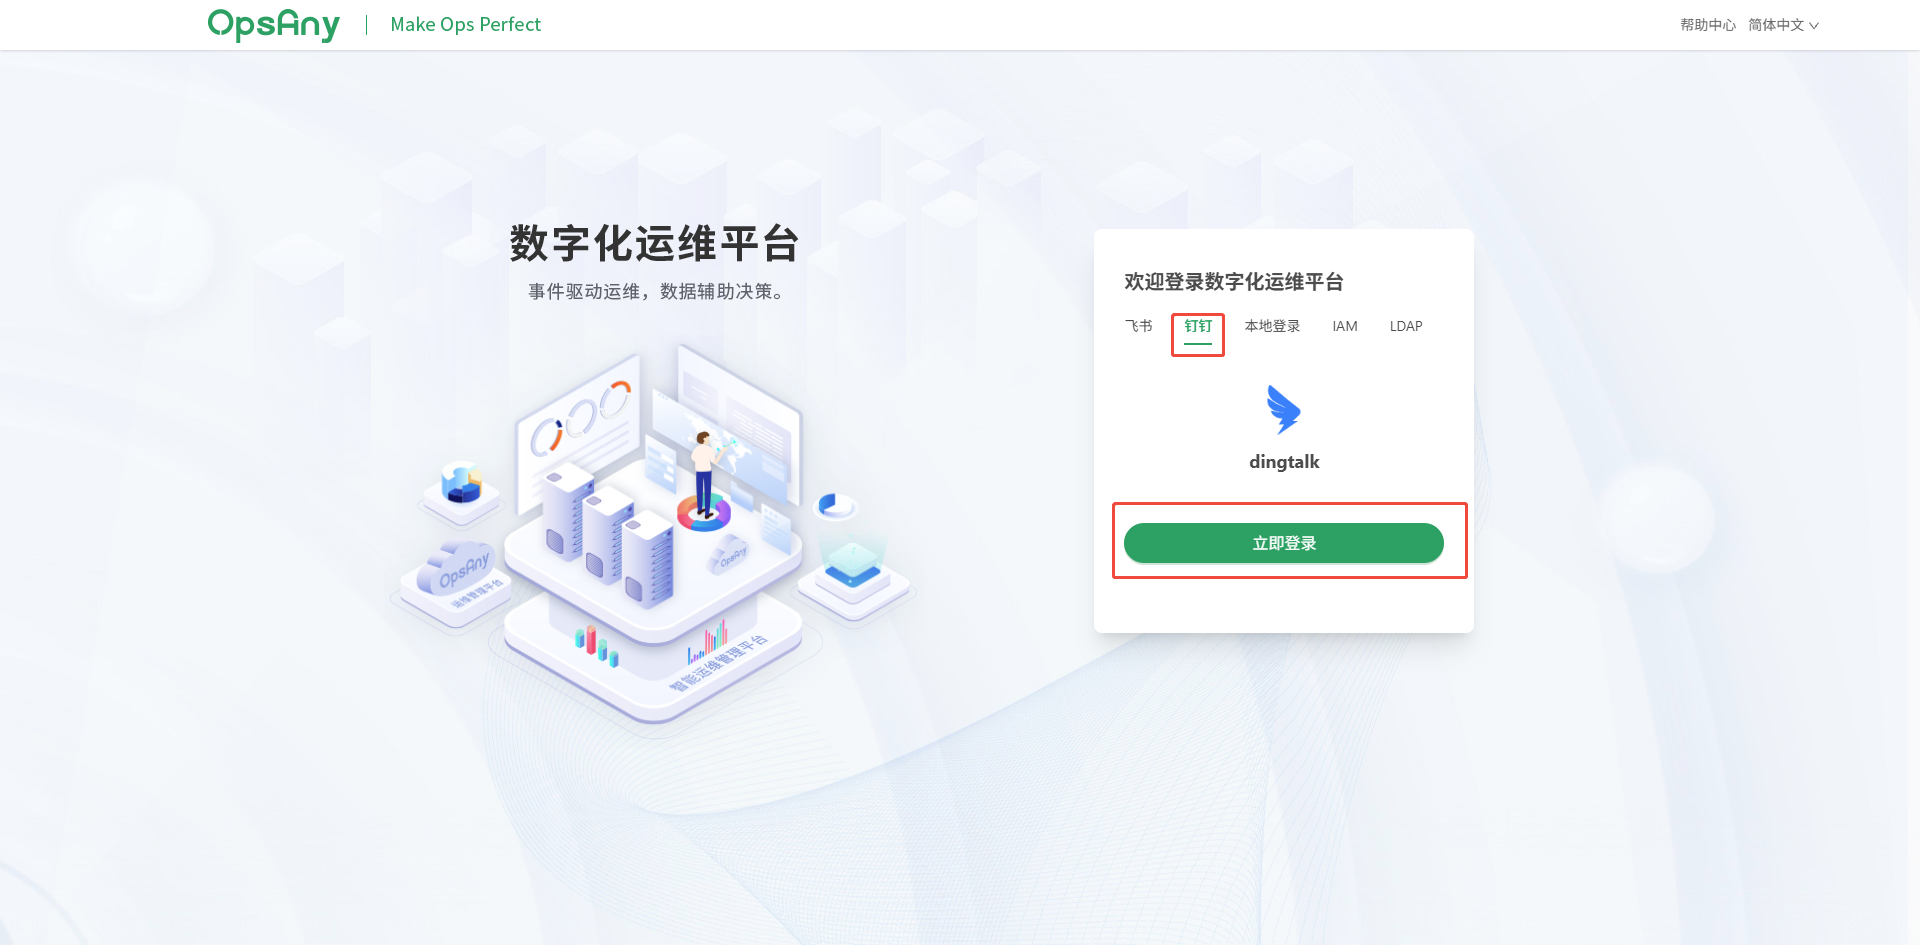
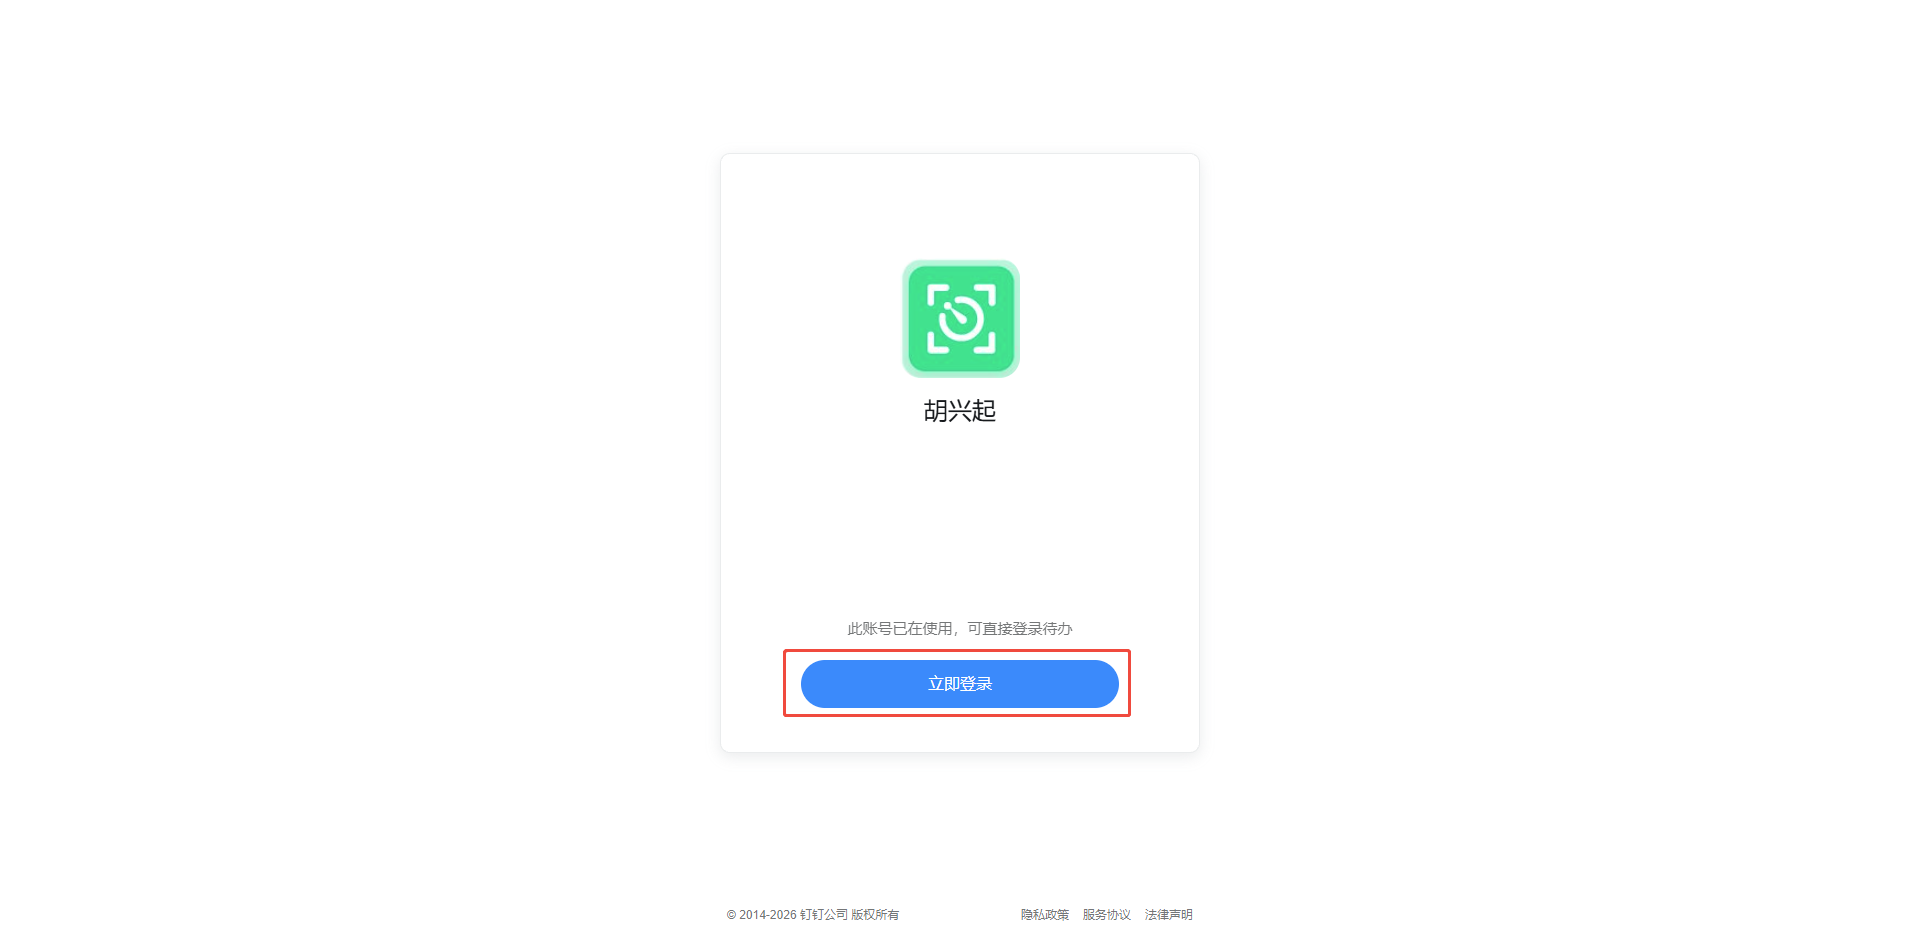
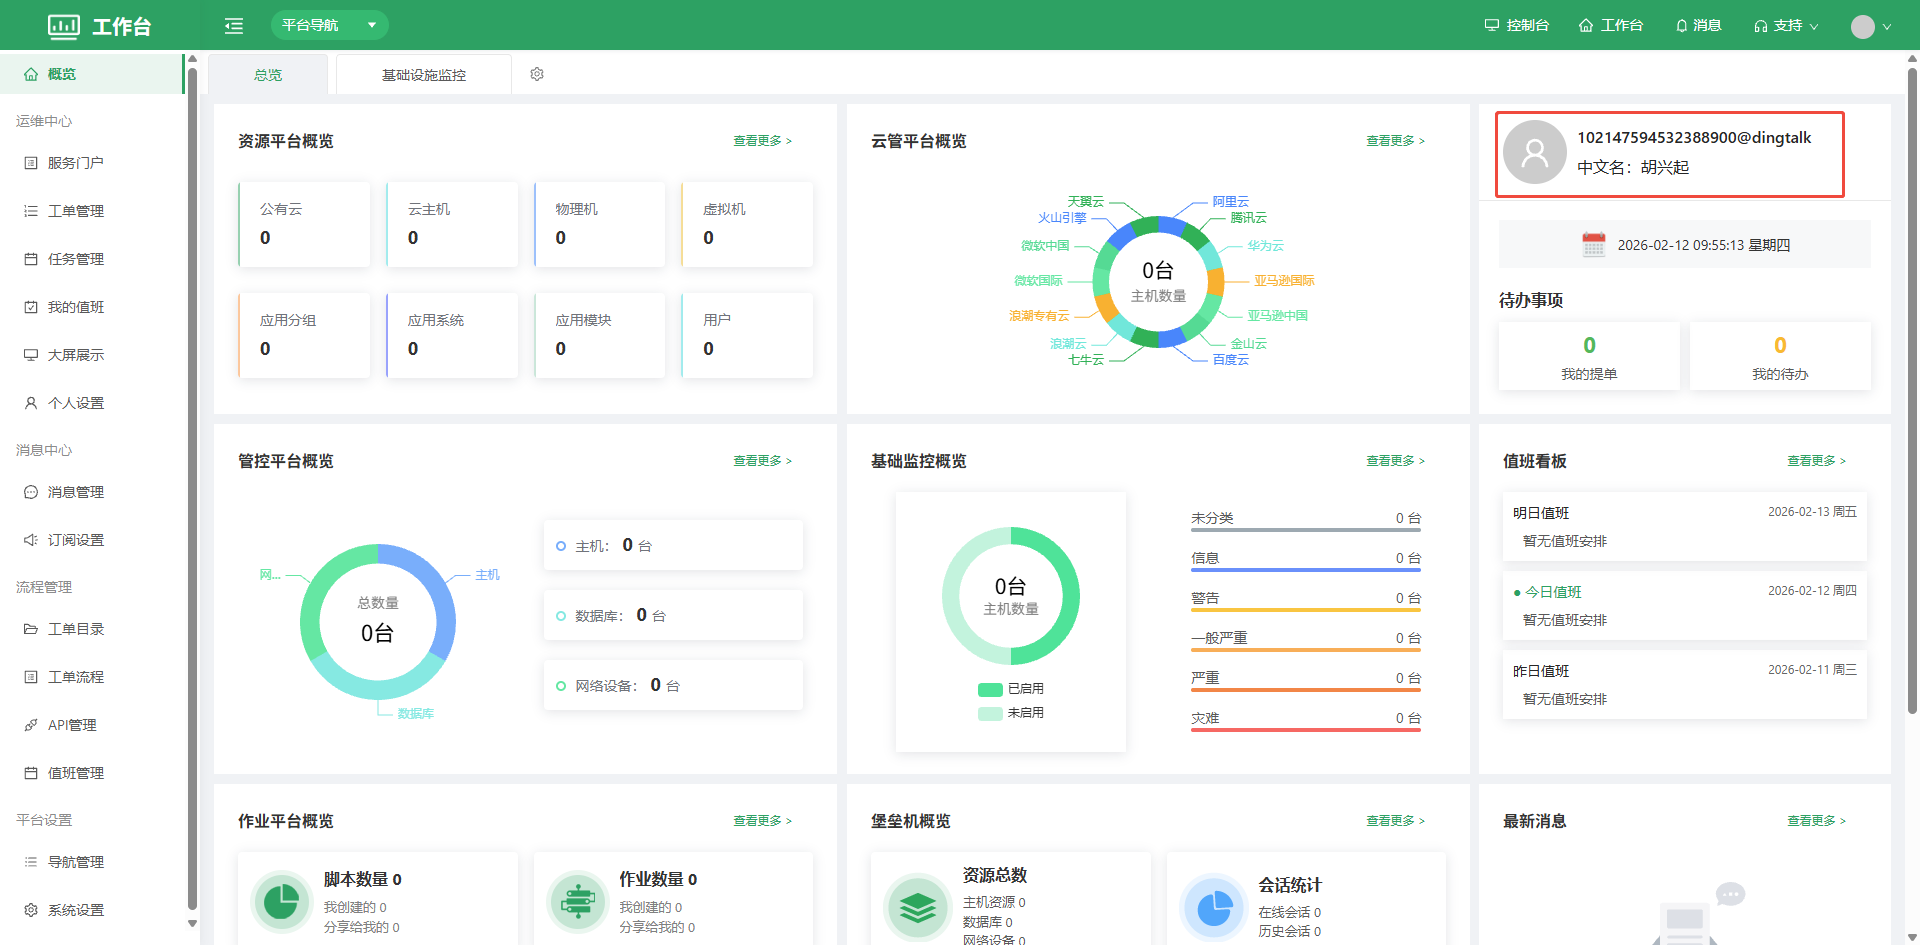
Login (the DingTalk user ID plus the login domain is used as the username).
4.1.3 Feishu Login
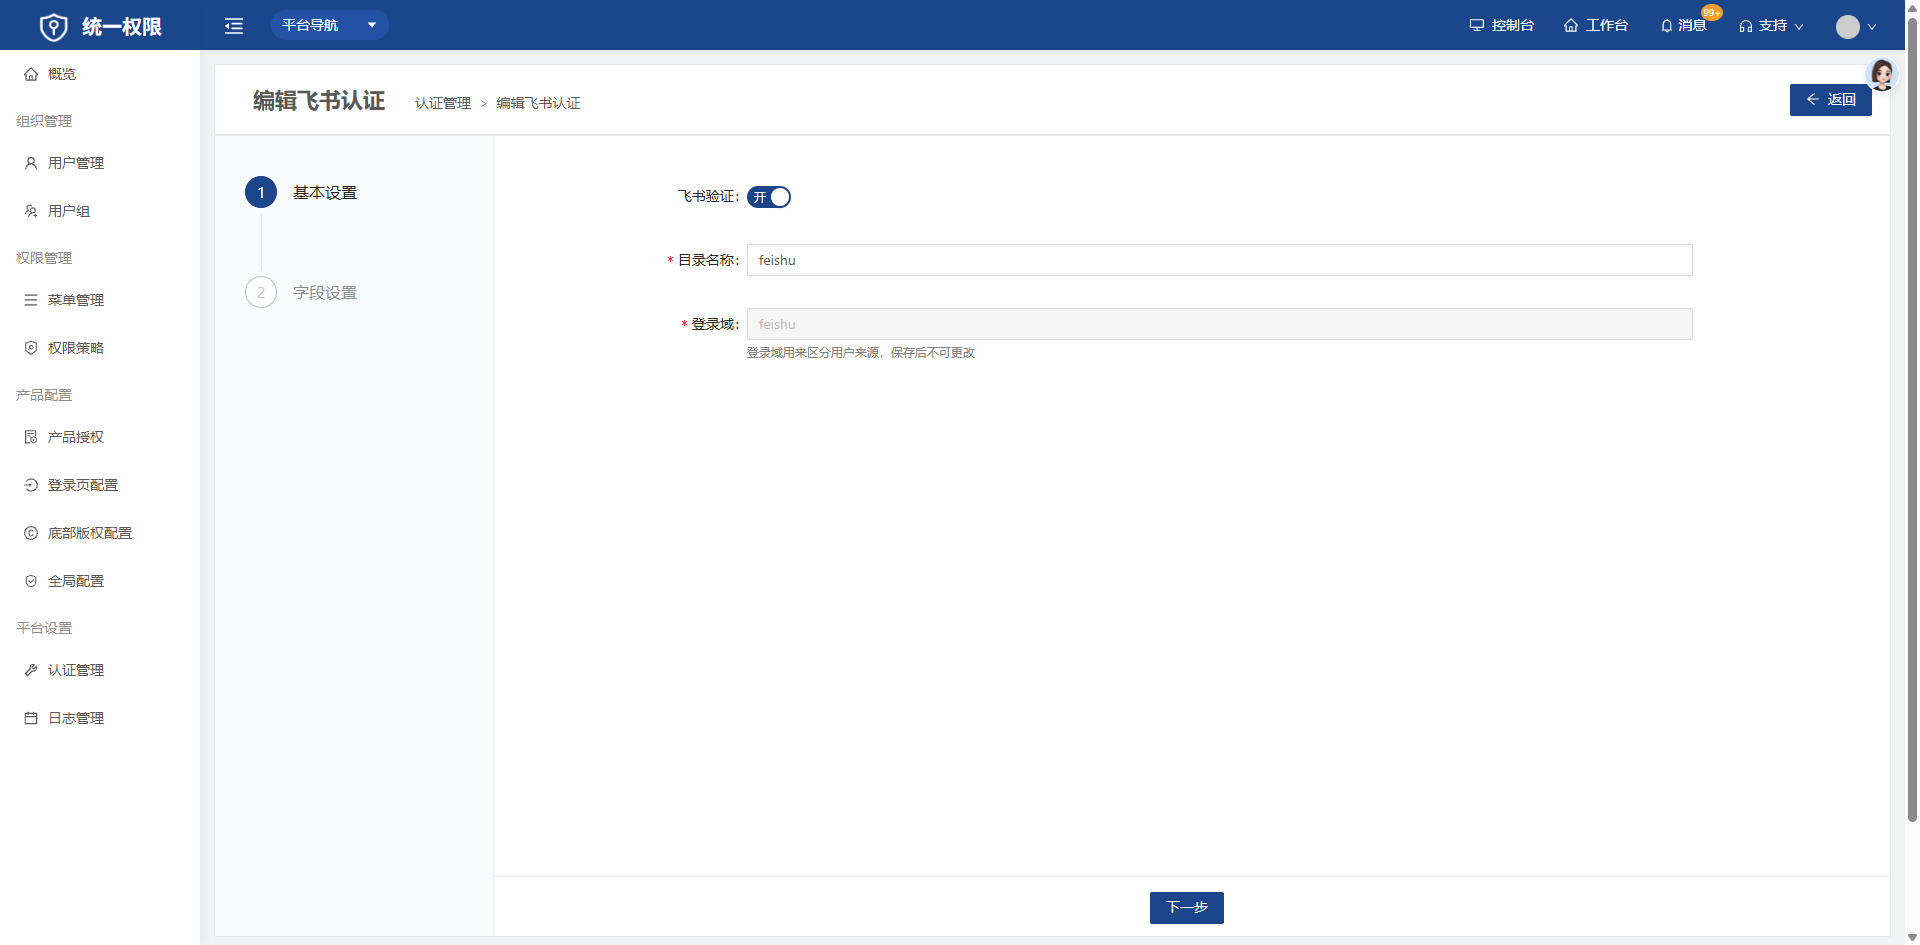
-
Set a custom Feishu directory name (shown as the top-level directory name in user management) and a custom login domain (when users are synchronized, the username is generated from the union_id and the configured login domain).
-
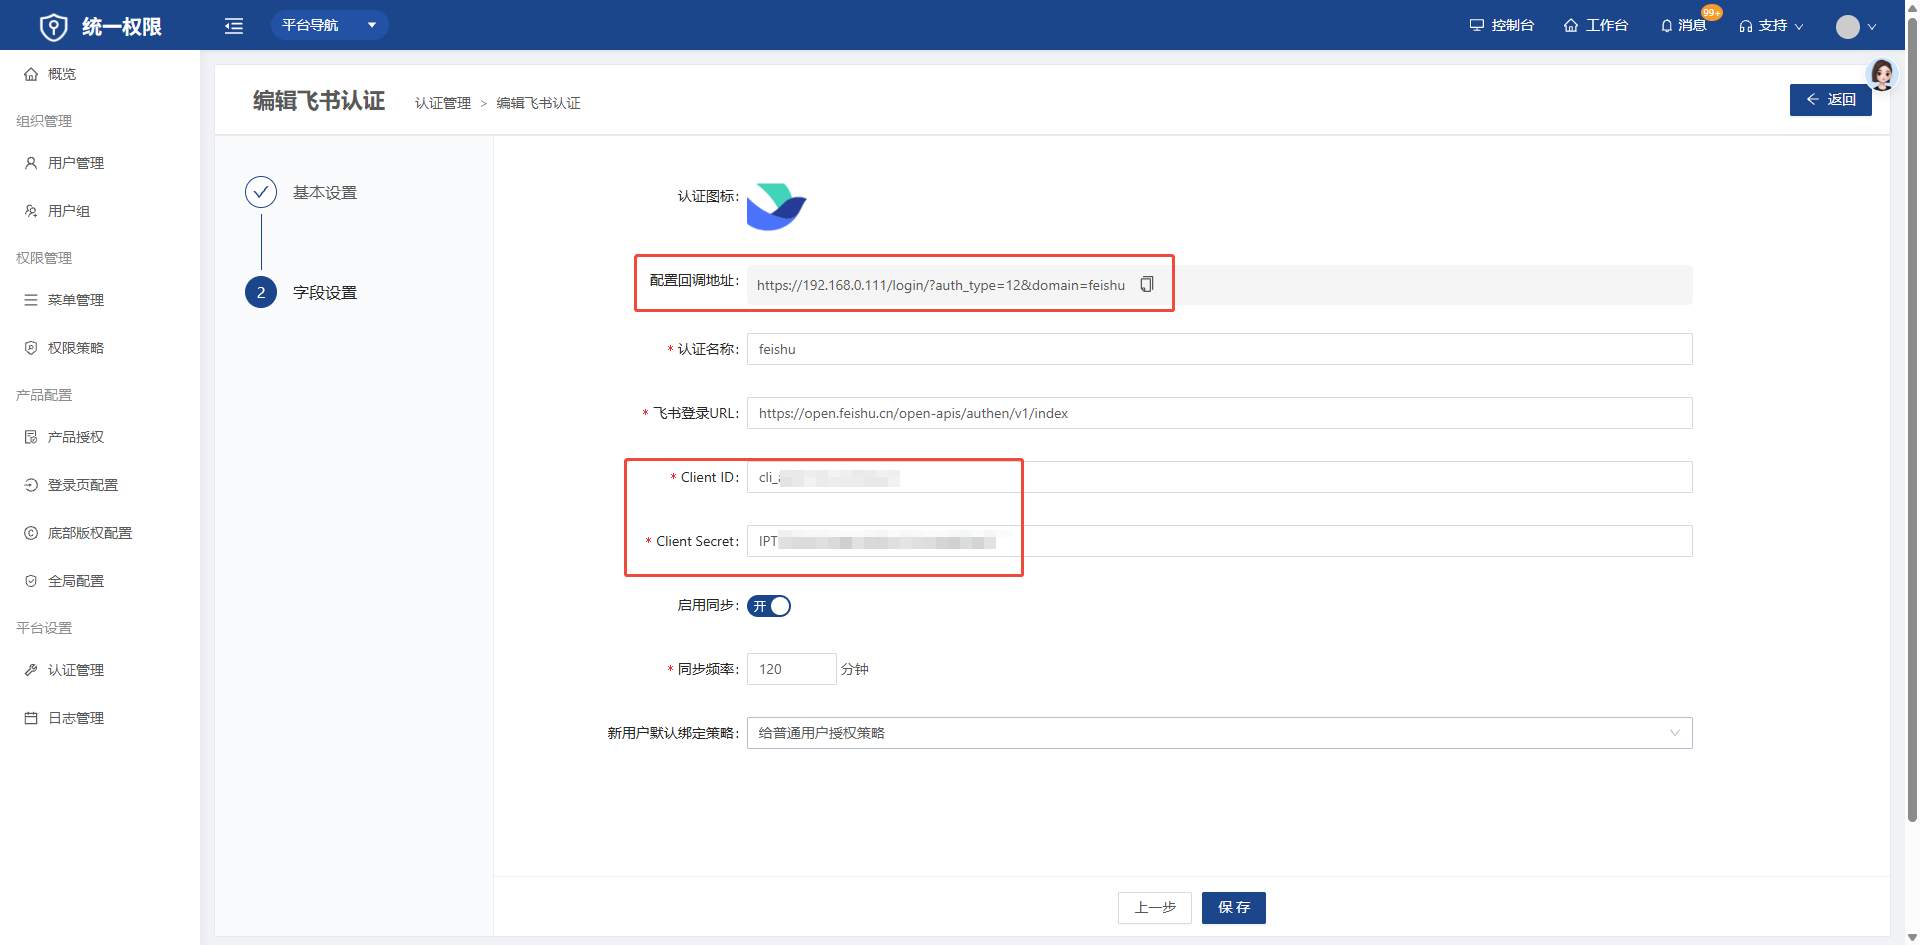
Upload an icon, copy the callback URL (used when creating the app in Feishu), and enter the App ID and App Secret (see the figure below).
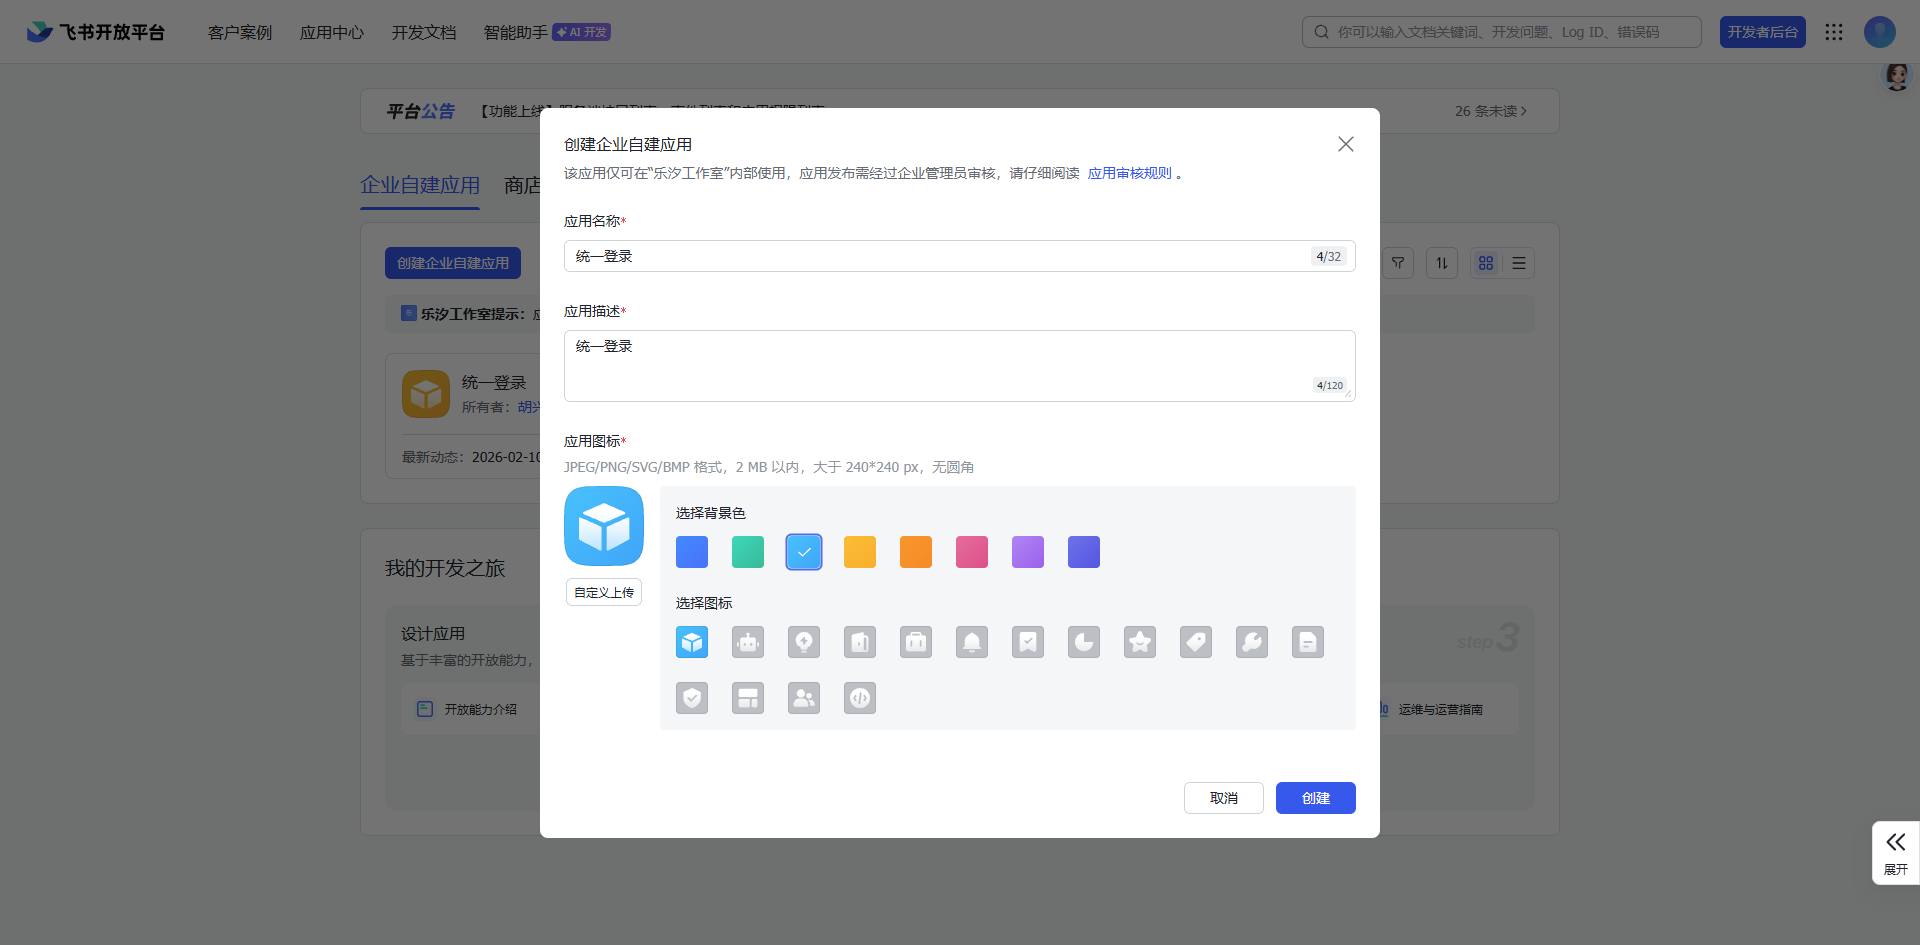
- Open the Feishu Developer Platform: https://open.feishu.cn/app?lang=zh-CN. Under Enterprise Self-built Apps, create an enterprise self-built app. If you already have a Feishu app, open it, obtain the App ID and App Secret, add the callback URL, and grant the API permissions.
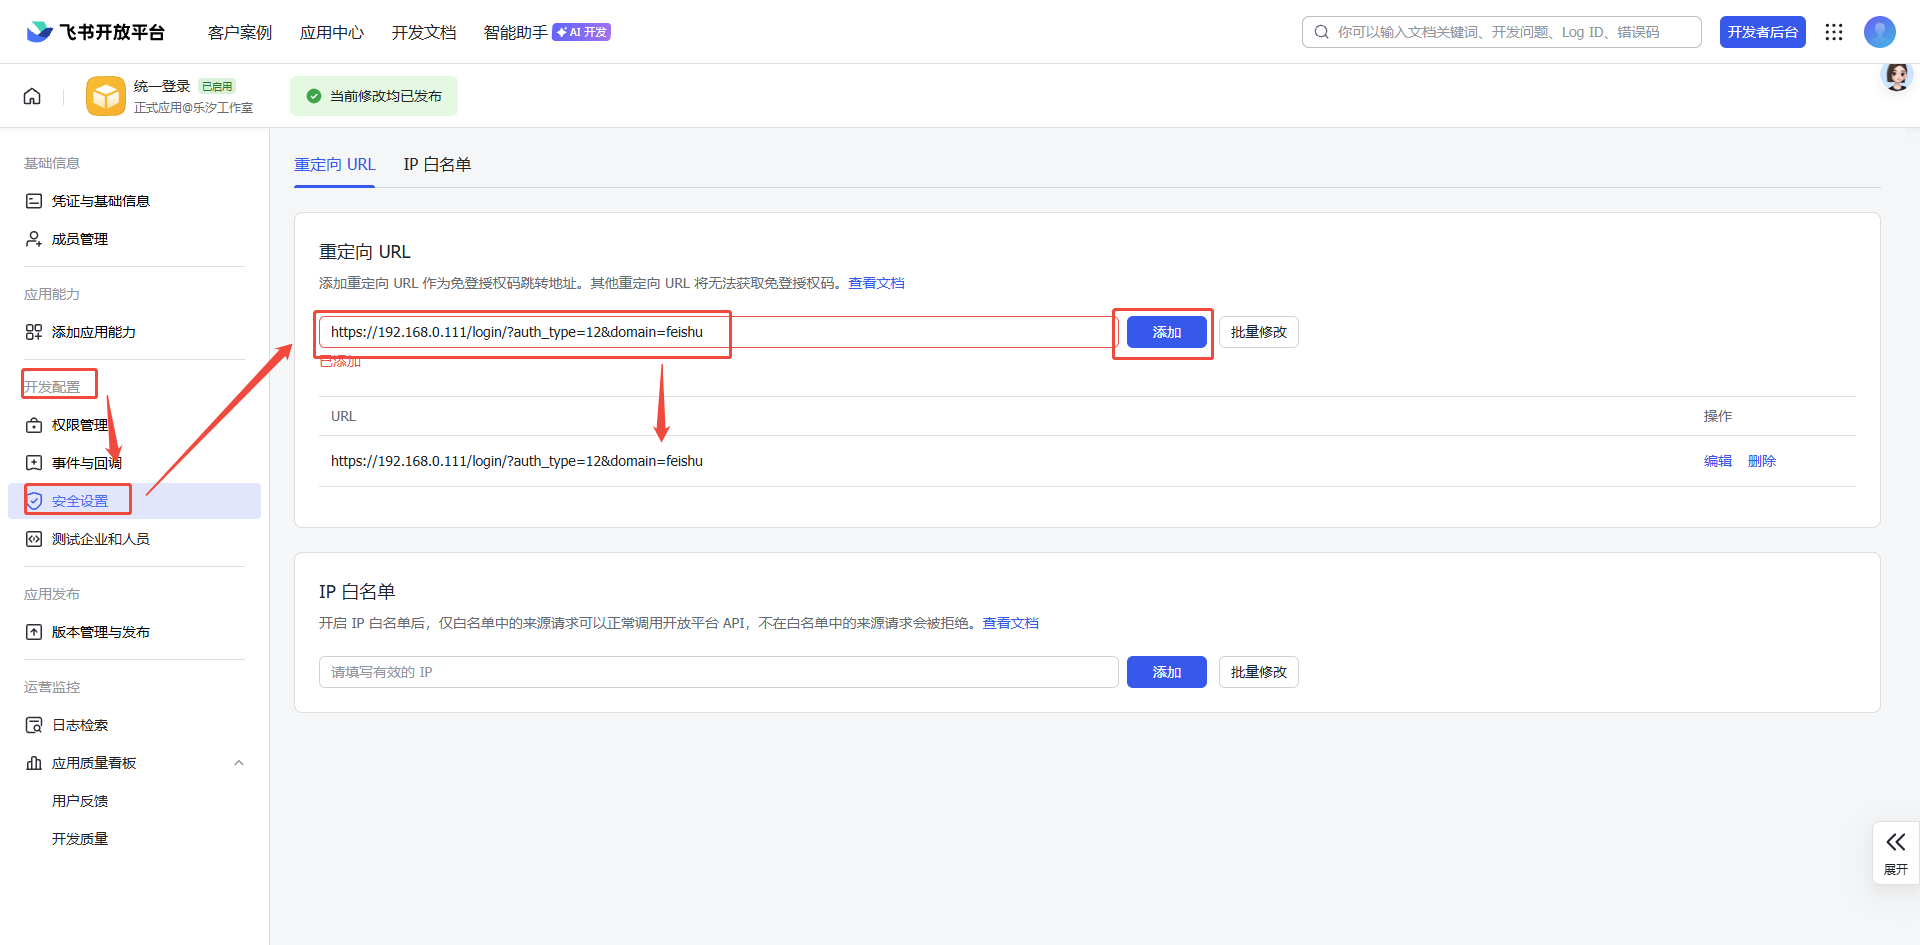
- Under Development Configuration - Security Settings, configure the Redirect URL. Paste the callback URL copied in step 2 into "Redirect URL" and save.
-
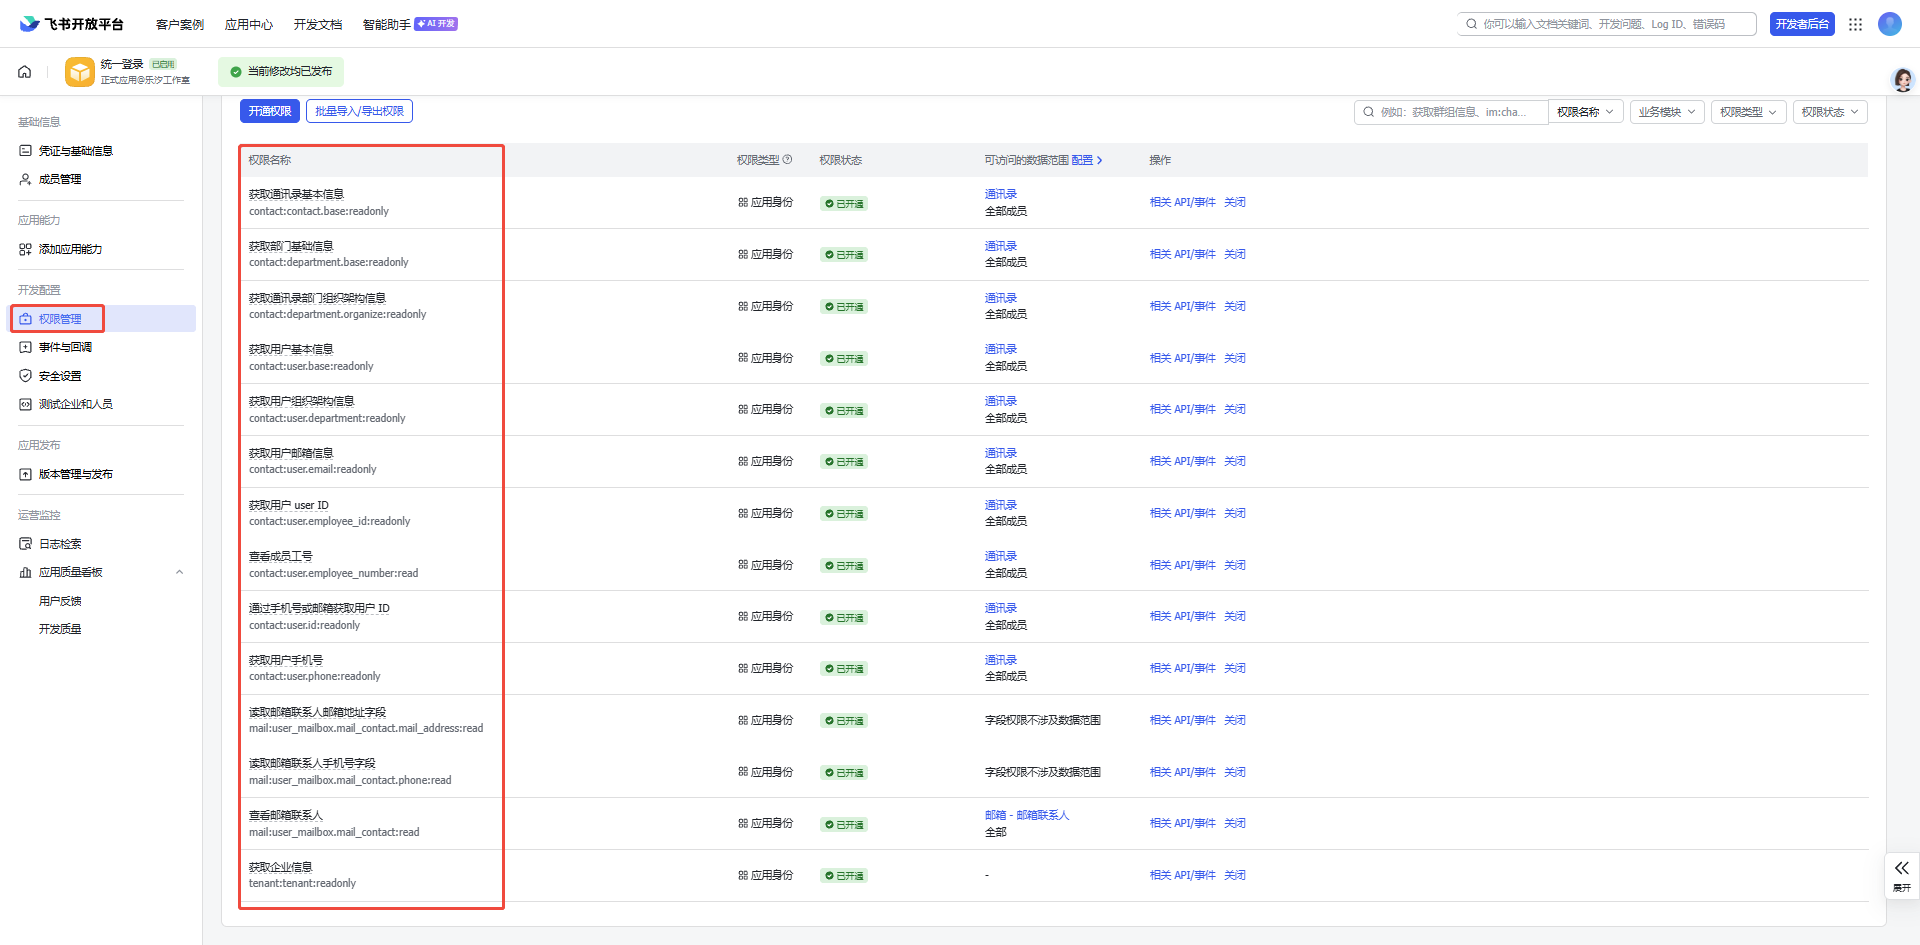
Under Development Configuration - Permission Management, grant the following API permissions.
-
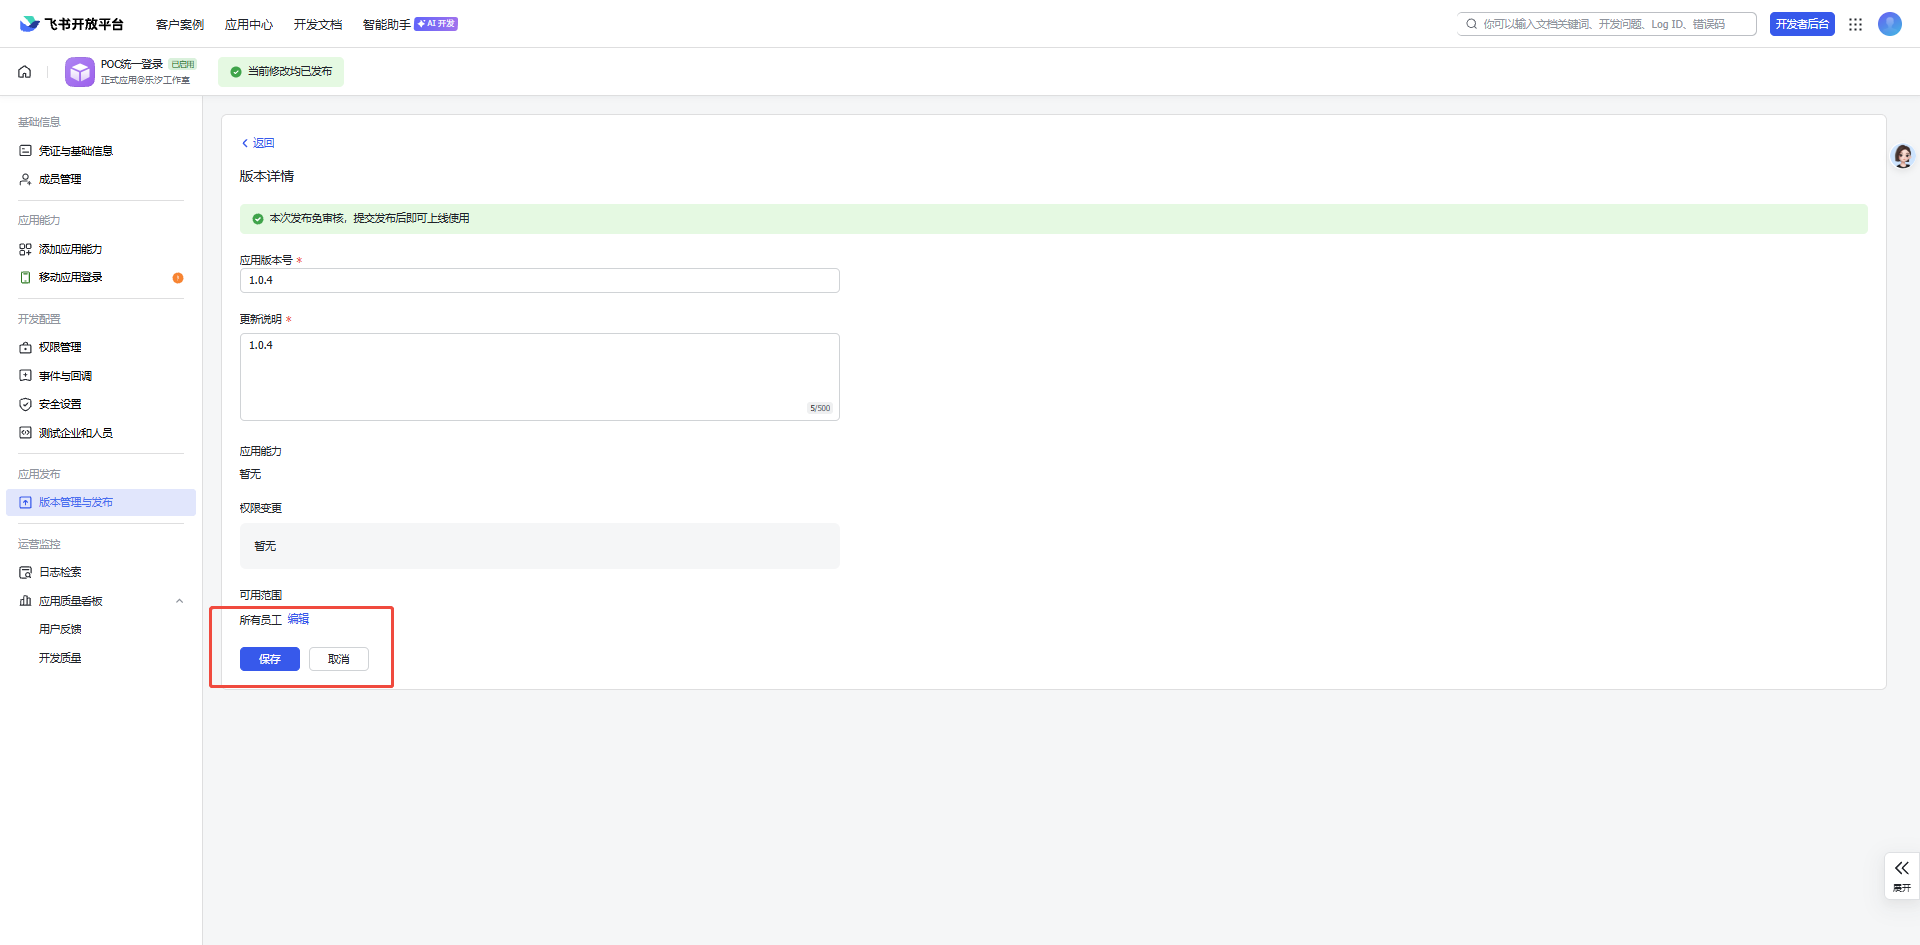
Under Version Management and Release, create a new version and publish it.
-
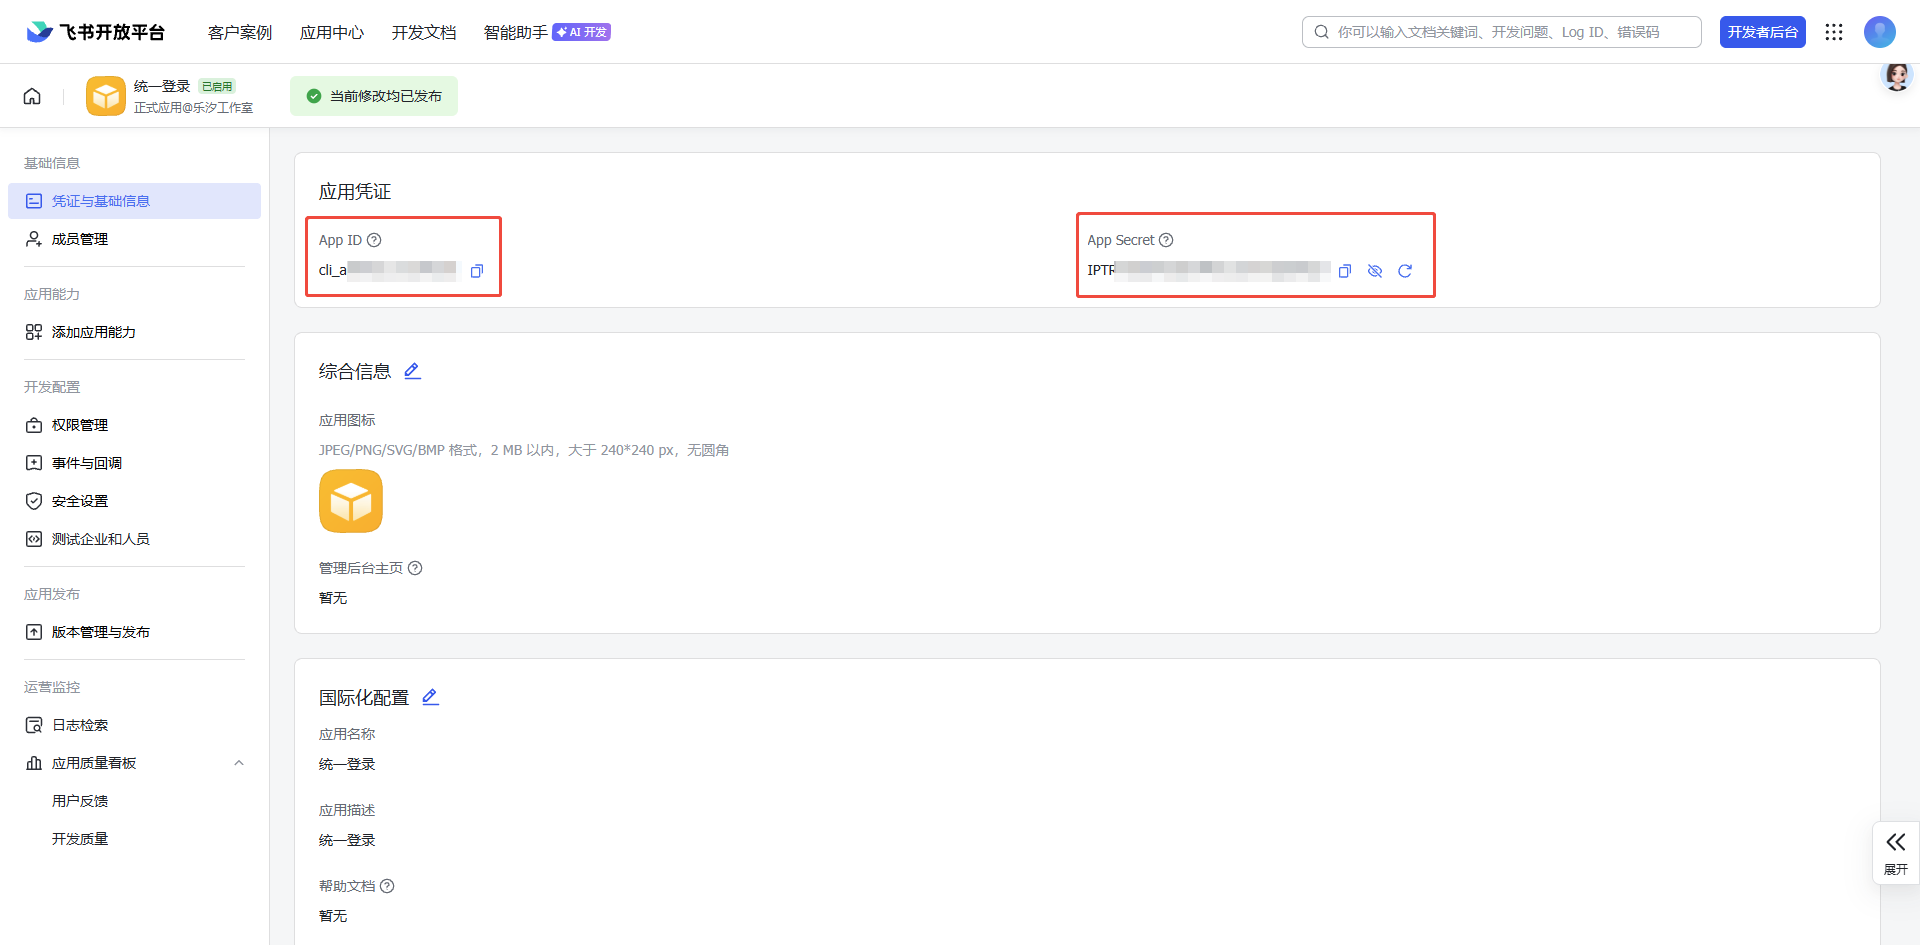
Under Credentials and Basic Information, copy the Client ID and Client Secret into the Feishu configuration you created on the platform and save.
-
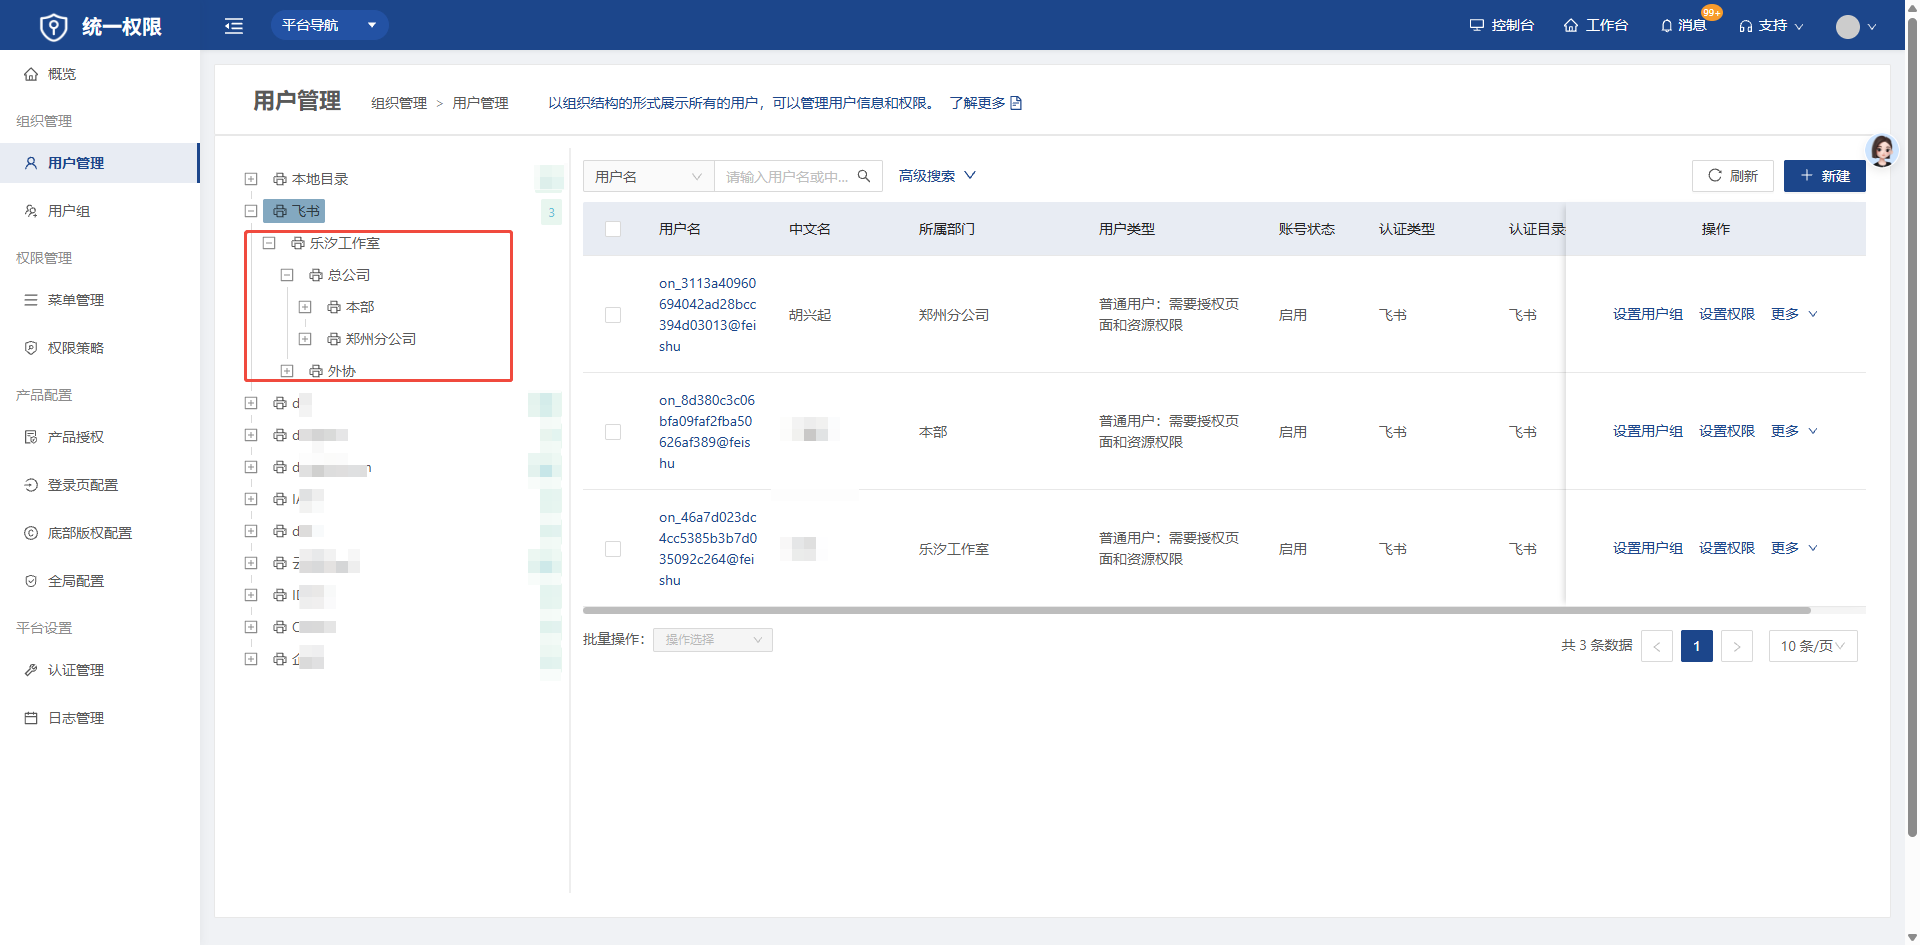
Department and user data after synchronization (the current version uses the department that ranks first in the sort order).
-
Login (the Feishu user ID plus the login domain is used as the username).
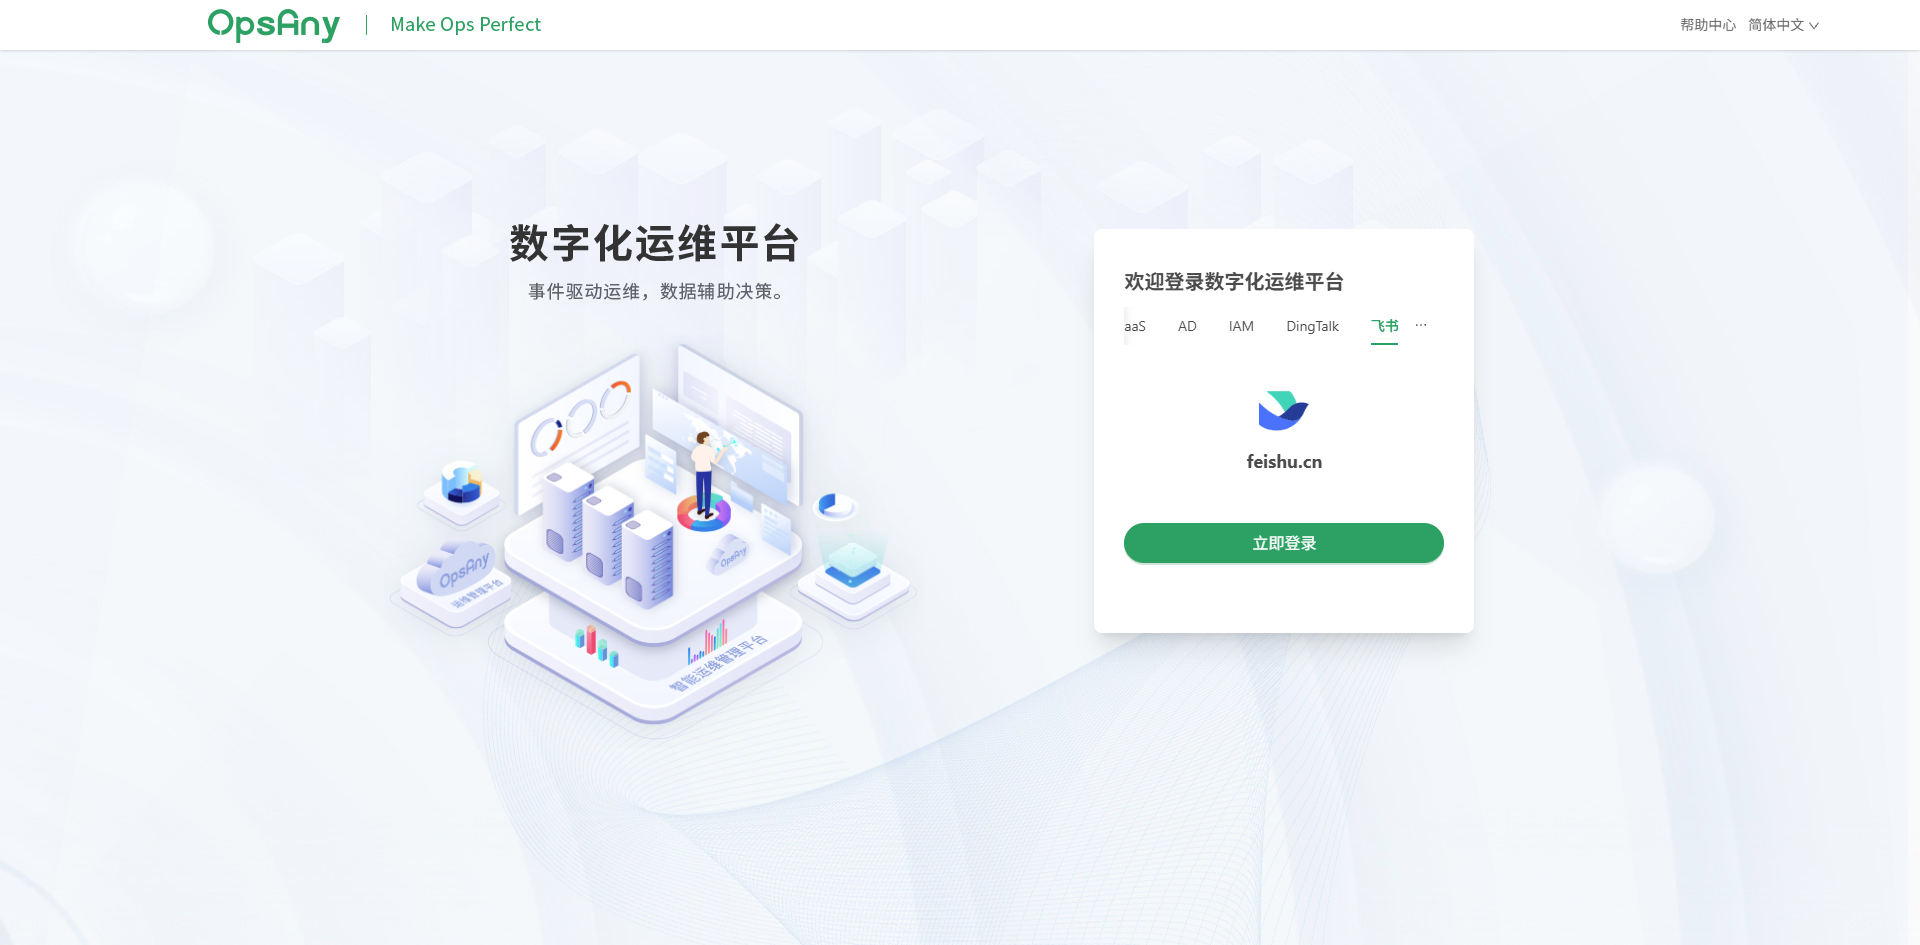
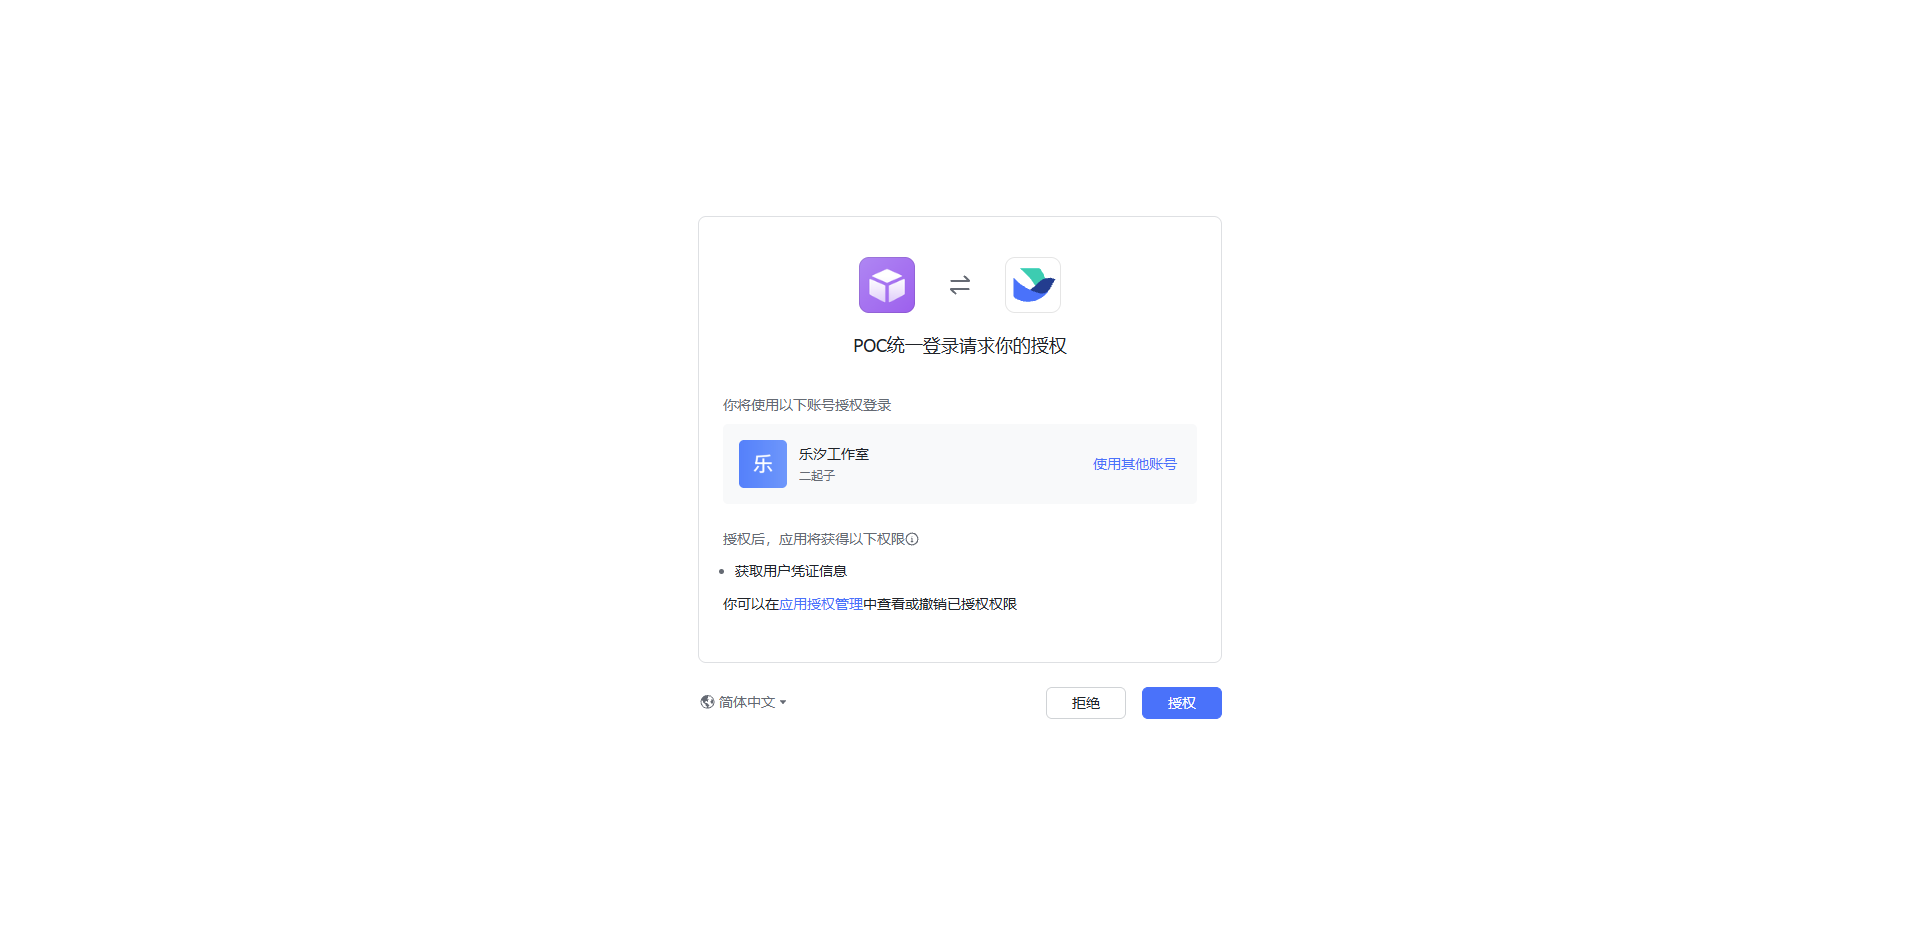
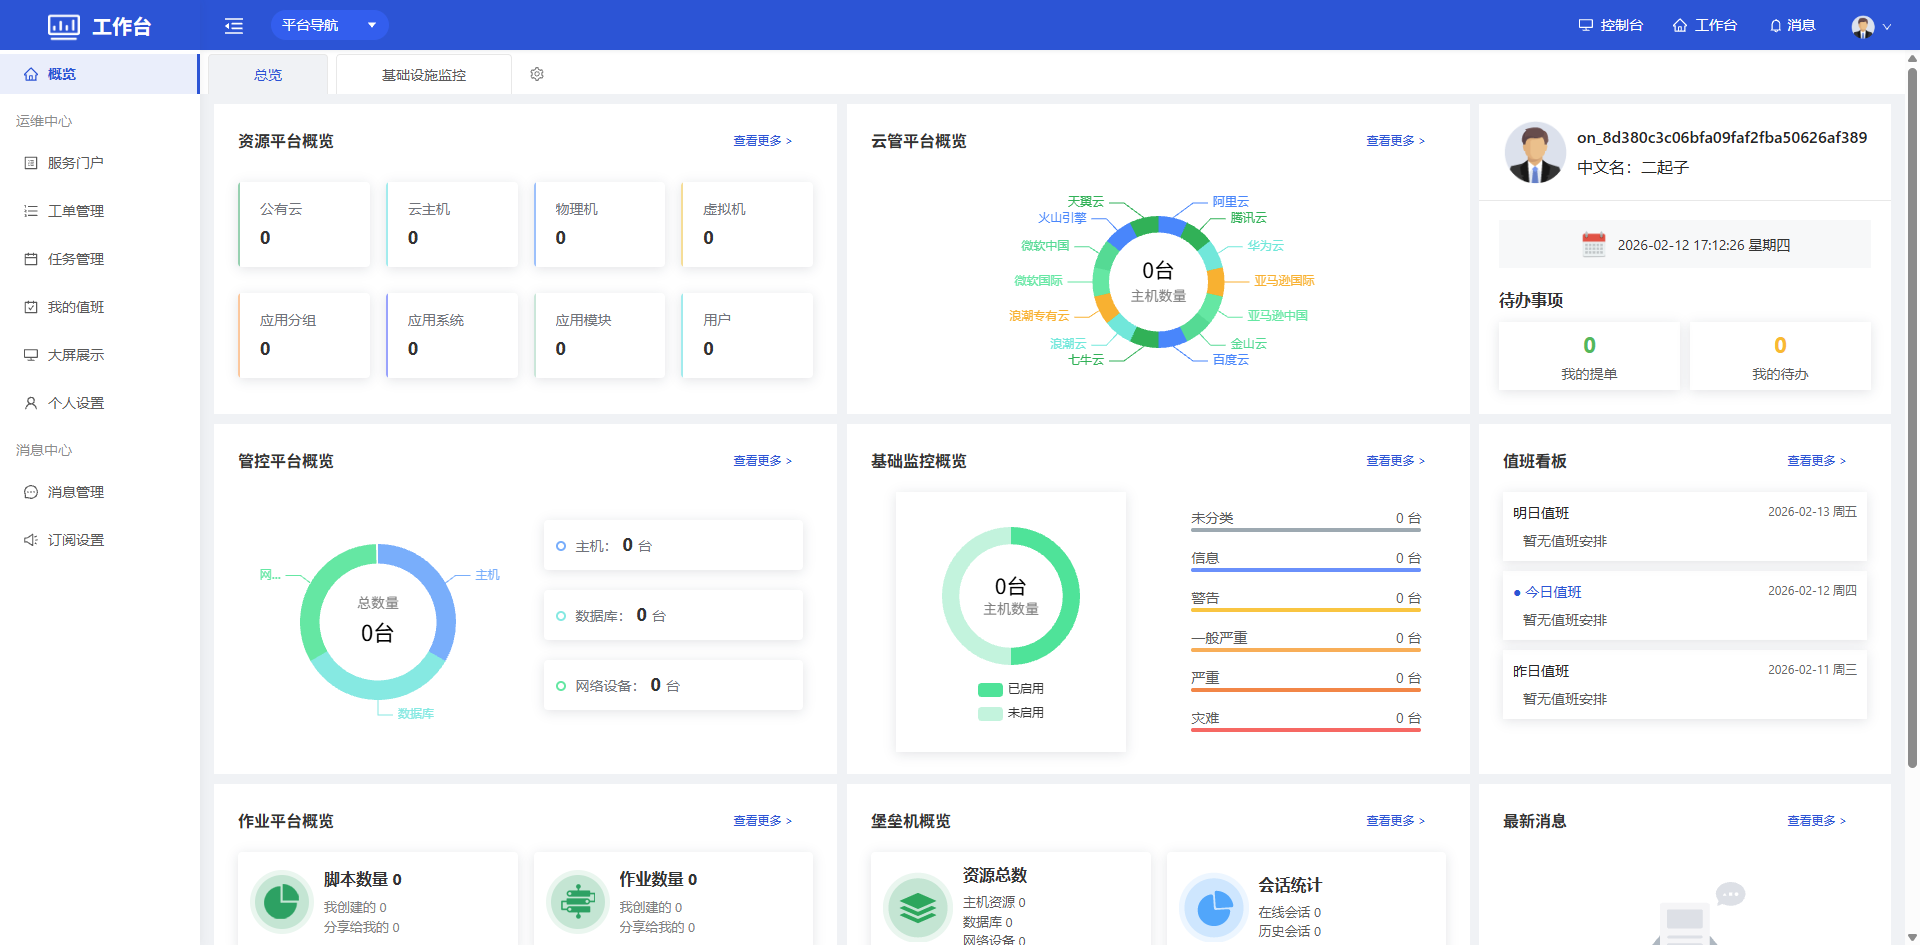
4.2 Log Management
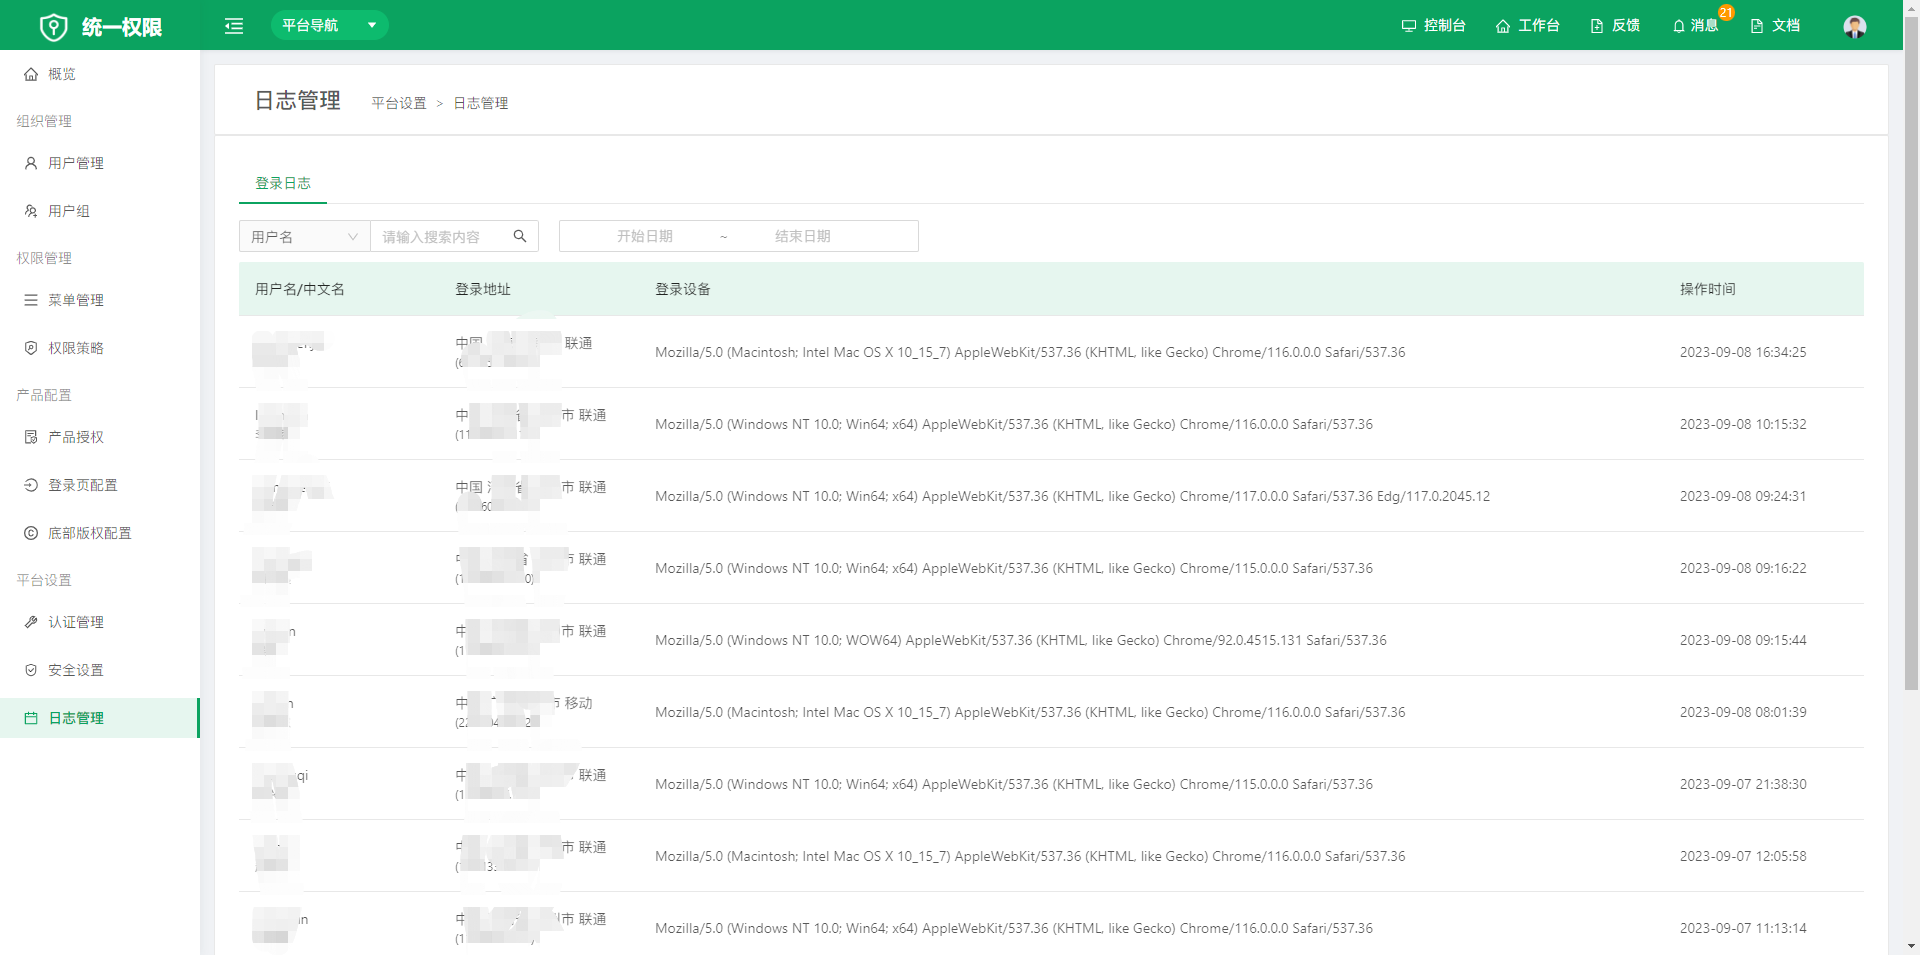
- Login Log: records detailed data generated when users sign in to the platform.